Volkswagen Golf Service & Repair Manual: Special connector systems
 Note Note
| If necessary, any housing catches in place (secondary
locking mechanisms) must be released or removed prior to
disengaging the contacts using the prescribed tool
→ Chapter. |
|
|
|
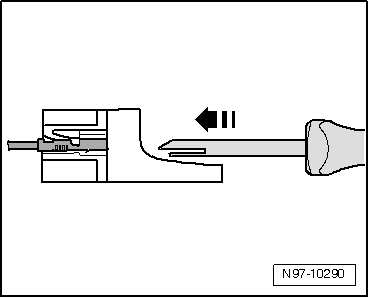
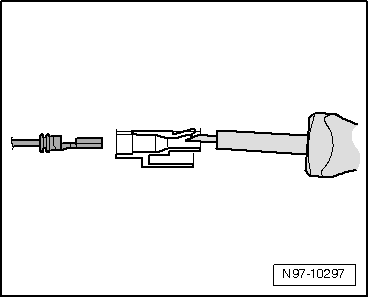
| – |
Insert the release tool appropriate for the contact housing
in the release port of the contact housing. |
| – |
Grab hold of the contact by the wire and push it lightly
into the contact housing. |
Note
| By pushing the contact in the direction of the contact
housing, the locking tabs of the contact are lifted up by the
housing edge and disengaged using the release tool. |
|
|
|
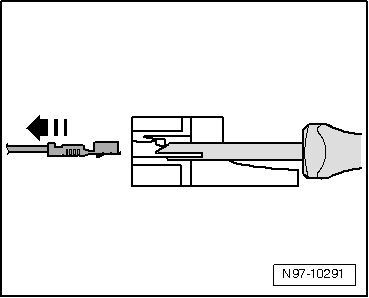
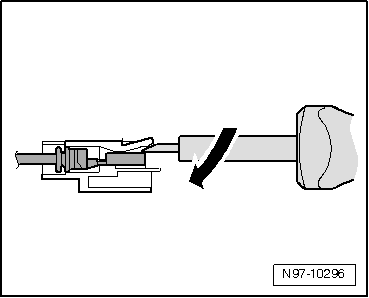
| – |
At the same time, push the release tool in the direction of
the contact housing and pull out the released contact from the
contact housing -arrow-. |
| – |
The release tool can be pulled out of the contact housing
again once the contact has been removed. |
|
|
|
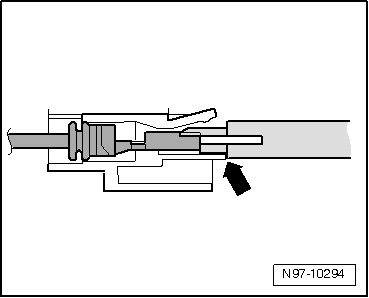
| – |
Insert the release tool appropriate for the contact housing
under the locking tab into the contact housing. |
| – |
Push the tool onto the limit stop
-arrow- in the contact housing. |
|
|
|
| The contact is ejected from the contact housing. |
| – |
The release tool can be pulled out of the contact housing
again once the contact has been ejected. |
|
|
|
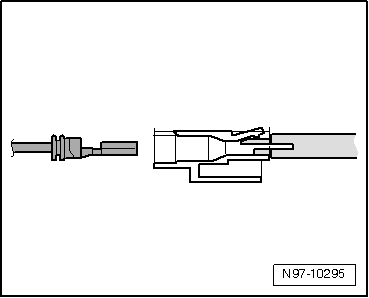
| Contacts without locking tabs: |
| – |
Insert the release tool under the locking tab of the contact
housing. |
| – |
Push through the release tool with a light upward movement
-arrow- onto the limit stop. |
|
|
|
| The contact is ejected from the contact housing. |
|
|
|
Note
If necessary, any housing catches in place (secondary
locking mechanisms) must be released or removed prior to
disengaging the contacts using the ...
Using contact surface cleaning set -VAS 6410-
The contact surface cleaning set -VAS 6410- allows optimal
repair quality to be achieved in the area of vehicle electrics.
...
© 2016-2026 Copyright www.vwgolf.org

 Flat connector systems
 Contact surface cleaning set -VAS 6410-