Volkswagen Golf Service & Repair Manual: Removing and installing high-level brake light, Golf
| Special tools and workshop equipment
required |
|
|
|
| – |
Switch off ignition and all electrical loads, and pull out
ignition key. |
 Caution
| Danger of damage to component surfaces. |
| When using leverage tools, mask visible areas of the
component with commercially available adhesive tape. |
|
|
|
|
| – |
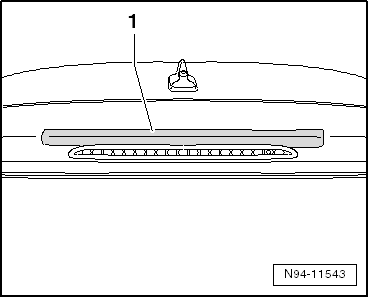
Attach a strip of adhesive tape -1-
to the area of the rear lid above the brake light. |
Caution
| Make sure the seal is not damaged when removing the
high-level brake light. |
|
|
|
|
| – |
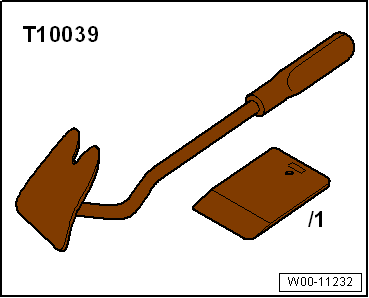
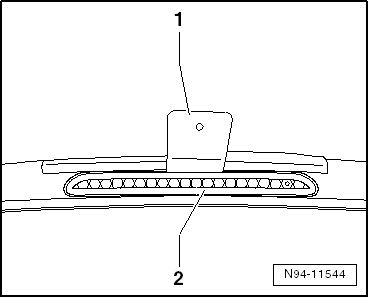
Insert wedge -T10039/1--1- at
top between high-level brake light -2-
and rear lid. |
| – |
Using plastic wedge -T10039/1--1-,
press high-level brake light -2-
downwards. |
| – |
Swing high-level brake light -2-
out of rear lid. |
|
|
|
| – |
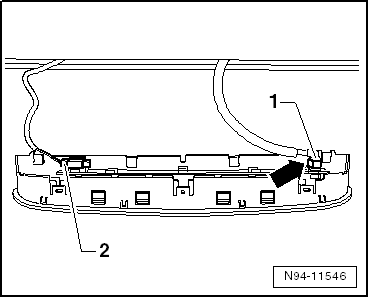
Pull out hose-locking device -arrow-. |
| – |
Pull hose connection -1- off
high-level brake light. |
| – |
Disconnect electrical connector -2-. |
| – |
Remove high-level brake light. |
 Note Note
| When installing high-level brake light, make sure seal is
correctly seated. The seal must not form loops or be damaged. |
| – |
Connect hose connection and connectors. |
| – |
Press high-level brake light into rear lid. |
| – |
Engage locking devices at top. |
| – |
Engage retaining springs at bottom. |
| – |
Check high-level brake light and rear window washer system
for fault-free function. |
|
|
 |
1 -
Bolt
Specified torque 2 Nm
2 -
Brake light connector
3 -
High-level brake light
W ...
Removing:
–
Remove roof spoiler
→ General body repairs, exterior; Rep. gr.66.
...
Other materials:
Checking pistons and cylinder bores
Checking piston
–
Using a micrometre, measure approx. 10 mm from the lower
edge, perpendicular to the piston pin axis.
Maximum deviation from nominal dimension: 0.04 mm
...
Assembly overview - alternator without sliding bushes
1 -
Bolt
Qty. 4
Specified torque: 23 Nm
2 -
Alternator -C-
Removing and installing
→ Chapter
Checking
→ Chapter
Removing and instal ...
Vehicles with torsion beam axle
Removing
–
If fitted, remove rear left underbody trim
→ General body repairs, exterior; Rep. gr.66.
–
Remove rear tunnel cross-piece
→ General body repairs, exterior; ...
© 2016-2026 Copyright www.vwgolf.org

 Assembly overview – high-level brake light, GTI, GTD and
»R«
Assembly overview – high-level brake light, GTI, GTD and
»R« Removing and installing high-level brake light, GTI, GTD and
»R«
Removing and installing high-level brake light, GTI, GTD and
»R«