Volkswagen Golf Service & Repair Manual: Removing and installing lower part of sump
| Special tools and workshop equipment
required |
| Commercially available scraper |
| Hand drill with plastic brush attachment |
| Sealant
→ Electronic Parts Catalogue |
| – |
Remove noise insulation
→ General body repairs, exterior; Rep. gr.66. |
|
|
|
| – |
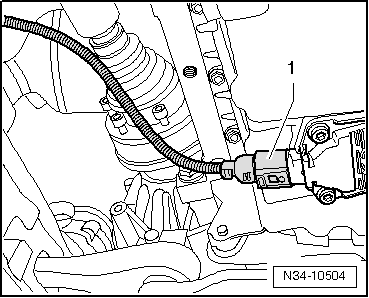
Disconnect electrical connector -1-
on oil level and oil temperature sender -G266-. |
|
|
|
| – |
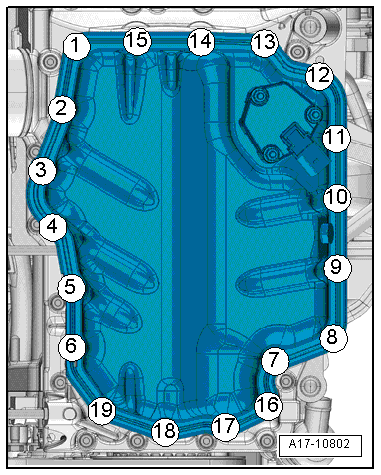
Loosen and unscrew bolts in the sequence
-19 … 1-. |
|
|
|
| – |
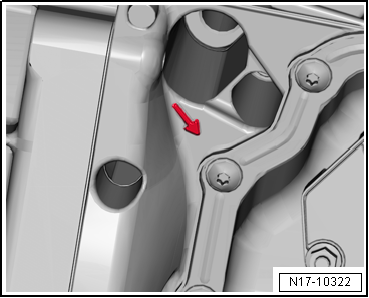
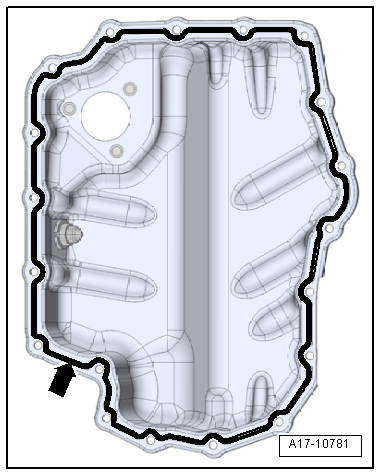
Fit a suitable screwdriver at the position marked with an
-arrow- and carefully lever lower
part of sump. |
| – |
Carefully detach lower part of sump from adhesive bond using
a commercially available scraper. |
 Note Note
| Danger of soiling lubrication system. |
| Cover open parts of engine. |
| – |
Spray sealing surface with sealant remover and leave to act. |
| – |
Remove sealant residues from sump upper part with a flat
scraper. |
Risk of eye injury caused by sealant residue.Wear eye protection. |
|
|
| – |
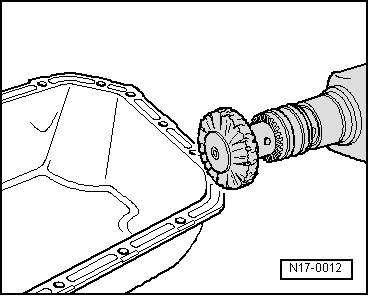
Remove residual sealant from bottom part of sump using,
e.g., a rotating plastic brush. |
| – |
Remove any oil and grease from sealing surfaces. |
Note
|
|
|
| Observe expiry date of sealing compound. |
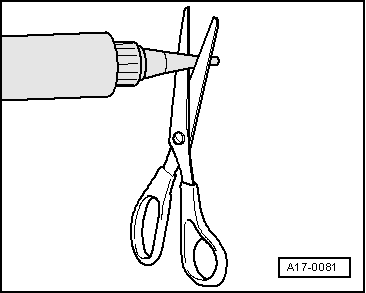
| – |
Cut off nozzle on tube at front marking (diameter of nozzle
approx. 2 mm). |
| Danger of blocking lubrication system with excess sealant. |
|
|
|
Removing
–
Drain off engine oil.
–
Disconnect electrical connect ...
Removing
–
Remove sump (bottom section)
→ Chapter.
– ...
Other materials:
Removing and installing wiper arms
Special tools and workshop equipment
required
Puller -T10369-
Removing
Caution
Risk of damage to wiper shafts ...
Recycling and refuse law
Note
The laws and regulations listed below are valid in the
Federal Republic of Germany. Other or additional laws and
regulations may apply in other countries.
Sources in other countries may be obtained from the
...
Cleaner for plastics
Designation:
Cleaner for plastics -D 195 850 A1-
Issued 04.2009
Product description
The cleaner for plastics -D 195 850 A1- is a liquid
universal cleaner and thinner/reducer ...
© 2016-2026 Copyright www.vwgolf.org

 Removing and installing oil level and oil temperature sender -G266-
 Removing and installing oil pump