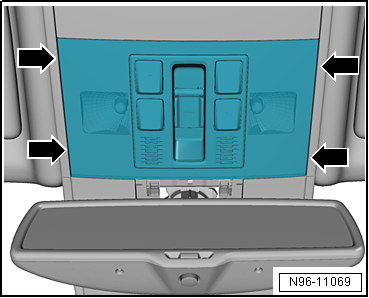
Volkswagen Golf Service & Repair Manual: Removing and installing light for front interior light -W1- with LED
|
 Note Note
|
|
 Caution
|
|
 Removing and installing illuminated vanity mirror -W20-/-W14-
Note
If an LED vanity mirror light is faulty, the entire light
must be renewed.
Removal and installation are described for ...
 Removing and installing bulb for front interior light -W1- with incandescent
bulbs
Removing and installing bulb for front interior light -W1- with incandescent
bulbs
Special tools and workshop equipment
required
Removal wedge -3409-
Note
...
Other materials:
Removing and installing front right reading light button -E634-
Note
The front right reading light button -E634- is an integral
part of the front interior light -WX1- and cannot be removed
individually.
Removing
–
Remove front interior light -WX1-
& ...
Removing and installing bracket for roof grab handle
Note
Removal and installation is described for the left front
bracket for roof grab handle. Follow same instructions for the
remaining brackets for roof grab handle as appropriate.
Special tools and workshop equipment
requ ...
Assembly overview - transverse link, multi-link suspension, front-wheel
drive
1 -
Nut
Renew after removing
2 -
Washer
3 -
Upper transverse link
Removing and installing
→ Chapter
4 -
Bolt
Renew after remov ...
