Volkswagen Golf Service & Repair Manual: Removing and installing gearbox mounting
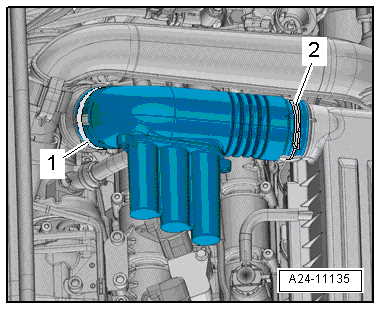
| – |
Release hose clips -1- and
-2-, and remove air pipe. |
| – |
Remove air filter housing
→ Chapter. |
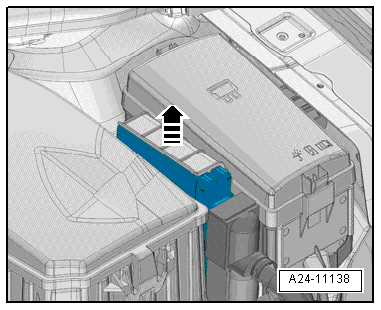
| – |
Remove battery tray
→ Electrical system; Rep. gr.27. |
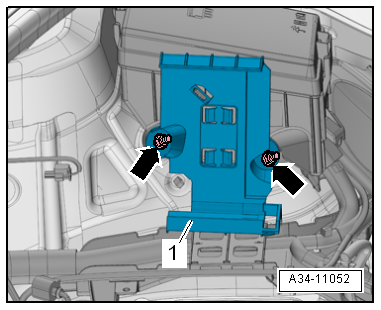
| – |
Release fastener -arrow-,
detach engine control unit -J623- and place to one side. |
|
|
|
| Remove engine control unit
→ Chapter. |
|
|
|
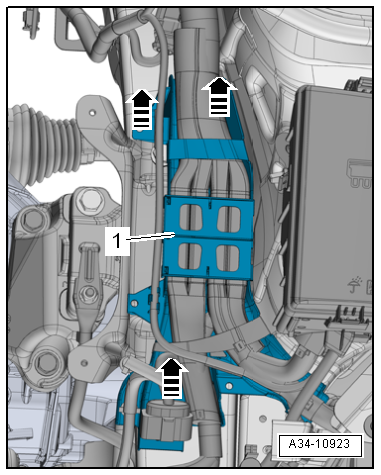
| – |
Unscrew nuts -arrows- and
remove bracket -1-. |
 Note Note
| Different types of brackets are fitted depending on version. |
|
|
|
| – |
Unclip cable guide -1- upwards
-arrows- and push slightly to one
side. |
| – |
Supporting engine in installation position
→ Chapter „Supporting engine in installation position“ |
|
|
|
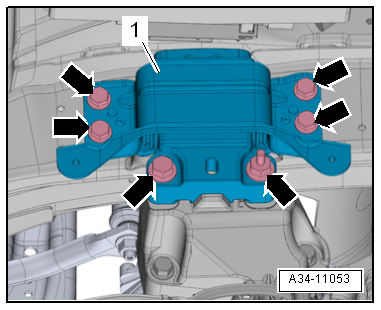
| – |
Remove bolts -arrows- and
detach gearbox mounting -1-. |
| Installation is carried out in the reverse order; note the
following: |
Note
| Renew bolts tightened through an additional specified angle. |
| Gearbox support and support arm of gearbox mounting must be
perfectly parallel to each other before screwing in bolts
-arrows 1-. If necessary, lift
gearbox at rear using trolley jack. |
| Only remove support bracket -10 - 222 A- when bolts on
assembly mounting have been tightened to specified torque. |
| – |
Lift gearbox with spindle of support bracket until gearbox
support makes contact with support arm of gearbox mounting. |
| – |
Checking adjustment of assembly mountings
→ Chapter. |
| – |
Detach support bracket -10 - 222 A- from engine. |
| → Chapter „Assembly overview - assembly mountings“ |
| → Chapter „Assembly overview - air filter housing“ |
| → Electrical system; Rep. gr.27 |
| → Chapter „Removing and installing engine control unit -J623-“ |
|
|
|
Removing
–
Disconnect electrical connector -1-.
–
Move clear hos ...
Remove noise insulation
→ General body repairs, exterior; Rep. gr.66.
– ...
© 2016-2026 Copyright www.vwgolf.org

 Removing and installing engine mountings
 Removing and installing pendulum support