Volkswagen Golf Service & Repair Manual: Removing and installing engine support
| – |
Disconnect battery
→ Electrical system; Rep. gr.27. |
| – |
Remove battery tray
→ Electrical system; Rep. gr.27. |
| – |
Drain coolant
→ Chapter. |
|
|
|
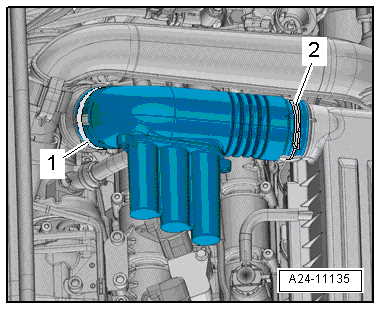
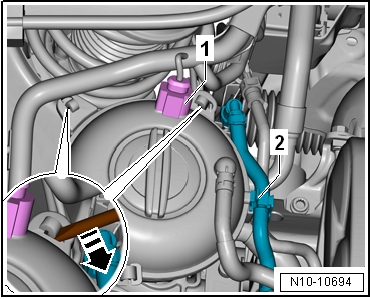
| – |
Release hose clips -1- and
-2-, and remove air pipe. |
| – |
Remove air filter housing
→ Chapter. |
| – |
Remove tensioner for poly V-belt
→ Chapter „Removing and installing tensioner for poly V-belt“. |
| – |
Release hoses from retainer -3-
and lay them to one side. |
|
|
|
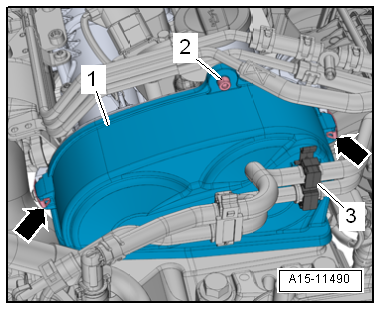
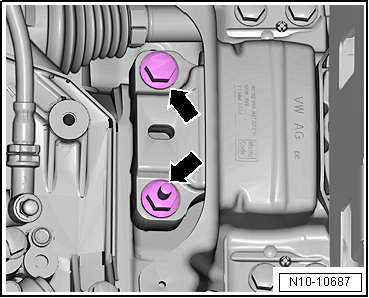
| – |
Release clips -arrows- and
detach upper toothed belt guard -1-. |
|
|
|
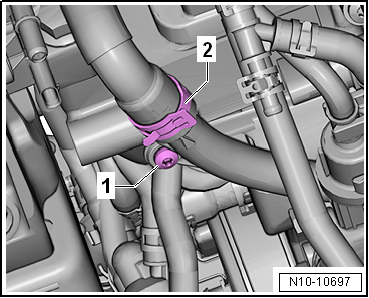
| – |
Loosen hose clamp -2- and pull
off coolant hose. |
|
|
|
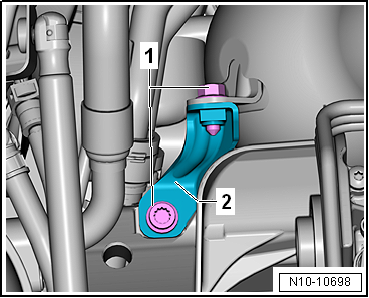
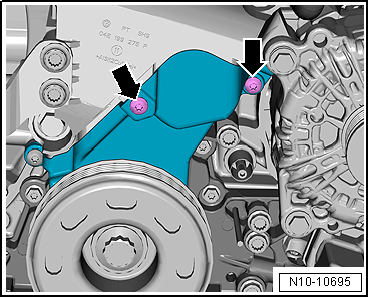
| – |
Unscrew bolts -1- and remove
bracket -2- for catalytic
converter. |
| – |
Pull off connector -1-. |
|
|
|
| – |
Move clear hose -2- from
activated charcoal filter. |
| – |
Using a screwdriver, release fasteners
-arrow- and move coolant expansion tank to one side. |
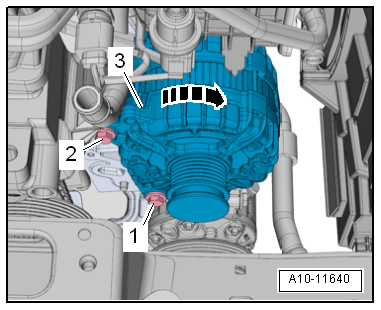
| – |
Open retaining clips on pipes for air conditioning system. |
| – |
Loosen bolt -1- but do not
remove. |
|
|
|
| – |
Swivel alternator -3- in
-direction of arrow- towards front. |
|
|
|
| – |
Unscrew bolts -arrows- from
bracket for front exhaust pipe. |
| – |
Remove pendulum support
→ Chapter. |
| – |
Supporting engine in installation position
→ Chapter „Supporting engine in installation position“ |
| – |
Tighten spindles slightly to take up weight of
engine/gearbox assembly; do not lift. |
| – |
Removing engine mounting
→ Chapter. |
|
|
|
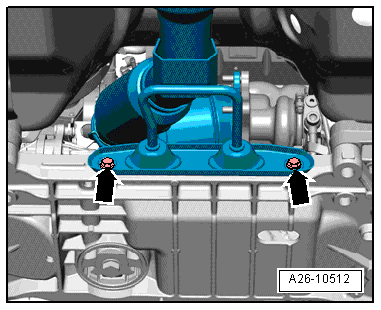
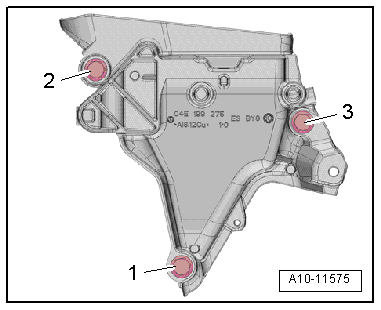
| – |
Unscrew bolts -1, 2, 3-. |
|
|
|
| – |
Push engine/gearbox assembly slightly towards left and
detach engine support. |
| Installation is carried out in the reverse order; note the
following: |
| – |
Checking adjustment of assembly mountings
→ Chapter. |
| → Chapter „Assembly overview - assembly mountings“ |
| → Chapter „Assembly overview - poly V-belt drive“ |
| → Chapter „Assembly overview - toothed belt cover“ |
| → Chapter „Assembly overview - coolant pipes“ |
| → Chapter „Assembly overview - charge air system“ |
| → Chapter „Assembly overview - air filter housing“ |
| → Chapter „Assembly overview - emission control“ |
| → Electrical system; Rep. gr.27 |
| → Electrical system; Rep. gr.27 |
|
|
|
Special tools and workshop equipment
required
Counterhold -T10475-
Removing
...
Special tools and workshop equipment
required
Assembly tool -T10485-
...
Other materials:
Removing and installing centre armrest
Special tools and workshop equipment
required
Torque wrench -V.A.G 1410-
Removing
–
Open lid -2- for
through-loading ...
Removing and installing tank flap unit
Removing
–
Screw off tank cover.
–
Remove bolt -3-.
–
Slightly pull tank flap unit towards rear
-arrow a- out of catches.
–
Swing tan ...
Washing the vehicle
First read and observe the introductory information
and safety warnings The longer substances such as insects, bird droppings,
resinous tree sap, road dirt, industrial deposits, tar, soot or road salt and other
corrosive materials remain on the vehicle, the more damage they do to the paintwo ...
© 2016-2026 Copyright www.vwgolf.org

 Removing and installing vibration damper
 Renewing crankshaft oil seal - belt pulley end