Volkswagen Golf Service & Repair Manual: Removing and installing dust and pollen filter, RHD vehicles
| Special tools and workshop equipment
required |
| Commercially available vacuum cleaner |
|
|
|
 Note
| Handle customer property in the glove compartment with care. |
| Store any objects from the glove compartment in a sealable
plastic bag. |
| – |
Move glove compartment lid to service position
→ General body repairs, interior; Rep. gr.68. |
|
|
|
| – |
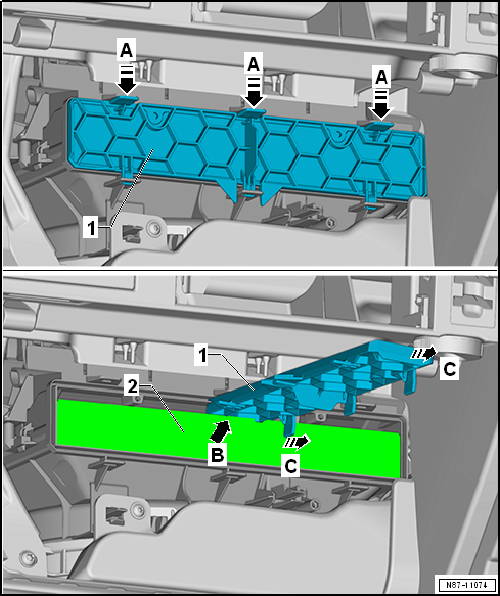
Release cover -1- in
-direction of arrow- and remove it. |
|
|
|
| – |
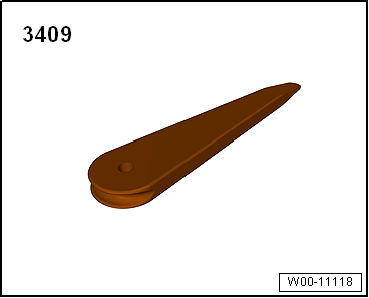
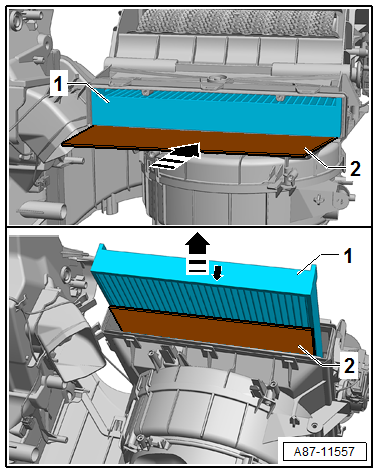
Push cover plate -T10532--2-
under the pollen filter -1-. |
Note
| The illustration shows a left-hand drive vehicle. |
|
|
|
| – |
Hook cover -1- into dust and
pollen filter -2--arrow -. |
Risk of damage to fresh air blower caused by dirt dropping out of the
dust and pollen filter when the cover plate is not seated
properly.Carefully pull out dust and pollen filter.Keep dust and pollen
filter covered by cover plate.
| – |
Pull out cover -1- in
-direction of arrow C-. |
| – |
Ensure that cover plate -T10532- is not pulled out as well. |
| – |
Before removing cover plate -T10532-, remove any dirt and
leaves using a commercially available vacuum cleaner. |
| – |
Install in reverse order. Note the following when doing
this: |
| – |
Observe installation position of dust and pollen filter when
installing. |
|
|
|
Special tools and workshop equipment
required
Commercially available vacuum cleaner
Cover plate -T10532-
...
Note
If only the fresh air blower -V2- is defective, remove and
install fresh air blower control unit -J126-
→ Chapter.
...
Other materials:
Removing and installing steering column, LHD
Special tools and workshop equipment
required
Torque wrench -V.A.G 1331-
Torque wrench -V.A.G 1332-
Remov ...
Introduction
This chapter contains information on the following subjects:
→ Warning and indicator lamps
→ Pedals
→ Manual gearbox: selecting a gear
→ Automatic gearbox: selecting a gear
→ Changing gear using Tiptronic
→ Driving with an ...
Assembly overview - driver side airbag
1 -
Catch
To release, use a Torx screwdriver T25 of approx. 100 mm length
2 -
Steering column electronics control unit -J527-
With airbag coil connector and return ring with slip ring -F138-
Assembly overview
→ Elec ...
© 2016-2024 Copyright www.vwgolf.org


 Removing and installing dust and pollen filter, LHD vehicles
 Removing and installing fresh air blower -V2-, LHD vehicles