Volkswagen Golf Service & Repair Manual: Removing and installing alternator, vehicles with 1.2 l TSI engine, 1.4 l
TSI engine and 1.4 l TSI natural gas engine
| Special tools and workshop equipment
required |
|
|
|
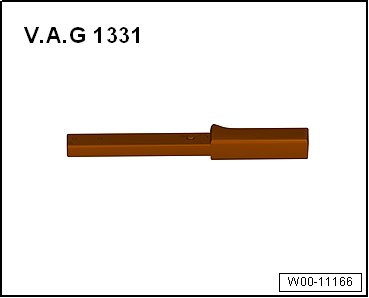
| Torque wrench -V.A.G 1331- |
| – |
With ignition switched off, disconnect earth cable from
battery -A-
→ Chapter. |
| – |
Remove poly V-belt
→ Rep. gr.13. |
| – |
Remove tensioner for poly V-belt
→ Rep. gr.13. |
| Vehicles with air conditioner |
 Caution
| Risk of damage to air conditioner compressor,
refrigerant lines and refrigerant hoses: |
| Make sure refrigerant lines and hoses are not
excessively stretched, kinked or bent. |
|
| – |
Remove air conditioner compressor from bracket
→ Heating, air conditioning system; Rep. gr.87. |
| – |
Secure air conditioner compressor to lock carrier so that
refrigerant lines are not under tension. |
| Continued for all vehicles |
|
|
|
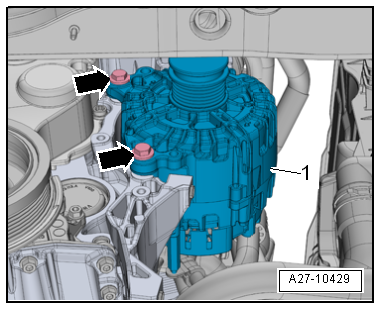
 Note Note
| If alternator -C--1- is stuck
in its bracket, screw bolts in again except for the last 2
turns. |
| Carefully hit bolt heads with flat side of hammer to release
sliding bushes of alternator mounting. |
|
|
|
| – |
Remove alternator -C--1- from
bracket with electrical wiring still connected. |
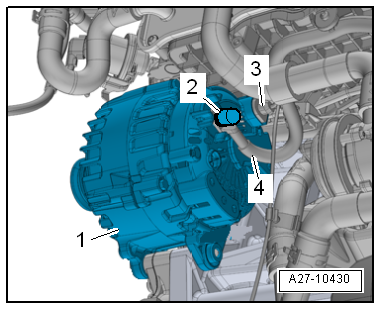
| – |
Disconnect electrical connector -3-. |
| – |
Unscrew nut and remove terminal 30/B+
-4-. |
| – |
Remove alternator -C--1-
downwards to the right. |
| Install in the reverse order of removal, observing the
following: |
| – |
To facilitate positioning of alternator -C-, slide bushes of
alternator mounting slightly towards back. |
Note
| Ensure that bushes of alternator mounting slide freely and
are not to tight (loosen, if necessary); otherwise clamping
force of sliding bushes is too low even if specified torque is
applied. |
| – |
Reconnect battery -A-
→ Chapter. |
| – |
Always start engine and check belt running after completing
work. |
| → Chapter „Assembly overview - alternator“ |
|
|
|
1 -
Alternator -C-
Removing and installing
→ Chapter
Checking
→ Chapter
Removing and install ...
Special tools and workshop equipment
required
Torque wrench -V.A.G 1331-
...
Other materials:
Assembly overview - suspension, multi-link suspension, four-wheel drive
1 -
Drive shaft
2 -
Bolt
Renew after removing
70 Nm +90°
3 -
Wheel bearing housing
Removing and installing
→ Chapter
4 -
...
Statutes and regulations
Note
The laws and regulations listed below are valid in the
Federal Republic of Germany. Other or additional laws and
regulations may apply in other countries.
Sources in other countries may be obtained from the
...
Sockets in the vehicle
Fig. 125 In the rear section of the centre
console: 12-volt socket
Fig. 126 In the luggage compartment: 12-volt
socket
First read and observe the introductory information
and safety warnings Maximum power rating
Electrical socket
Maximum power rating
...
© 2016-2024 Copyright www.vwgolf.org

 Assembly overview - alternator with sliding bushes
 Removing and installing alternator, vehicles with 2.0 l TSI engine