Volkswagen Golf Service & Repair Manual: Assembly overview - wheel housing trim, saloon
 Note
Note
| The illustration shows the wheel housing trim on the left side.
The right-hand side is similar (mirror image of left-hand side). |
| I: Vehicles without side padding |
| II: Vehicles with side padding |
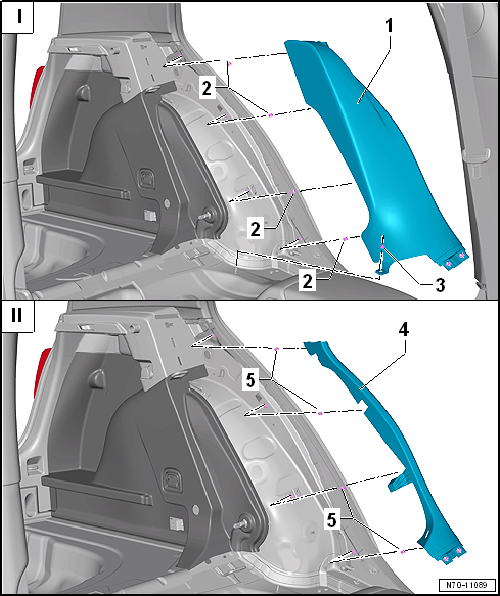
- Removing and installing
→ Chapter
- Insert into trim
- Remove any retaining clips left in body mountings using removal tool
-T40280
- Renew any damaged or deformed retaining clips
- Removing and installing
→ Chapter
- Insert into trim
- Remove any retaining clips left in body mountings using removal tool
-T40280
- Renew any damaged or deformed retaining clips
Note
The illustration shows the side trim panel on the left side. The
right-hand side is similar (mirror image of left-hand side).
1 -
Side trim ...
Note
The illustration shows the wheel housing trim on the left side.
The right-hand side is similar (mirror image of left-hand side).
I: Vehicles without side paddin ...
Other materials:
Separating control unit from hydraulic unit
Special tools and workshop equipment
required
ESD workplace -VAS 6613-
Torx bit T25
If a control unit is defective, separate it from the
hydraulic unit and renew only the control ...
Removing and installing rear wheel housing liner
Special tools and workshop equipment
required
Torque wrench -V.A.G 1783-
Note
Removal and installation are descr ...
Removing and fitting head restraints
Fig. 48 Removing the front head restraint
Fig. 49 Removing the rear head restraint
First read and observe the introductory information
and safety warnings Every seat is fitted with a head restraint. The front
head restraints are intended solely for use with the front seats, and the centr ...
© 2016-2026 Copyright www.vwgolf.org

 Assembly overview - side trim panel
 Assembly overview - wheel housing trim, estate