Volkswagen Golf Service & Repair Manual: Assembly overview - wheel housing trim, estate
 Note
Note
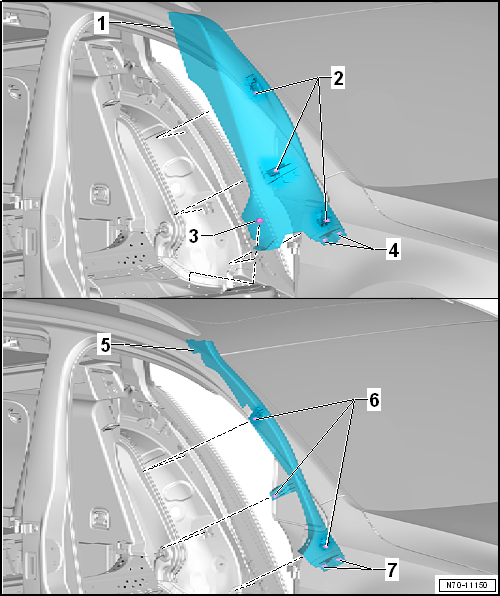
| The illustration shows the wheel housing trim on the left side.
The right-hand side is similar (mirror image of left-hand side). |
| I: Vehicles without side padding |
| II: Vehicles with side padding |
- Removing and installing
→ Chapter
- Insert into trim
- Remove any retaining clips left in body mountings using removal tool
-T40280-.
- Renew any damaged or deformed retaining clips
- For securing sill panel moulding
- Insert in wheel housing trim
- Renew any damaged or deformed retaining clips
- Removing and installing
→ Chapter
- Insert into trim
- Remove any retaining clips left in body mountings using removal tool
-T40280
- Renew any damaged or deformed retaining clips
- For securing sill panel moulding
- Insert in wheel housing trim
- Renew any damaged or deformed retaining clips.
Note
The illustration shows the wheel housing trim on the left side.
The right-hand side is similar (mirror image of left-hand side).
I: Vehicles without side paddin ...
1 -
Foot rest
Removing and installing
→ Chapter
Must fully engage into bracket.
2 -
Nut
Qty. 3
2 Nm
...
Other materials:
Renewing left oil seal
Special tools and workshop equipment
required
Multipurpose tool -VW 771-
Thrust piece -3305-
...
Incorporation of high-voltage heater (PTC) - Z115- into coolant circuit
Note
In vehicles with a high-voltage system, the high-voltage
heater (PTC) -Z115- is used as a supplementary heater.
In vehicles with a high-voltage system and an auxiliary
heater installed as optional equipment, the ...
Rear brakes
The type of brake system installed in the vehicle is
indicated among other things by the corresponding PR number on
the vehicle data sticker.
The vehicle data sticker can be found in the spare wheel
well and in the service schedule.
...
© 2016-2026 Copyright www.vwgolf.org

 Assembly overview - wheel housing trim, saloon
 Assembly overview - foot rest and floor covering, LHD vehicles