Volkswagen Golf Service & Repair Manual: Seam seals, body of hybrid vehicles
 Note Note
| Seam seals made during repair work must be identical in
appearance and thickness to the original seam seals. |
| To avoid damage or faulty operation, brush seam seals smooth
near attachments which must be attached. |
| Water drainage holes must remain clear. |
| All threaded studs and welded nuts with metric threads as
well as all other studs and contact surfaces for assembly must
be functional following the extent of the sealing work. |
| Sealant must never be applied to bare substrates. Substrates
must always be filled first. |
|
|
|
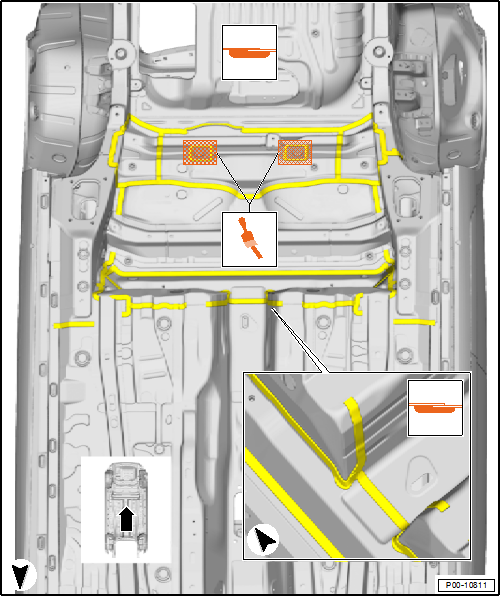
| Seam seals, centre underbody |
| The left side is shown in the magnifying glass view. The right side
is the mirror image. |

| Coarse seam seals require that the sealant be applied at least 20 mm
wide and 2 mm high. |
| Sealant in the marked areas must be brushed following application. |
 Note
Note
| When brushing the sealant seam, ensure that the sheet metal edges
which are to be protected are not exposed and that the metal is covered
with a sufficiently thick layer of PVC. |
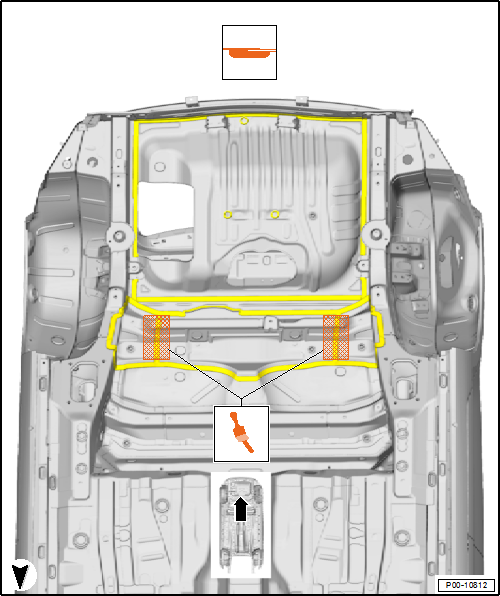
| Seam seals, rear underbody |

| Coarse seam seals require that the sealant be applied at least 20 mm
wide and 2 mm high. |
| Sealant in the marked areas must be brushed following application. |
 Note
Note
| When brushing the sealant seam, ensure that the sheet metal edges
which are to be protected are not exposed and that the metal is covered
with a sufficiently thick layer of PVC. |
Note
Seam seals made during repair work must be identical in
appearance and thickness to the original seam seals.
To avoid ...
© 2016-2026 Copyright www.vwgolf.org

 Note
Note
 Note
Note
 Note
Note Seam seals, body of CNG-powered vehicles
 Undercoating