Volkswagen Golf Service & Repair Manual: Repairing corrugated pipe
| Special tools and workshop equipment
required |
|
|
|
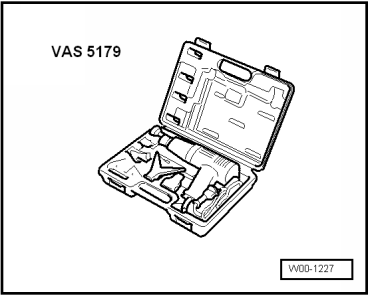
| Hot air blower -VAS 5179- or |
| Hot air blower -V.A.G 1416/- or |
| Hot air blower -VAS 1978/14- |
 Note Note
| Repair points must not be subjected to pulling or bending
forces. |
| If the damaged section is longer than 20 mm, a new piece of
corrugated pipe must be used and the procedure described below
must be performed twice. |
|
|
|
| – |
Cut damaged section at right angles out of corrugated pipe
which is to be repaired. |
| – |
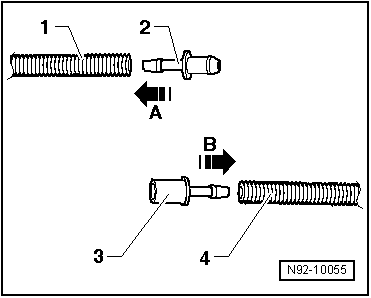
Select suitable end pieces -2-
and -3- and correct sized
shrink-fit piping from the electronic parts catalogue (ETKA). |
| – |
Heat end of corrugated pipe -1-. |
| – |
Push connector -2- into
corrugated pipe -2--arrow A-. |
| – |
Heat end of corrugated pipe -4-. |
| – |
Push connector -3- into
corrugated pipe -4--arrow B-. |
|
|
|
| – |
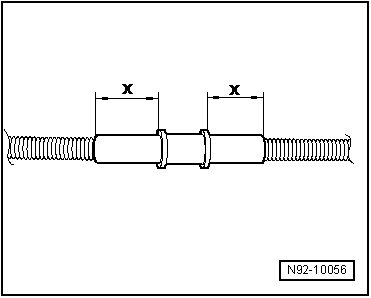
Cut heat-shrink hose so that ends of corrugated pipe are
each covered by about 20 mm -dimension x-
of heat-shrink hose. |
| – |
Push heat-shrink hose over corrugated pipe, join connectors
and secure repair joints with heat-shrink hose. |
|
|
|
Smooth pipe with a diameter or 5x1 mm or 6x1 mm can be
repaired with EPDM hose.
–
Cut damaged section at right angles out of ...
Distinguishing features of Bosch and Federal Mogul products.
When renewing wiper rubbers, note the make. When renewing
wiper blades, the same ...
© 2016-2026 Copyright www.vwgolf.org


 Repairing smooth pipe
 Distinguishing features of jointless wiper blades