Volkswagen Golf Service & Repair Manual: Removing and installing window regulator
| Special tools and workshop equipment
required |
|
|
 Note Note
| Removal and installation are described only for the left
window regulator. Removal and installation of the right window
lifter mechanism are similar. |
|
|
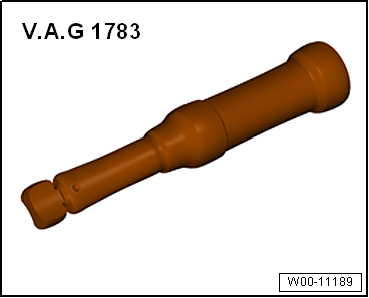
Torque wrench -V.A.G 1783- |
| – |
Remove front door trim
→ General body repairs, interior; Rep. gr.70. |
| – |
Remove loudspeaker
→ Communication; Rep. gr.91. |
| – |
Detach cable from window regulator. |
| – |
Remove door window
→ Chapter. |
| – |
Removing window regulator motor
→ Chapter |
| – |
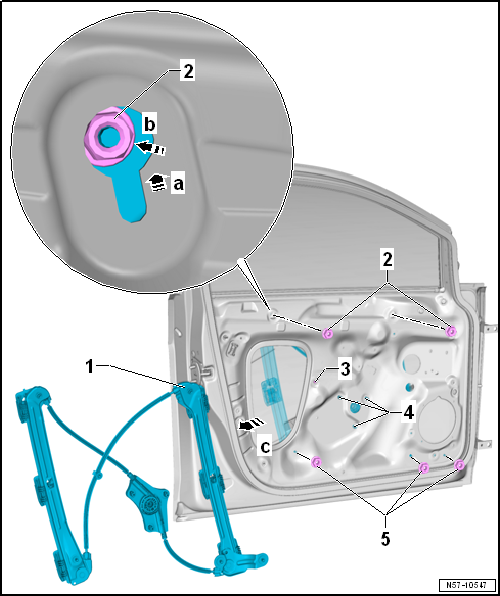
Release locking hook of cable drum -4-
and insert into door. |
| – |
Unscrew hexagon nuts -5- and insert
threaded studs of window regulator into door. |
| – |
Loosen hexagon nuts -2-, do not remove. |
| – |
Slightly push window regulator upwards in door
-arrow a- and guide into door -arrow b-. |
| – |
Turn window regulator -1- through 90°
and guide through opening in door -arrow c-
to remove. |
| – |
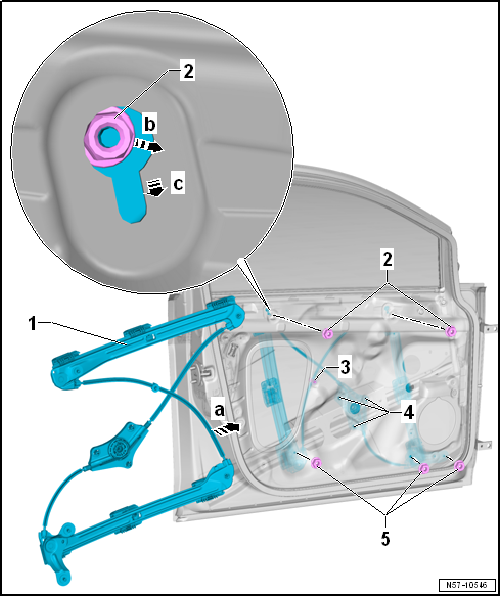
Insert window regulator -1- through
opening in door -arrow a- and move to
mounting position. |
| – |
Insert threaded studs of window regulator into door skin
-arrow b-. |
| – |
Press cable drum against door inner part -4-
until looking hooks engage audibly. |
| – |
Secure cable to window regulator. |
| – |
Install window regulator motor
→ Chapter |
| – |
Install door window
→ Chapter |
| |
Hexagon nuts
→ Chapter „Assembly overview - window regulator“ |
Special tools and workshop equipment
required
Note
...
Special tools and workshop equipment
required
Note
Removal and installation are described only ...
© 2016-2026 Copyright www.vwgolf.org


 Removing and installing window regulator motor -V14-/-V15-
 Removing and installing inner door cover