Volkswagen Golf Service & Repair Manual: Removing and installing track rod
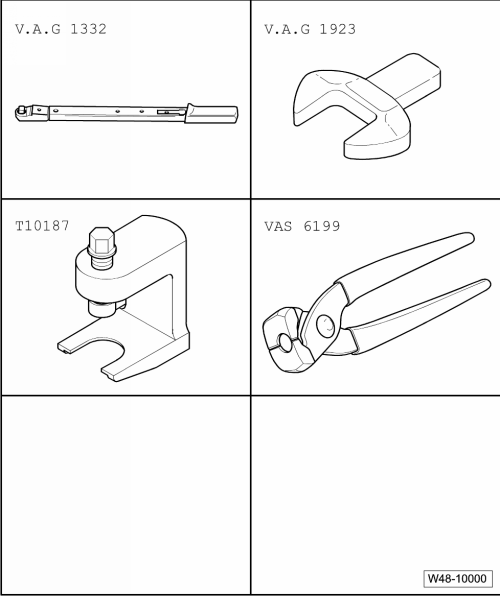
| Special tools and workshop equipment required |
| Torque wrench -V.A.G 1332- |
| Open-end insert, 38 mm -V.A.G 1923- |
| Ball joint puller -T10187- |
| Locking pliers for Phaeton steering rack -VAS 6199- |
| Carry out the following work: |
| – |
Turn steering wheel to straight-ahead position. |
| – |
Clean outside of steering rack in vicinity of boot. |
| – |
Loosen nut on track rod ball joint but do not remove
completely. |
|
|
|
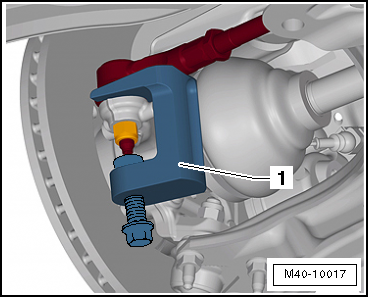
| – |
Using ball joint puller -T10187--1-,
press track rod ball joint off wheel bearing housing, and
unscrew nut. |
 Caution
| Leave nut screwed on a few turns to protect thread
on pin. |
|
| – |
Open clamps and push boot back. |
| – |
Turn steering as follows: |
| |
- For left track rod, turn steering to full right lock |
| |
- For right track rod, turn steering to full left lock. |
|
|
|
| 1 - |
Open-end spanner attachment -V.A.G 1923- |
| 2 - |
Torque wrench -V.A.G 1332- |
 Note Note
| If the steering rack shows signs of corrosion, damage, wear
or soiling, renew the complete steering rack. |
| Likewise, if there is no film of grease on the steering
rack, the steering rack must be renewed. |
| Install in reverse order of removal, observing the
following: |
Caution
| Do not grease steering rack. |
|
|
|

|
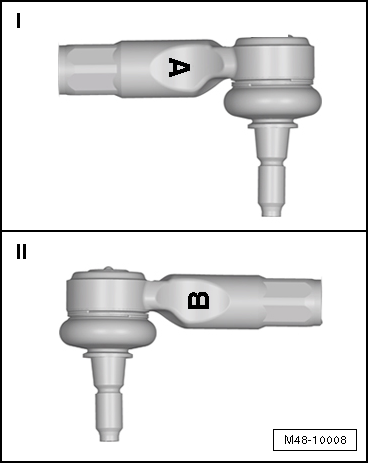
| – |
Make sure that correct track rod ball joint is installed on
each side. |
| I - |
Track rod ball joint on right marked with an “A” |
| II - |
Track rod ball joint on left marked with a “B” |
| – |
Turn steering wheel to straight-ahead position. |
| – |
Thread new clamps and rubber boot onto track rod. |
|
|
|
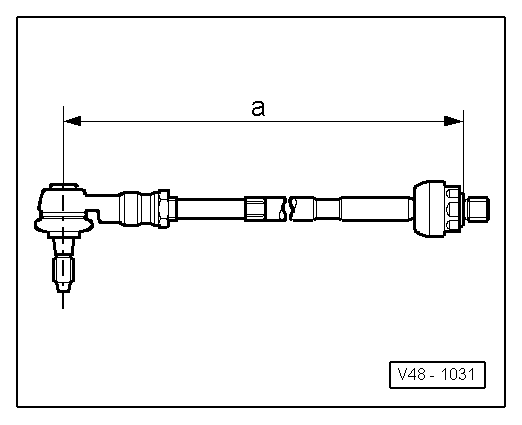
| – |
Screw track rod into track rod ball joint until dimension
-a- is attained. |
| Dimension -a- = 373 ± 1 mm |
|
|
|
| 1 - |
Open-end spanner attachment -V.A.G 1923- |
| 2 - |
Torque wrench -V.A.G 1332- |
| – |
Lightly grease sealing surface between boot and track rod
with grease -G 052 168 A1- from repair kit. |
|
|
|
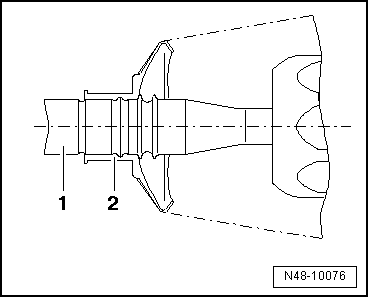
| – |
Push rubber boot -2- onto track
rod -1-, making sure that boot is
correctly positioned. |
| – |
Secure spring-type clip on rubber boot using hose clip
pliers -V.A.G 1275-. |
| – |
Lightly grease sealing surface between boot and steering
rack housing with grease -G 052 168 A1- from repair kit. |
| – |
Push rubber boot onto steering rack housing as far as it
will go. |
|
|
|
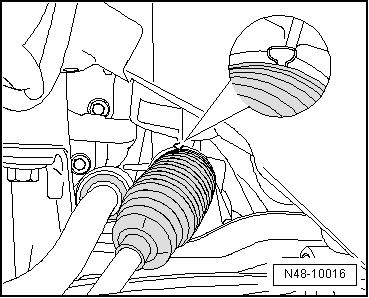
| – |
Install new clamp, as shown in figure, with locking pliers
for Phaeton steering rack -VAS 6199-. |
| – |
Check wheel alignment
→ Chapter. |
| – |
If both track rods have been exchanged, basic setting must
be carried out for steering angle sender -G85-
→ Vehicle diagnostic tester. |
| – |
Then carry out basic setting of steering
→ Vehicle
diagnostic tester |
| → Chapter „Assembly overview - steering rack“ |
| → Chapter „Repairing steering rack“ |
| → Chapter „Torque settings for wheel bolts“ |
|
|
|
Special tools and workshop equipment required
Hose clip pliers -V.A.G 1275-
Torque wrench -V.A.G 1332-
Tool insert 24 mm -V.A.G 133 ...
Special tools and workshop equipment
required
Ball joint puller -T10187-
...
Other materials:
Repair paintwork system for matt-finished vehicles
Issue 04.13
The repair paintwork system for matt-finished vehicles is
outlined below. Area of use: larger areas/full painting
operations
Application
Metal substrate
...
Adaptive cruise control
Calibrating adaptive cruise control (ACC), except for e-Golf
Before adjustment of the Adaptive Cruise Control (ACC)
system, the sensor, the retainers and securing elements are to
be checked for damage, external influence and secure sea ...
Assembly overview - rear window wiper system
1 -
Cap
2 -
Nut
Specified torque: 12 Nm
3 -
Wiper arm with joint-free wiper
Removing and installing
→ Chapter
Adjusting park position
→ Ch ...
© 2016-2026 Copyright www.vwgolf.org

 Removing and installing boot
 Removing and installing track rod ball joint