Volkswagen Golf Service & Repair Manual: Removing and installing track rod ball joint
| Special tools and workshop equipment
required |
|
|
|
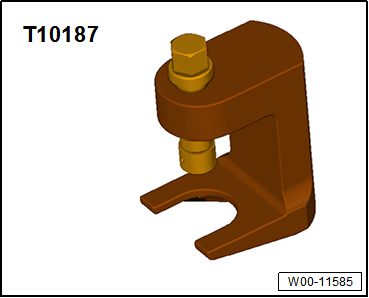
| Ball joint puller -T10187- |
|
|
|
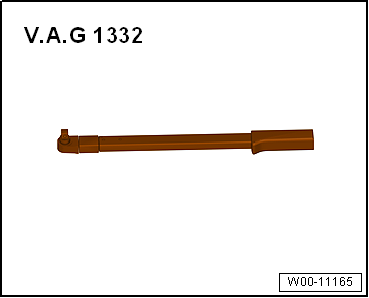
| Torque wrench -V.A.G 1332- |
|
|
|
| – |
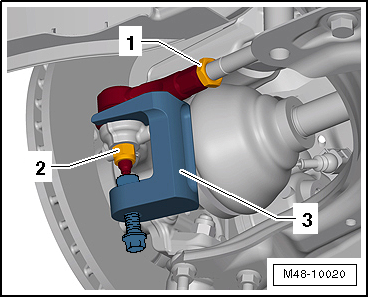
Mark position of track rod ball joint on track rod. |
| – |
Loosen nut -2- on track rod
ball joint but do not remove completely. |
 Caution
| Leave nut screwed on a few turns to protect thread
on pin. |
|
| – |
Push track rod off wheel bearing housing and remove nut. |
| 1 - |
Ball joint puller -T10187- |
| – |
Unscrew track rod ball joint from track rod. |
| Install in reverse order of removal, observing the
following: |
|
|
|
| – |
Make sure that correct track rod ball joint is installed on
each side. |
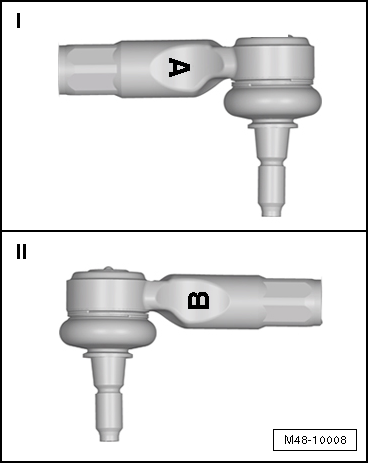
| I - |
Track rod ball joint on right marked with an “A” |
| II - |
Track rod ball joint on left marked with a “B” |
| – |
Screw track rod ball joint onto track rod as far as
previously applied mark and secure with lock nut. |
| – |
Insert track rod ball joint into wheel bearing housing. |
| – |
Bolt track rod ball joint with new nut. |
| – |
Check wheel alignment
→ Chapter. |
| → Chapter „Assembly overview - steering rack“ |
| → Chapter „Repairing steering rack“ |
| → Chapter „Torque settings for wheel bolts“ |
|
|
|
Special tools and workshop equipment required
Torque wrench -V.A.G 1332-
Open-end insert, 38 mm -V.A.G 1923-
Ball joint puller -T10 ...
1 -
Right track rod ball joint
Marked with “A”
→ Anchor
Removing and installing
→ Chapter
...
© 2016-2026 Copyright www.vwgolf.org

 Removing and installing track rod
 Repairing steering rack