Volkswagen Golf Service & Repair Manual: Removing and installing boot
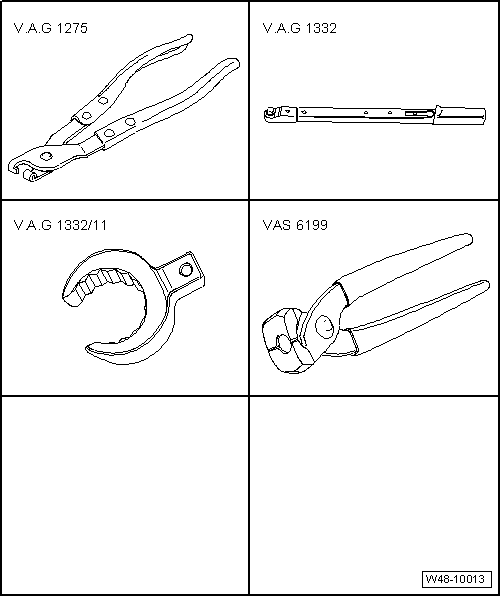
| Special tools and workshop equipment required |
| Hose clip pliers -V.A.G 1275- |
| Torque wrench -V.A.G 1332- |
| Tool insert 24 mm -V.A.G 1332/11- |
| Locking pliers for Phaeton steering rack -VAS 6199- |
 Note Note
| If boot is defective, moisture and dirt will enter steering
rack. There must be a palpable film of grease in the area of the
teeth on the steering rack. If there is no film of grease, the
steering rack must be renewed. |
| The steering rack must be renewed: |
| In the event of corrosion. |
| In the event of excessive wear |
| In the event of soiling on the steering rack. |
| – |
Turn steering wheel to straight-ahead position. |
| – |
Mark position of nut on track rod. |
| – |
Remove track rod ball joint
→ Chapter. |
| – |
Clean outside of steering rack in vicinity of boot. |
| No dirt must be allowed to enter the steering rack through a
defective rubber boot during this operation. |
| – |
Pull boot off steering rack housing and track rod. |
Note
| If the steering rack shows signs of corrosion, damage, wear
or soiling, renew the complete steering rack. |
| Likewise, if there is no film of grease on the steering
rack, the steering rack must be renewed. |
| Install in reverse order of removal, observing the
following: |
 Caution
| Do not grease steering rack. |
|
| – |
Turn steering wheel to straight-ahead position. |
| – |
Thread new clamps and rubber boot onto track rod. |
| – |
Lightly grease sealing surface between boot and track rod
with grease -G 052 168 A1- from repair kit. |
|
|
|
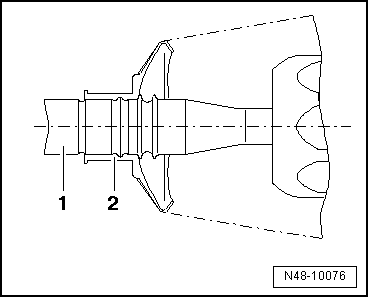
| – |
Push rubber boot -2- onto track
rod -1- as shown in figure. |
| – |
Secure spring-type clip on rubber boot using hose clip
pliers -V.A.G 1275-. |
| – |
Lightly grease sealing surface between boot and steering
rack housing with grease -G 052 168 A1- from repair kit. |
| – |
Push rubber boot onto steering rack housing to stop. |
|
|
|
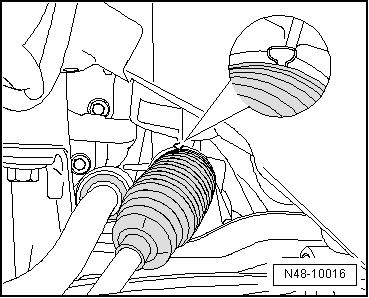
| – |
Use locking pliers for Phaeton steering rack -VAS 6199- to
install new clamp, as shown in figure. |
| – |
Screw in track rod ball joint up to mark made during removal
and install
→ Chapter. |
| – |
Install front wheel and tighten. |
| – |
Check wheel alignment
→ Chapter. |
| – |
If both track rods have been exchanged, basic setting must
be carried out for steering angle sender -G85-
→ Vehicle diagnostic tester. |
| – |
Then carry out basic setting of steering
→ Vehicle
diagnostic tester |
| → Chapter „Assembly overview - steering rack“ |
| → Chapter „Repairing steering rack“ |
| → Chapter „Torque settings for wheel bolts“ |
|
|
 |
Special tools and workshop equipment required
Ball joint puller -T10187-
Torque wrench -V.A.G 1331-
Torque wrench -V.A.G 1332-
...
Special tools and workshop equipment required
Torque wrench -V.A.G 1332-
Open-end insert, 38 mm -V.A.G 1923-
Ball joint puller -T10 ...
© 2016-2026 Copyright www.vwgolf.org

 Removing and installing steering rack, RHD vehicles, except for e-Golf
 Removing and installing track rod