Volkswagen Golf Service & Repair Manual: Removing and installing spring, torsion beam axle
| Special tools and workshop equipment
required |
|
|
|
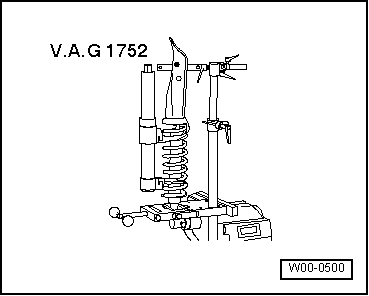
| Spring compressor -V.A.G 1752/1- |
|
|
|
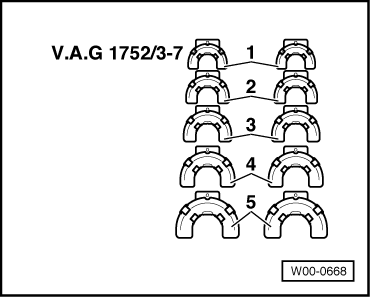
| Spring retainer -V.A.G 1752/3A- |
| Adapter -V.A.G 1752/9-, not illustrated |
|
|
|
| – |
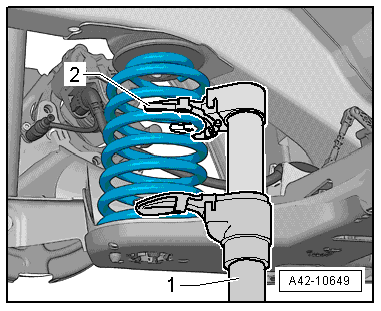
Pull out clip -1- in
-direction of arrow- onto stop. |
|
|

|
| – |
Insert spring compressor-1-. |
| 1 - |
Spring compressor -V.A.G 1752/1- |
| 2 - |
Spring retainer -V.A.G 1752/3A- |
 WARNING
| Ensure that coil spring is correctly seated in
spring retainers -V.A.G 1752/3A--2-. |
|
| – |
Compress coil spring until it can be removed. |
 Note Note
| Use a spanner or a reversible ratchet handle to compress
spring compressor. |
| Install in reverse order of removal, observing the
following: |
| – |
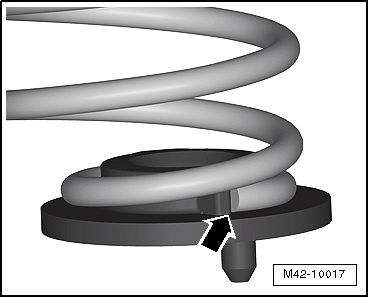
Check that the lower spring plate is not damaged. |
| – |
If necessary, renew lower spring plate. |
| – |
Place lower plate onto bottom of coil spring. |
|
|
|
| End of spring -arrow- must lie
against stop on bottom spring seat. |
| – |
Mount spring together with spring plate. |
| – |
The bottom spring seat has a pin. |
| – |
Insert this pin into hole in torsion beam axle. |
| – |
Insert upper spring seat into upper end of spring. |
|
|
|
| – |
Bead of spring seat -arrow-
must lie against coil spring correctly. |
| – |
Release tension on coil spring while locating upper spring
seat on lug on body. |
| – |
Remove spring compressor. |
|
|

|
| – |
Push in clip -1- in opposite
-direction of arrow- onto stop. |
| → Chapter „Torque settings for wheel bolts“ |
|
|
|
1 -
Shock absorber
Removing and installing
→ Chapter
Defective shock absorbers must always be degassed and drained before
...
Special tools and workshop equipment
required
Spring compressor -V.A.G 1752/1-
&nb ...
Other materials:
Locking and unlocking the vehicle from the inside
Fig. 29 In the driver door: central locking
button
First read and observe the introductory information
and safety warnings
Press the
button :
Unlocks
the vehicle.
Locks the
vehicle.
The central locking b ...
Removing and installing lower rear lid trim
Special tools and workshop equipment
required
–
Remove upper rear lid trim
→ Chapter.
–
Remove warning triangle.
...
Special connector systems
Note
If necessary, any housing catches in place (secondary
locking mechanisms) must be released or removed prior to
disengaging the contacts using the prescribed tool
→ Chapter.
...
© 2016-2026 Copyright www.vwgolf.org

 Repairing shock absorber
 Removing and installing spring, multi-link suspension, left spring for
front-wheel drive, left and right spring for four-wheel drive
Removing and installing spring, multi-link suspension, left spring for
front-wheel drive, left and right spring for four-wheel drive