Volkswagen Golf Service & Repair Manual: Assembly overview - high-pressure pump
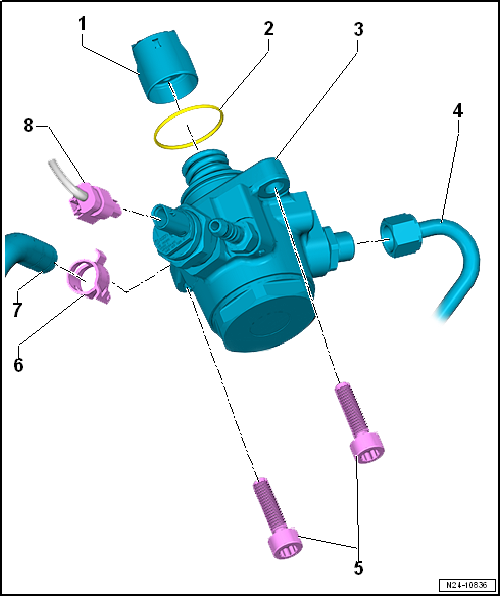
| When installing lubricate lightly with clean engine oil |
| When installing lubricate lightly with clean engine oil |
| With fuel pressure regulating valve -N276-. |
| Removing and installing
→ Chapter |
The fuel system is under high pressure.Risk of injury due to fuel which may
spurt out.Release high pressure.
| Removing and installing
→ Chapter |
| Check for damage before re-installing. |
| Unions must not show any signs of damage |
| Lubricate thread of union nuts with clean engine oil |
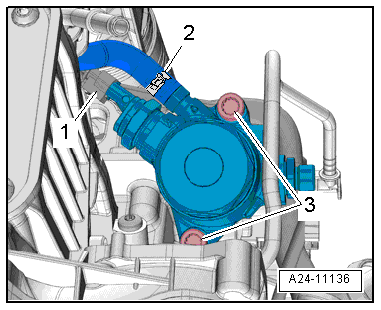
| Specified torque and tightening sequence
→ Fig. |
| High-pressure pump - specified torque and sequence |
| To prevent flange of high-pressure pump from being deformed
during installation, install high-pressure pump as follows: |
| – |
Tighten bolts in stages as follows: |
|
|
|
| Stage |
Bolts |
Specified torque/
additional specified angle |
| 1 |
-3- |
Screw in to contact by hand |
| 2 |
-3- |
Tighten one turn alternately
until flange of high-pressure pump makes contact with camshaft housing |
| 3 |
-3- |
20 Nm |
| 4 |
-3- |
Turn 90° further |
Removing
Engine cold
The fuel system is under high pressure.Risk of injury due to fuel which
may spurt out.Release high pressure.
...
© 2016-2026 Copyright www.vwgolf.org


 Removing and installing high-pressure pump