Volkswagen Golf Service & Repair Manual: Removing and installing spring, multi-link suspension, right spring for
front-wheel drive
| Special tools and workshop equipment
required |
|
|
|
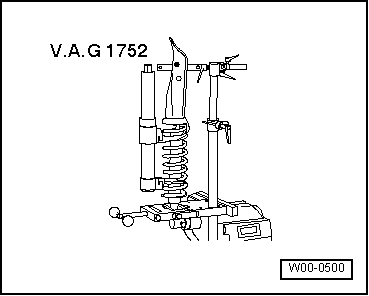
| Spring compressor -V.A.G 1752/1- |
|
|
|
| Spring retainer -V.A.G 1752/3A- |
| Adapter -V.A.G 1752/9-, not illustrated |
| – |
Remove rear wheel housing liner
→ General body repairs, exterior; Rep. gr.66. |
|
|
|
| – |
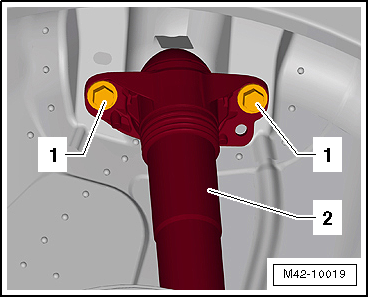
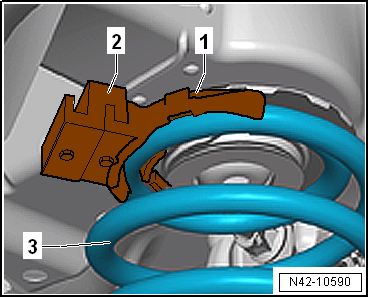
Unscrew bolts -1- for shock
absorber -2-. |
|
|
|
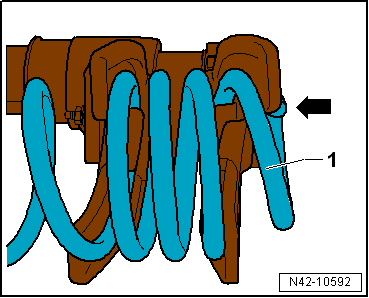
| – |
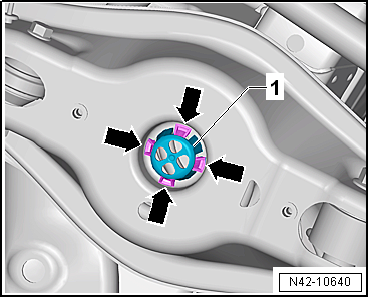
Press lugs -arrows- of assembly
aid -1- inwards. |
| – |
Remove assembly aid -1-
upwards. |
|
|
|
| – |
Fit spring retainer -V.A.G 1752/3A--1-
along with adapter -V.A.G 1752/9--2-
to uppermost spring coil -3-. |
|
|
|
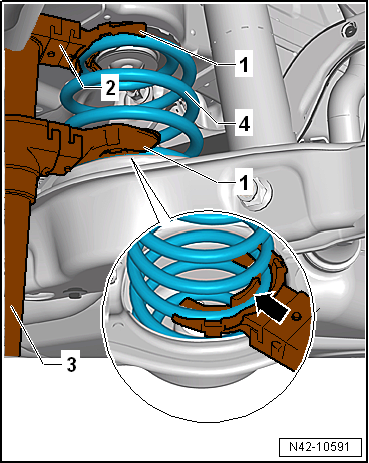
| When the spring is renewed, this must be clamped into the
spring compressor -V.A.G 1752/1- as described in following
description: |
| – |
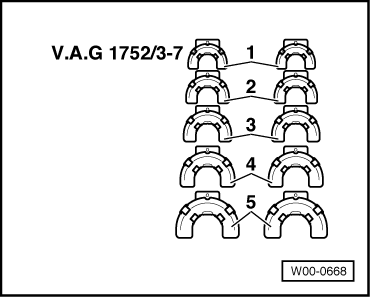
Clamp uppermost 4 coils of spring -1-
in spring compressor -V.A.G 1752/1- to stop. The end of the coil
spring must lie against the spring retainer -V.A.G 1752/3A--arrow-. |
 WARNING
| Ensure that coil spring is seated correctly in
spring retainer -V.A.G 1752/3A- (risk of accident). |
|
| – |
Check that the lower spring plate is not damaged. |
| – |
If necessary, renew lower spring plate. |
| – |
Place lower plate onto bottom of coil spring. |
|
|
|
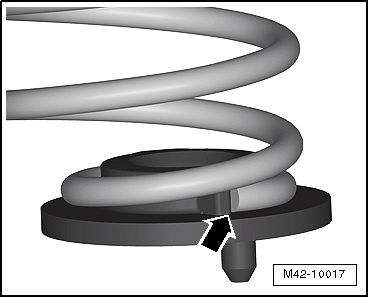
| End of spring -arrow- must lie
against stop on bottom spring seat. |
| – |
Mount spring together with spring plate. |
| – |
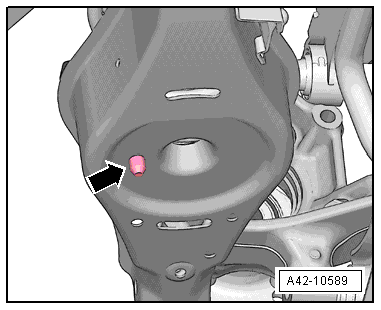
The bottom spring seat has a pin. |
|
|
|
| – |
Insert this pin in holes in lower transverse link
-arrow-. |
| – |
Insert upper spring seat into upper end of spring. |
|
|
|
| – |
Bead of spring seat -arrow-
must lie against coil spring correctly. |
|
|

|
| – |
Release tension on spring -4-
while locating upper spring seat on lug on body. |
| – |
Unbolt spring compressor-3-
from adapter -V.A.G 1752/9--2- and
remove. |
| 1 - |
Spring retainer -V.A.G 1752/3A- |
| 2 - |
Adapter -V.A.G 1752/9- |
| 3 - |
Spring compressor -V.A.G 1752/1- |
|
|
|
| – |
Remove spring retainer -V.A.G 1752/3A--1-
with adapter -V.A.G 1752/9--2-. |
|
|
|
| – |
Insert assembly aid -1- and
press downwards. |
| – |
Lugs -arrows- must engage. |
| → Chapter „Torque settings for wheel bolts“ |
|
|
|
Special tools and workshop equipment
required
Spring compressor -V.A.G 1752/1-
&nb ...
Other materials:
Charging battery in maintenance mode with battery charger -VAS 5903-
Note
When a battery is being charged in the maintenance mode and
an electrical consumer draws current from the battery, the
battery charger -VAS 5903- automatically compensates the charge.
The maintenance mode can be ...
Seat belt verification
Removing and installing seat occupied sensor, front passenger side -G128-
Note
The seat occupied sensor is only installed in the front
passenger seat.
Removing
WARNING
...
Switching lights on and off
Fig. 82 Next to the steering wheel: examples
of the various light switches
First read and observe the introductory information
and safety warnings Observe any country-specific regulations when using vehicle
lighting.
In vehicles with a factory-fitted towing bracket, the vehicle's
re ...
© 2016-2026 Copyright www.vwgolf.org

 Note
Note Removing and installing spring, multi-link suspension, left spring for
front-wheel drive, left and right spring for four-wheel drive
Removing and installing spring, multi-link suspension, left spring for
front-wheel drive, left and right spring for four-wheel drive