Volkswagen Golf Service & Repair Manual: Removing and installing seat cover and seat padding for seat pan
| Special tools and workshop equipment
required |
|
|
|
| |
|
Removal wedge -3409 |
| Vehicles with seat depth adjustment |
| – |
Set seat depth adjustment as far forwards as possible. |
| – |
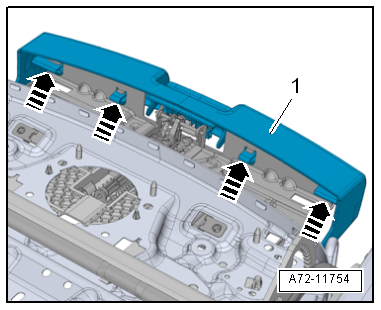
Release locking lugs -arrows-
on trim -1- using removal wedge
-3409-. |
| – |
Remove trim from seat depth adjustment. |
|
|
|
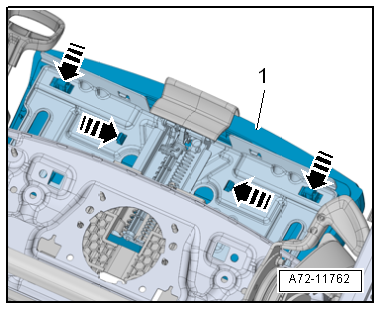
| – |
Release locking lugs -arrows-
on carrier from seat depth adjustment using removal wedge
-3409-. |
| – |
Pull off carrier -1- with seat
padding and seat cover for seat depth adjustment upwards and
towards front. |
|
|
|
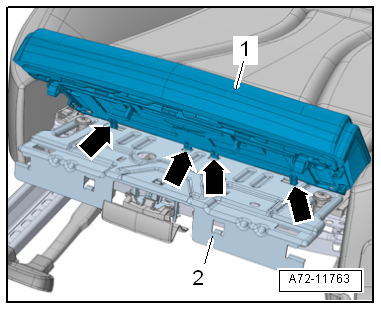
| – |
Detach tabs -arrows- from seat
depth adjustment -2-. |
| – |
Fold back carrier with seat padding and seat cover upwards. |
| – |
To do this, pull off carrier -1-
with seat padding and seat cover for seat depth adjustment
upwards and simultaneously towards front. |

Caution
| Risk of damage to locking lugs. |
| Proceed with great care when unclipping and clipping
in. |
|
|
|
|
| – |
Place carrier -2- with seat
padding and seat cover for seat depth adjustment onto front
seat. |
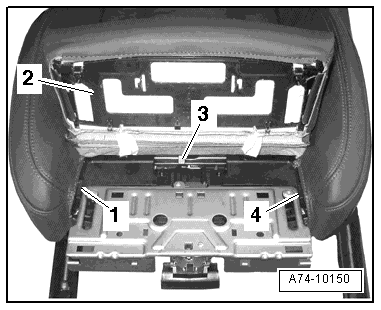
 Note Note
| For reasons of clarity, the lower seat pan frame is not
shown. |
| – |
Detach seat cover retaining strips -1-
and -4-. |
| – |
Remove beading strip -3- of
seat cover from seat depth adjustment. |
| – |
To do this, pull beading strip towards front. |
|
|
|
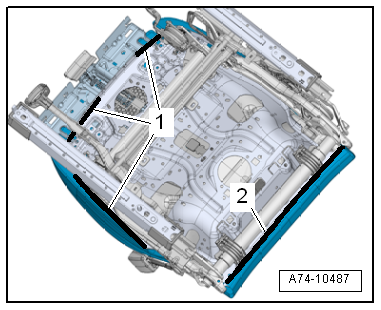
| Continued for all vehicles |
| – |
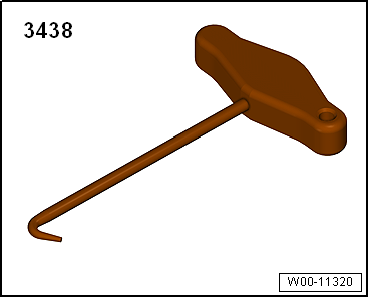
Detach beading strip -1- and
-2- using front-end hook -3438-. |
| – |
Remove padding and cover from seat pan
-2-. |
| – |
Separate cover from padding
→ Chapter. |
| Installation is carried out in reverse order. |
| |
→ Chapter „Assembly overview - front seat“ |
|
|
|
1 -
Seat padding
Allocation
→ Electronic Parts Catalogue
2 -
Heater element
Driver seat: heated seat cushion for fron ...
Volkswagen R GmbH, optional equipment
»R«
Note
Removal and installation is described for the left seat.
Apply the same instruc ...
© 2016-2026 Copyright www.vwgolf.org

 Assembly overview - seat heating element
 Removing and installing backrest cover and backrest padding