Volkswagen Golf Service & Repair Manual: Removing and installing sealing flange on pulley end
| Special tools and workshop equipment
required |
| Sealant
→ Electronic Parts Catalogue |
| – |
Remove noise insulation
→ General body repairs, exterior; Rep. gr.66. |
| – |
Remove air conditioner compressor with refrigerant lines
connected, and tie it up on the right side
→ Heating, air conditioning; Rep. gr.87. |
| – |
Remove toothed belt
→ Chapter. |
|
|
|
| – |
Detach crankshaft pulley -1--arrow-. |
Risk of damage to engine caused by incorrect valve timing.Do not turn
crankshaft out of TDC position.
|
|
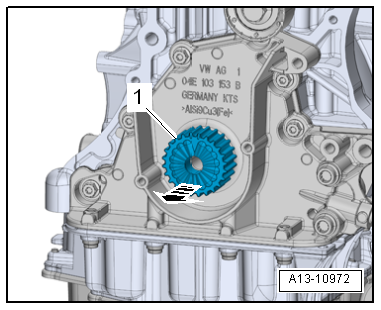
|
| – |
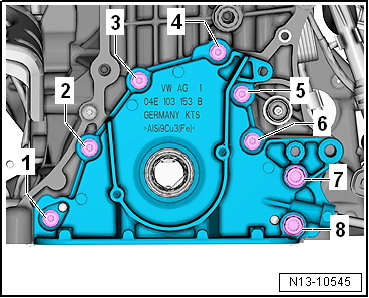
Unscrew bolts -1 … 8- and
carefully remove sealing flange from the glued joint. |
| – |
Drive out seal with sealing flange removed. |
| Installation is carried out in the reverse order; note the
following: |
| The lubrication system can be soiled by sealant residue. |
| Cover open section of sump with clean clothes. |
| – |
Remove sealant residue from sealing flange and sump (top
section). |
| – |
Remove any oil and grease from sealing surfaces. |
 Note Note
|
|
|
| Observe use-by-date of sealant. |
| – |
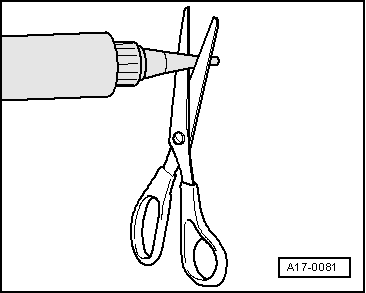
Cut off nozzle on tube at front marking (diameter of nozzle
approx. 2 mm). |
|
|
|
| – |
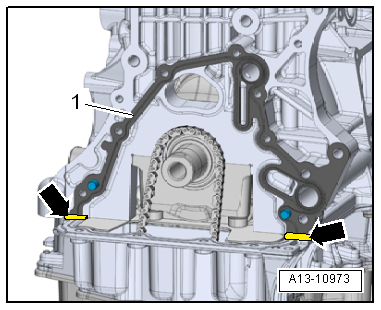
Slide gasket -1- onto dowel
pins in cylinder block. |
| – |
Apply a thin bead of sealant at the edge of the joint
between the cylinder block and the sump
-arrows-. |
|
|
|
| – |
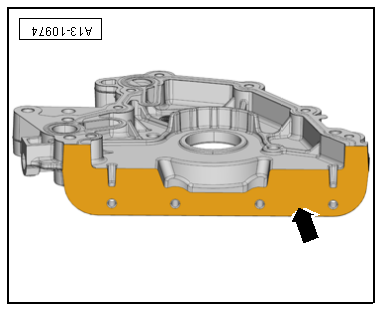
Thinly coat lower sealing surface
-arrow- of sealing flange with sealant. |
 Note Note
| Install the sealing flange within 5 minutes after the
sealant has been applied. |
| – |
Carefully fit gasket sealing flange onto dowel pins on
cylinder block. |
| – |
Tighten bolts for sealing flange
→ Fig.. |
| – |
Install crankshaft oil seal on belt pulley end
→ Chapter. |
|
|
|
| – |
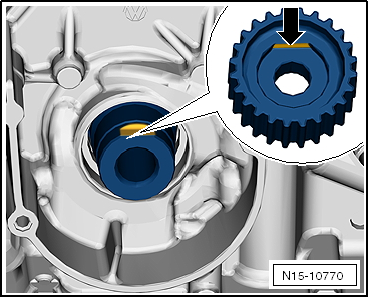
Fit crankshaft sprocket onto crankshaft. |
| The contact surface between vibration damper and crankshaft
pulley must be free of oil and grease. |
| The machined surface -arrow- of
crankshaft pulley must be positioned over the machined surface
of the crankshaft journal. |
| – |
Install toothed belt (adjust valve timing)
→ Anchor. |
| – |
Install air conditioner compressor
→ Heating, air conditioning; Rep. gr.87. |
| – |
Install noise insulation
→ General body repairs, exterior; Rep. gr.66. |
| → Fig. „“Sealing flange at belt pulley end - Prescribed torque
and tightening sequence”“ |
| → Heating, air conditioning; Rep. gr.87 |
|
|
|
Special tools and workshop equipment
required
Assembly tool -T10485-
...
© 2016-2026 Copyright www.vwgolf.org

 Note
Note Note
Note Renewing crankshaft oil seal - belt pulley end


