Volkswagen Golf Service & Repair Manual: Removing and installing lower rear lid trim
| Special tools and workshop equipment
required |
|
|
|
| – |
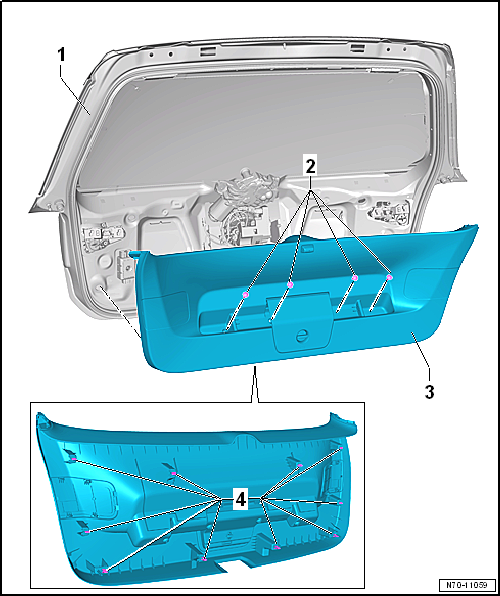
Remove upper rear lid trim
→ Chapter. |
| – |
Remove warning triangle. |
|
|
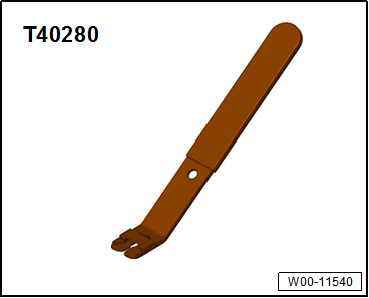
Removal tool -T40280 |
| – |
Unclip service flaps at sides of trim -3-. |
| – |
Grasp in service holes in trim. |
| – |
Release trim -3- with a
»firm jerk« from mountings in rear lid
-1-. |
| – |
Check if all retaining clips -4- are
inserted in trim -3-. |
| – |
Unclip any retaining clips left in rear lid using removal tool
-T40280-. |
| – |
Fit those retaining clips back in trim -3-. |
 Note Note
| Before installing, check all fasteners for damage and
renew if necessary. |
| Installation is carried out in reverse order. |
| |
→ Chapter „Assembly overview - lower rear lid trim“ |
|
|
|
Special tools and workshop equipment
required
Wedges -T10383
Removing
...
Other materials:
General information
Repair instructions for repair work on ABS
The ABS brake system is divided diagonally. The
servo-assistance is effected pneumatically by the vacuum brake
servo unit.
Vehicles with ABS are not fitted with a mechanical bra ...
Introduction
This chapter contains information on the following subjects:
→ Warning and indicator lamps
→ Pedals
→ Manual gearbox: selecting a gear
→ Automatic gearbox: selecting a gear
→ Changing gear using Tiptronic
→ Driving with an ...
Adjusting the driving mode to suit your requirements
First read and observe the introductory information
and safety warnings The systems that can be adjusted to your individual requirements
depend on the vehicle equipment level.
Switch on the ignition.
If necessary, switch on the infotainment system.
Press the Driving Mode Selec ...
© 2016-2026 Copyright www.vwgolf.org

 Removing and installing upper rear lid trim
 Roof trims