Volkswagen Golf Service & Repair Manual: Removing and installing headlight range control unit -J431-/control unit for
cornering light and headlight range control -J745-, LHD vehicles
 Note Note
| When renewing the control unit, select
Renew function for the respective control unit in
Guided fault finding or
Guided functions mode
→ Vehicle
diagnostic tester. |
| – |
Remove dash panel end trim on driver side
→ General body repairs, interior; Rep. gr.68. |
| – |
Remove driver side knee airbag
→ General body repairs, interior; Rep. gr.69. |
|
|
|
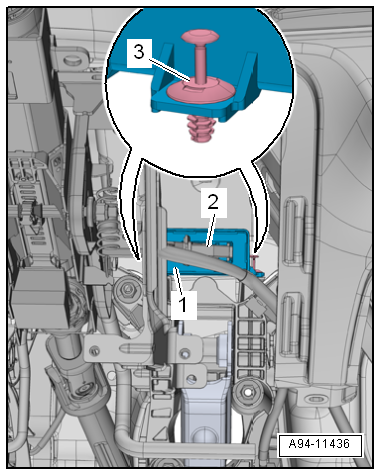
| – |
Release spreader clip -3- and
pull it out. |
| – |
Remove headlight range control unit
-1- towards rear. |
| – |
Disconnect electrical connector -2-. |
|
|
|
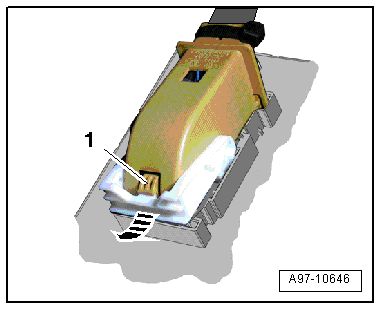
| – |
To do so, press locking detent -1-,
swing retainer in -direction of arrow-
and pull off connector. |
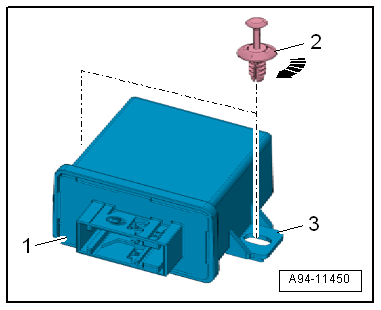
| Install in the reverse order of removal, observing the
following: |
|
|
|
| – |
Press spreader clip -2- into
opening -3- in control unit
-1-. |
| – |
Engage spreader clip by turning it 90°
-arrow-. |
|
|
|
1 -
Control unit
Removing and installing
→ Chapter
Versions without cornering light:
Headlight range control un ...
Note
When renewing the control unit, select
Renew function for the respective control unit in
Guided fault finding or
Guided functions mode
&# ...
© 2016-2024 Copyright www.vwgolf.org

 Assembly overview - automatic headlight range control, RHD vehicles
 Removing and installing headlight range control unit -J431-/control unit for
cornering light and headlight range control -J745-, RHD vehicles
Removing and installing headlight range control unit -J431-/control unit for
cornering light and headlight range control -J745-, RHD vehicles