Volkswagen Golf Service & Repair Manual: Removing and installing headlight
| Special tools and workshop equipment
required |
|
|
|
| Torque wrench -V.A.G 1783- |
|
|
|
| – |
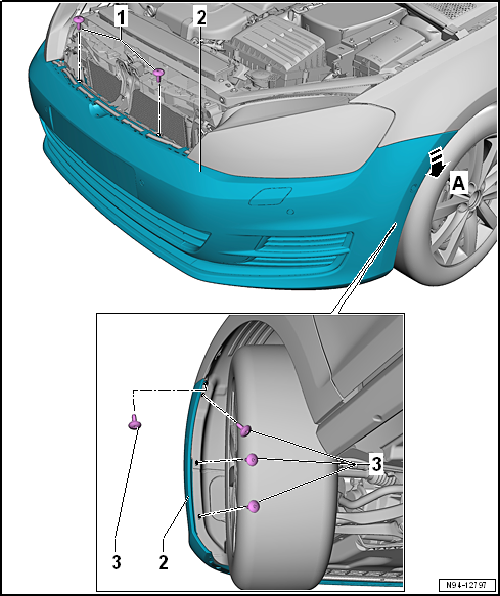
Unscrew bolts -3- from front wheel
housing liner. |
| – |
Unscrew bolts -1- if present. |
| – |
Release bumper -2- from wing and pull
it off in direction of arrow -A-. |
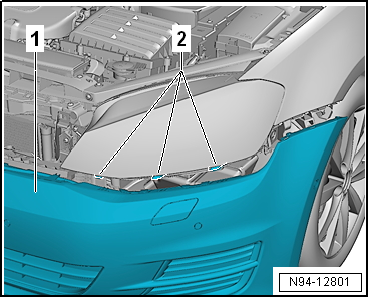
| – |
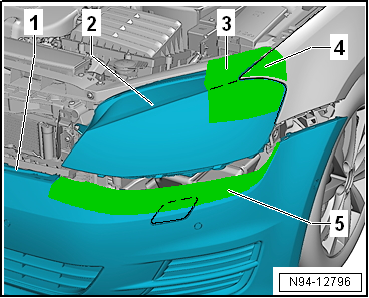
Mask off marked area -3- on
headlight -2-. |
| – |
Mask off underside of wing tip -4-. |
| – |
Mask off marked area -5- on
bumper -1-. |
|
|
|
| – |
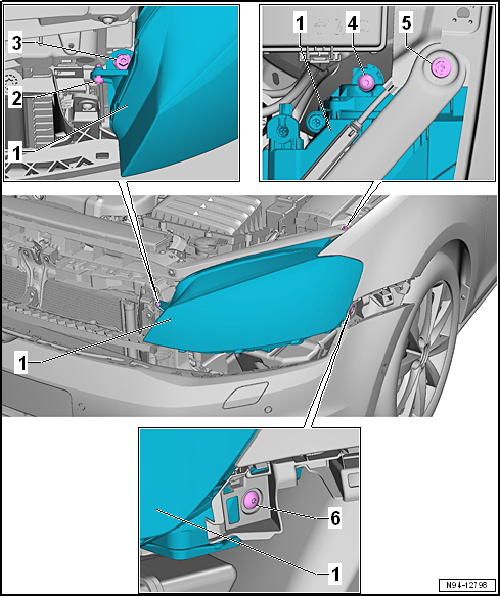
Unscrew bolts -3, 5 and 6-. |
| – |
Disconnect electrical connector. |
| – |
Pull headlight -1- forwards to remove. |
| Install in the reverse order of removal, observing the
following: |
| – |
Press headlight into bumper guide. |
| – |
Ensure uniform gap all around headlight
→ Chapter. |
|
|
|
| – |
Insert bumper -1-. When doing
this, ensure that bumper is being guided into mountings
-2- beneath headlight. |
| – |
Check headlight setting and adjust headlight if necessary
→ Booklet36.1 |
| → Chapter „Assembly overview - headlight“ |
|
|
|
| Adjusting dual halogen headlight |
| Adjusting dual halogen headlight
→ Booklet36.1. |
|
|
|
| Adjusting gas discharge headlights |
| Adjusting gas discharge headlights
→ Booklet36.1. |
|
| Adjusting LED headlights
→ Booklet36.1. |
|
| Adjusting fog lights
→ Booklet36.1 |
|
|
|
| Adjusting auxiliary headlights |
| Retrofitted auxiliary headlights of other systems must be
checked and adjusted according to valid guidelines. |
|
|
|
1 -
LED module for daytime running light and side light
Left LED module for daytime running light and side light -L176-
Right LED module fo ...
Special tools and workshop equipment
required
Torque wrench -V.A.G 1783-
...
© 2016-2026 Copyright www.vwgolf.org

 Note
Note WARNING
 Caution
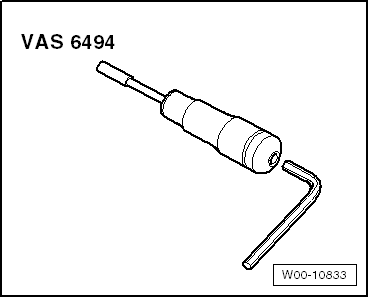
 Assembly overview - daytime running lights
 Adjusting headlight installation position