Volkswagen Golf Service & Repair Manual: Removing and installing decoupler pulley with freewheel
| There are different versions of decoupler pulleys with
freewheel. |
| Before removing the decoupler pulley with freewheel, it must
be determined which special tool must be used. |
 Caution
| The length of the poly V-belt depends on the version
of decoupler pulley with freewheel installed. |
| Please check which type of the decoupled pulley with
freewheel is installed in order to ensure installation
of the correct poly V-belt. Refer to ETKA for proper
allocation of the poly V-belt. |
|
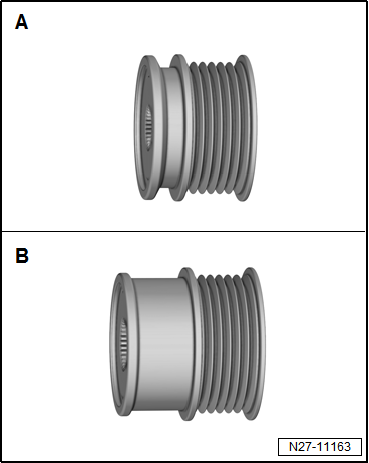
| Distinguishing between different versions of decoupler
pulleys with freewheel: |
| -A- decoupler pulley with
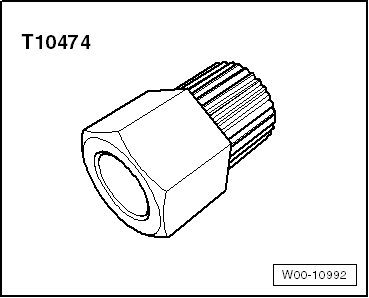
freewheel, small; use special tool T10474 |
|
|
|
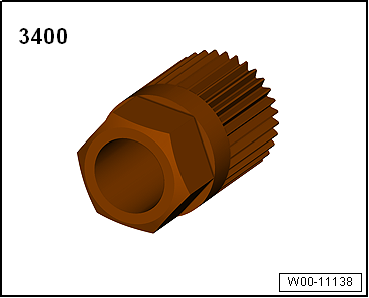
| -B- decoupler pulley with
freewheel, large; use special tool 3400 |
 Note Note
| Poly V-belts used for large decoupler pulleys with freewheel
must be longer (due to larger diameter of the pulley), and vary
depending on the installation of an air conditioning system in
the vehicle. |
| Special tools and workshop equipment
required |
|
|
|
| Multipoint adapter -T10474- |
|
|
|
| Multipoint adapter -3400- |
|
|
|
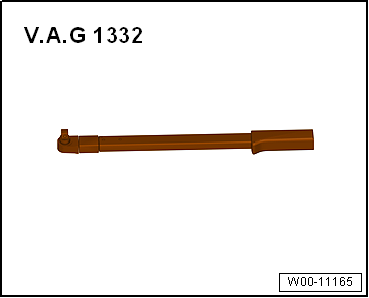
| Torque wrench -V.A.G 1332- |
| Ratchet wrench bit, 8 mm hexagon or TORX T50 |
| – |
Remove alternator
→ Chapter. |
| – |
Clamp alternator in a vice at securing points. |
| – |
Remove protective cap, if fitted, from decoupler pulley with
freewheel. |
| – |
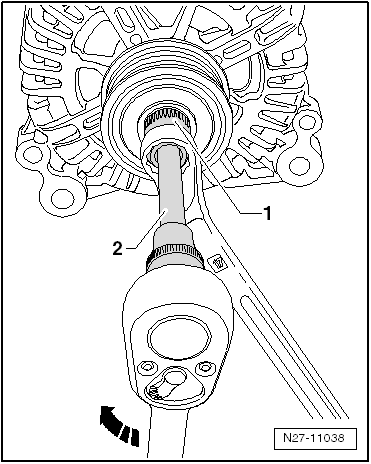
Insert multipoint adapter -T10474- or multipoint adapter
-3400--1- into pulley, and fit a
ring spanner. |
|
|
|
| – |
Insert suitable tool -2- into
alternator shaft. |
| – |
Turn alternator shaft clockwise to loosen it while
counterholding with ring spanner. |
| – |
Hold decoupler pulley with freewheel stationary with your
hand, and turn alternator shaft until decoupler pulley with
freewheel can be removed. |
| Install in the reverse order of removal, observing the
following: |
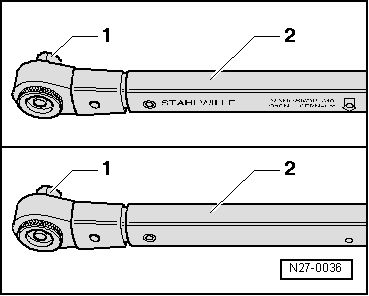
| Modify the torque wrench -V.A.G 1332- as follows to fit
decoupler pulley with freewheel: |
|
|
|
| – |
Release socket drive -1- and
pull off grip -2-. |
| – |
Turn torque wrench grip -2-
180° and reinsert socket drive. |
| – |
Set turning direction of torque wrench to anti-clockwise at
socket drive. |
| – |
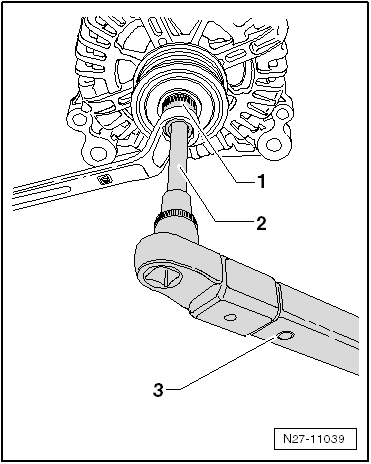
First screw poly V-belt pulley with freewheel onto
alternator shaft by hand to stop. |
| – |
Insert multipoint adapter -T10474--1-
into decoupler pulley with freewheel, and fit a ring spanner. |
|
|
|
| – |
Insert suitable tool -2- into
alternator shaft. |
| – |
Turn alternator shaft anti-clockwise using torque wrench -V.A.G
1332--3- to tighten decoupler
pulley with freewheel. |
| – |
Tighten bolted connection to 80 Nm. |
|
|
|
Special tools and workshop equipment
required
Multipoint adapter -3400-
...
Special tools and workshop equipment
required
Offset screwdriver for slotted-head screws -VAS 6416-
...
Other materials:
Trailer socket
The trailer socket must be connected in accordance with the
manufacturer's instructions to the electrical system of the
pulling vehicle.
When installing, observe the relevant current flow diagrams
and the installation instructions from t ...
Rodent proofing
First read and observe the introductory information
and safety warnings Rodent proofing equipment is made up of special brushes
and casings and impedes entry to the engine compartment by rodents when the bonnet
is shut. This prevents damage caused to components by rodent bites.
NOTICE
If ...
Assembly overview - starter, vehicles with dual clutch gearbox (DQ200–7F)
1 -
Starter -B-
Removing and installing
→ Chapter
2 -
Double stud
Specified torque: 80 Nm
3 -
Earth cable
Depending on vehicle equipment
...
© 2016-2026 Copyright www.vwgolf.org

 Removing and installing poly V-belt pulley with freewheel, manufacturer:
Valeo
Removing and installing poly V-belt pulley with freewheel, manufacturer:
Valeo Removing and installing voltage regulator, manufacturer: Bosch