Volkswagen Golf Service & Repair Manual: Removing and installing dash panel
| Special tools and workshop equipment
required |
|
|
|
| |
Torque wrench -V.A.G 1783- |
| – |
Remove centre console
→ Chapter. |
| – |
Move front seats as far back as possible. |
| – |
Disconnect battery earth cable
→ Electrical system; Rep. gr.27. |
| – |
Remove driver side airbag
→ Chapter. |
| – |
Remove steering wheel
→ Running gear, axles, steering; Rep. gr.48. |
| – |
Remove steering column switch module
→ Electrical system; Rep. gr.94. |
| – |
Remove light switch trim
→ Chapter. |
| – |
Remove dash panel cover on driver side
→ Chapter. |
| – |
Remove glove compartment
→ Chapter. |
| – |
Remove centre vent
→ Chapter. |
| – |
Remove dash panel insert
→ Electrical system; Rep. gr.90. |
| – |
Remove trim for display unit for front information display
and operating unit control unit -J685-
→ Communication; Rep. gr.91. |
| – |
Remove left and right trim for triangular window
→ Chapter. |
| – |
If fitted, remove sunlight penetration photosensor -G107-
→ Heating, air conditioning; Rep. gr.87. |
| – |
Disconnect connector for front passenger airbag
→ Chapter. |
|
|
|
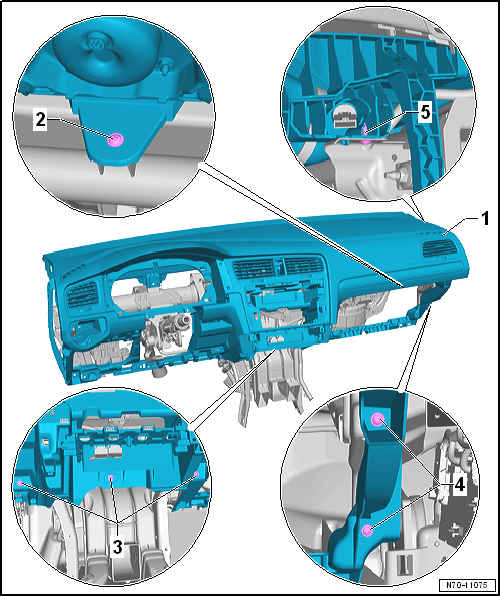
| – |
Unscrew bolt -2- securing dash panel
-1- to central tube on front passenger
side. |
| – |
Unscrew bolts -3- securing dash panel
-1- to central tube in middle. |
| – |
Unscrew bolts -4- and
-5- securing dash panel
-1- to central tube on right side. |
| – |
Unscrew bolts -2-,
-3- and -4-
securing dash panel -1- to central tube on
left side. |
| – |
Unscrew bolt -5- securing dash panel
-1- to central tube on driver side. |
| – |
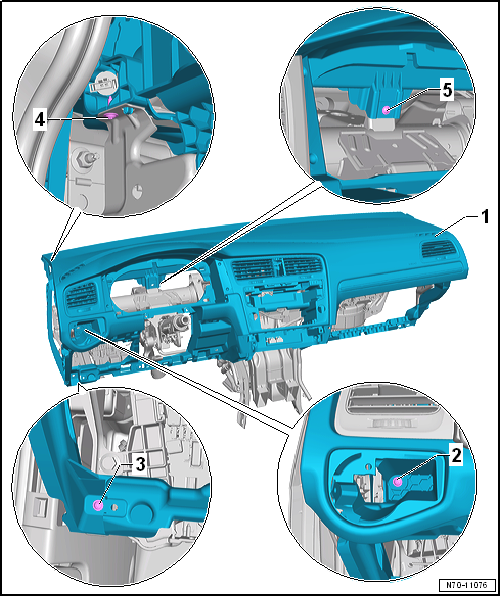
Lift up dash panel -1- until locating
lugs on left and right -arrow B- are
released from mountings. |
| – |
At the same time, pull dash panel -1-
out of mountings -2- in transitional area
to windscreen -arrow A-. |
 Note
Note
| The help of a second mechanic is required to remove the dash panel. |
| – |
Remove dash panel -1- from dash panel
central tube -2-. |
| – |
Disconnect connectors and lay wiring harnesses on dash panel to one
side. |
| – |
Carefully remove dash panel from vehicle interior and place it on a
soft surface. |
Note
-
| |
Before installing, check all fasteners for damage and
renew if necessary. |
-
| |
When securing the dash panel, tighten bolts in
reverse order of removal. |
| Install in reverse order, but note the following: |
|
|
|

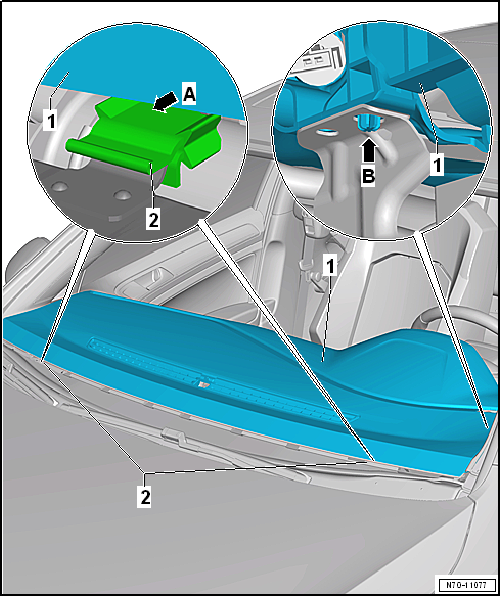
| – |
Before installing dash panel, check whether mountings
-1- are firmly attached to body
-2-. |
| – |
With the aid of a second mechanic position dash panel
-1- onto dash panel central tube
-2- so that a perfect fit is achieved. |
| – |
Insert dash panel -1- into mountings
-2- in transitional area to windscreen
-arrow A-. |
| – |
Insert locating lugs on left and right into mountings
-arrow B-. |
| |
→ Chapter „Assembly overview - dash panel“ |
|
|
|
Special tools and workshop equipment
required
Removal wedge -3409
...
Special tools and workshop equipment
required
Front-end hook -3370
...
© 2016-2026 Copyright www.vwgolf.org

 Removing and installing dash panel insert trim
 Removing and installing dash panel vents