Volkswagen Golf Service & Repair Manual: Removing and installing dash panel vents
| Special tools and workshop equipment
required |
|
|
|
| |
|
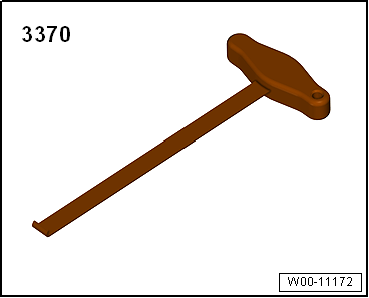
Front-end hook -3370 |
| |
|
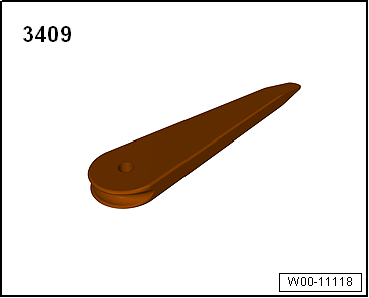
Removal wedge -3409 |
| – |
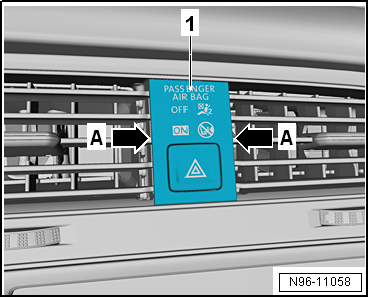
Grasp front passenger side airbag deactivated warning lamp
-K145--1- at sides
-arrows A-, and pull it out of dash
panel. |
| – |
Disconnect electrical connectors. |
|
|
|
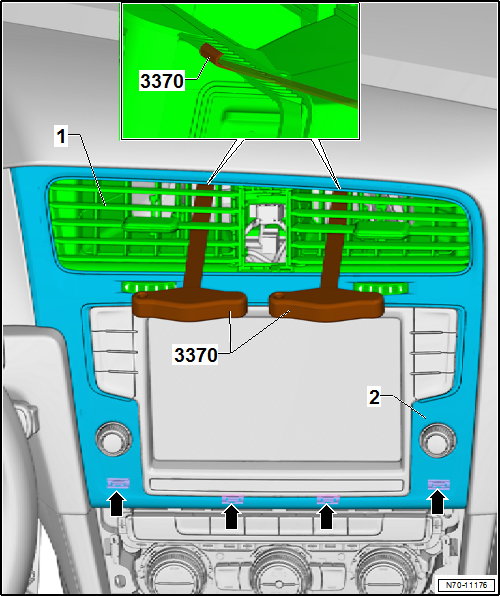
| – |
Carefully guide one front-end hook -3370- into each centre
vents (left and right) -arrows-. |
|
|

|
| – |
Engage each of the front-end hooks -3370- at top end into
corresponding fresh air duct. |
 Note
Note
| The front-end hooks -3370- must be inserted to a depth of approx.
11 cm. |
| – |
Pull centre vent -1- with trim
-2- attached out of mounting aperture in
dash panel with a firm tug simultaneously on both front-end hooks
-3370-. |
| – |
Carefully unclip trim -2- from
mountings in dash panel -arrows- using
removal wedge -3409-. |
Note
| Before installing, check all fasteners for damage and renew
if necessary. |
| Installation is carried out in reverse order. |
|
|
|
Special tools and workshop equipment
required
Torque wrench -V.A.G 1783-
...
Note
Removal and installation is described for the side defroster
vent on driver side. Follow same instructions for the front
passenger side as appropr ...
Other materials:
Calibrating adaptive cruise control
Conditions
–
The adaptive cruise control unit -J428- needs to be
calibrated if the following conditions apply:
Adaptive cruise control unit -J428- has been removed and
then reinstalled or it has been ...
Battery with »standard« colour indicator
This is a maintenance-free battery with liquid electrolyte
(wet battery).
WARNING
It is not permissible to test or charge batteries
whose colour indicator is light yellow. Do not
slave/ ...
Trailer detector control unit -J345-
General description:
The trailer detector control unit -J345- detects a power
consumption of at least 5 W
→ Remark when “towing a trailer” and passes this information
to various control units via the CAN data bus.
...
© 2016-2026 Copyright www.vwgolf.org

 Caution
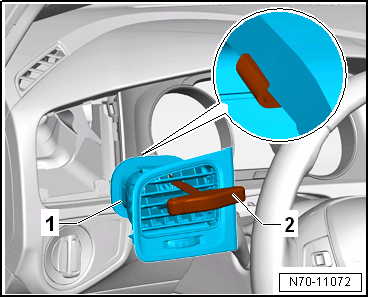
 Removing and installing dash panel
 Removing and installing side defroster vent