Volkswagen Golf Service & Repair Manual: Lowering rear axle, multi-link suspension, front-wheel drive, e-Golf
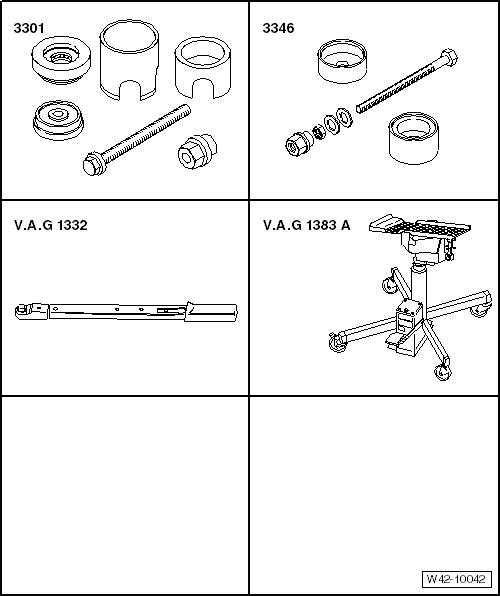
| Special tools and workshop equipment required |
| Torque wrench -V.A.G 1332- |
| Engine and gearbox jack -V.A.G 1383 A- |
| Lower subframe with attachments. |
| – |
Unbolt brake calipers on both sides of vehicle and suspend
from body. |
| – |
Remove springs
→ Chapter. |
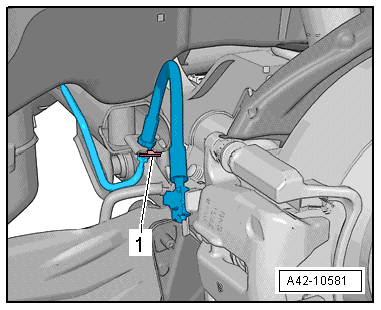
| Vehicles with vehicle level sender |
|
|
|
| – |
Disconnect connector -1-. |
| Continuation for all vehicles |
|
|
|
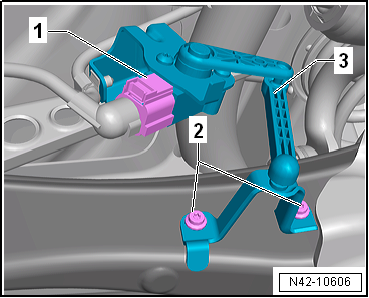
| – |
Unplug electrical connector -1-
from ABS speed sensor on both sides and move clear. |
| – |
Unplug electrical connector -2-
from electromechanical parking brake motor on brake caliper on
both sides. |
| – |
Detach electrical wiring harness from retainers
-arrows- and move clear. |
|
|
|
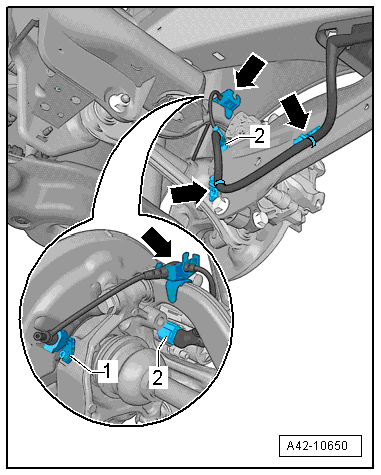
| – |
Pull out retaining clip -1- on
both sides of vehicle. |
| – |
Free brake lines from holder. |
 Note Note
|
|
|
| – |
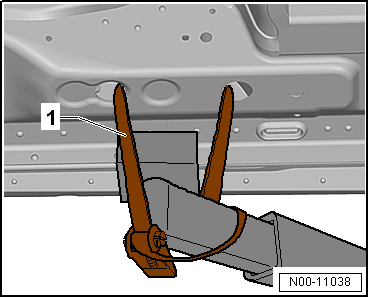
Use tensioning straps -T10038--1-
to strap vehicle to support beams of lifting platform on both
sides. |
 WARNING
| If the vehicle is not strapped down, there is a
great danger that the vehicle will slip off the lifting
platform! |
|
| – |
Fix subframe at both forward bolts
→ Chapter. |
|
|
|
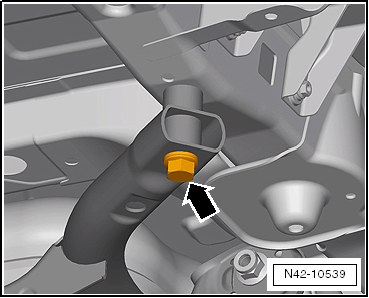
| – |
Unscrew rear right bolt of subframe
-arrow-. |
|
|
|
| – |
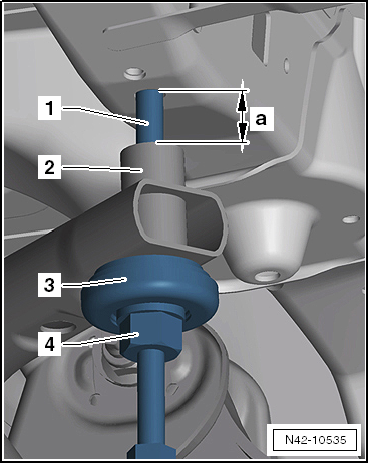
Screw spindle -3346/2- into thread of longitudinal member
using thrust piece of assembly tool -3301- and nut -3346/3-. |
| 3 - |
Thrust piece from assembly tool -3301- |
| – |
Unscrew rear left bolt of subframe. |
| – |
Turn nut -3346/3- on spindle -3346/2- until subframe is
lowered by -a- = 40 mm. |
| Installing subframe with attachments |
| Install in reverse order of removal, observing the
following: |
| → Chapter „Torque settings for wheel bolts“ |
| Bolts for bracket of high-voltage battery unit
→ Electrical system; Rep. gr.93 |
| On vehicles with vehicle level sender, carry out basic
settings for wheel damper electronics → Vehicle
diagnostic tester. |
| On vehicles with vehicle level sender, carry out basic
adjustment of headlights
→ Electrical system; Rep. gr.94. |
| – |
When does wheel alignment have to be checked
→ Chapter? |
|
|
|
Special tools and workshop equipment required
Assembly tool -3301-
Assembly tool -3346-
Torque wrench -V.A.G 1332-
...
Special tools and workshop equipment
required
Torque wrench -V.A.G 1332-
...
© 2016-2026 Copyright www.vwgolf.org

 Lowering rear axle, multi-link suspension, front-wheel drive, except for
e-Golf
Lowering rear axle, multi-link suspension, front-wheel drive, except for
e-Golf Lowering rear axle, multi-link suspension, four-wheel drive