VW Golf manuals

Volkswagen Golf Service & Repair Manual: Checking outer constant velocity joint

The joint is to be dismantled to renew the grease if it is heavily soiled, or to check the running surfaces of the balls for wear and damage.
Removing
   
–  Before dismantling, mark position of ball hub in relation to ball cage and joint body with an electric scriber or oil stone -arrow-.
–  Swivel ball hub and ball cage and take out balls one after the other.
 

Checking outer constant velocity joint

–  Turn cage until the two rectangular windows -arrow- lie on joint body.
–  Take out cage with hub.
 

Checking outer constant velocity joint

–  Swivel one segment of the hub into one of the cage openings.
–  Tip hub out of cage.
  Note
The six balls for each joint belong to a tolerance group. Check stub axle, hub, cage and balls for small indentations (pitting) and traces of seizing.
Too much circumferential backlash in the joint becomes noticeable during load change jolts. In such cases the joint must be renewed.
Smoothing and traces of wear of the balls are no reason to change the joint.
Installing
Install in reverse order of removal, observing the following:
–  Press half of the total amount of grease from repair kit into the joint body.
–  Fit cage with hub into joint body.
  Note
Make sure cage is inserted in correct position (i.e. sides facing in same direction as original position).
–  Press in opposing balls one after the other; the original position of the hub relative to the cage and joint body must be restored.
–  Fit new circlip in shaft.
–  Distribute remaining grease in boot.
 

Checking outer constant velocity joint

Loosening and tightening threaded connections of drive shaft
Special tools and workshop equipment required     Socket, 24 mm -T10361A-   ...

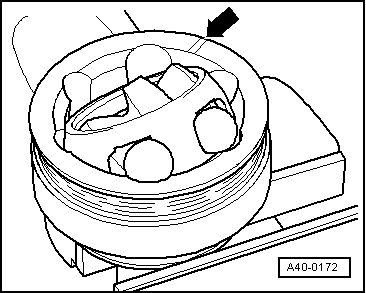
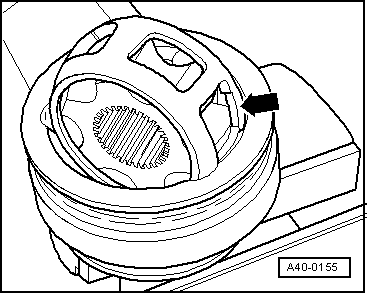
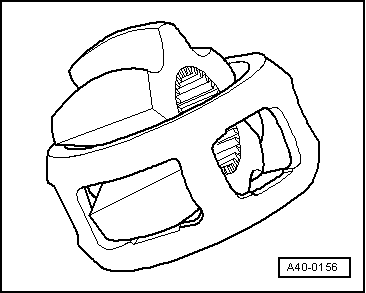
Checking inner constant velocity joint
The joint is to be dismantled to renew the grease if it is heavily soiled, or to check the running surfaces of the balls for wear and damage.   ...

Other materials:

Removing and installing bulbs for cornering light -L148-/-L149-
  Note Left cornering light bulb -L148- and right cornering light bulb -L149- are only fitted on gas discharge headlights. Removal and installation are described for the left side. Removal and installation on the right ...

2-pack HS Optimum Plus clear coat
Designation: 2-pack HS Optimum Plus clear coat -LZK 769 K07 A5- Issued 04.2013 Product description 2-pack HS Optimum Plus clear coat is a VOC compliant high-solid clear coat. ...

Removing and installing front senders
Removing –  Remove wheel housing liner → General body repairs, exterior; Rep. gr.66.     –  Press both locking lugs in direction of arrow -A- w ...

© 2016-2024 Copyright www.vwgolf.org