Volkswagen Golf Service & Repair Manual: Adjusting bonnet
| Special tools and workshop equipment
required |
|
|
|
| |
|
Torque wrench -V.A.G 1331- |
Note
- Vehicle must be standing on its wheels to enable bonnet to be
adjusted.
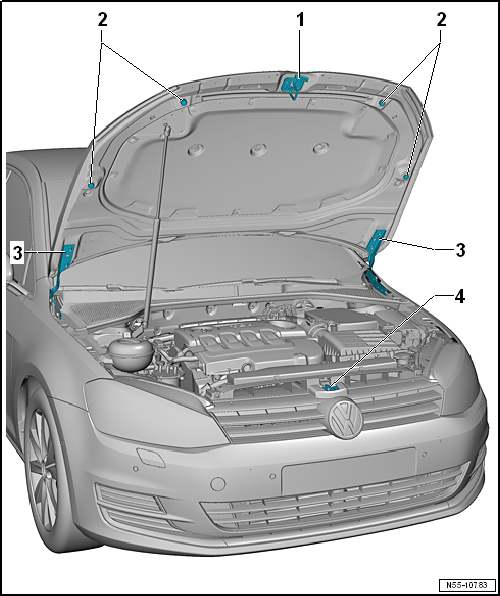
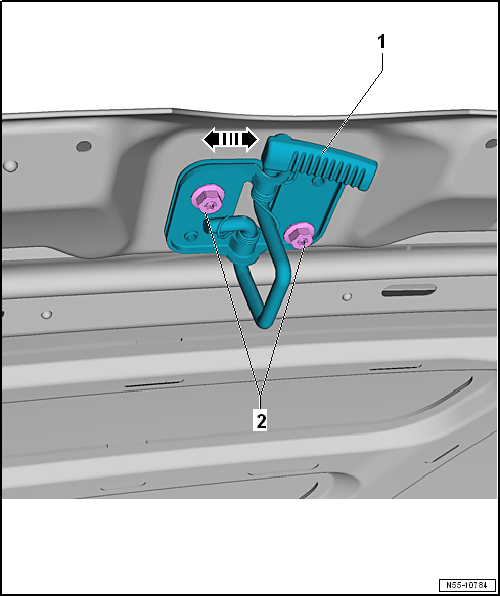
- The adjustment buffers -2- on the left
and right are not a means of adjustment. They have the function of
stabilising and damping the bonnet.
- The bonnet is correctly adjusted when all shut lines are even when
closed. The bonnet must not protrude too far inwards or outwards. The
contours must also be flush with each other.
- The bonnet must engage into the bonnet lock without excessive force
| – |
Remove striker pin -1-
→ Chapter. |
| – |
Front part of bonnet can be adjusted in height to wings by means of
bonnet lock -4-
→ Chapter. |
| – |
After bonnet has been adjusted, the striker pin
-1- can be re-installed and adjusted
→ Anchor. |
| |
Bonnet lock
→ Chapter „Assembly overview - Bowden cable“ |

Note
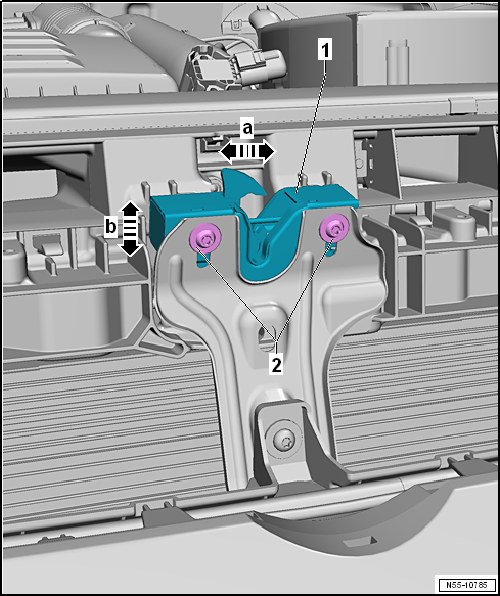
| Only loosen bolts -5-, do not remove
them completely. |
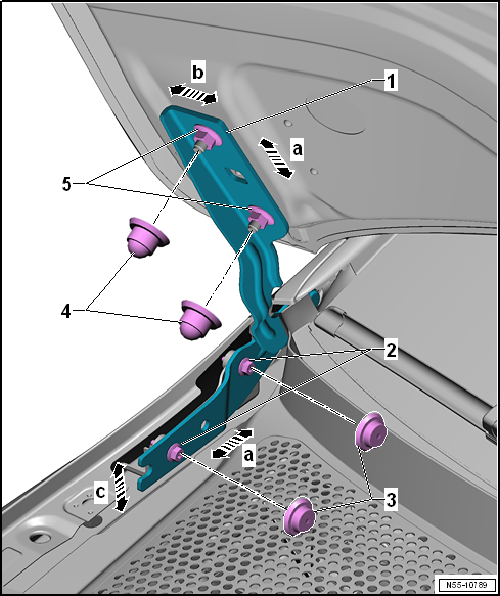
| – |
If fitted, remove caps -3 or 4-. |
| – |
By loosening hexagon nuts -5- on left
and right bonnet hinges -1-, bonnet can be
centred laterally -arrows b- and in
longitudinal direction -arrows a- between
wings. |
| – |
By loosening bolts -2- on left and
right bonnet hinges -1-, bonnet can be
centred vertically -arrows c- and in
longitudinal direction -arrows a- between
wings. |
| – |
Ensure that gaps are uniform
→ Rep. gr.00. |
| – |
Specified torque for hexagon nuts -5-
and bolts -2-: 22 Nm. |
| – |
After adjusting, carry out corrosion protection measures on bonnet
hinges -1-, hexagon nuts
-5- and bolts -2-. |
| – |
If necessary, readjust adjustment buffers. |
| |
Hinges
→ Chapter „Assembly overview - bonnet“ |
| Adjusting adjustment buffer |
|
|
|
| – |
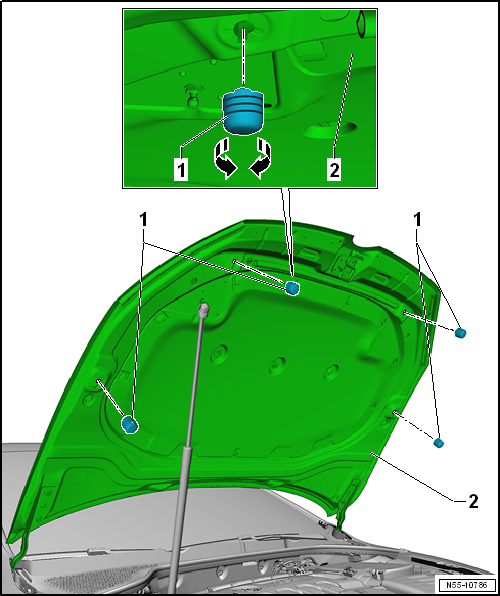
Turn adjustment buffers -1- to adjust
-arrows-. |
| – |
After bonnet -2- has been adjusted, the
striker pin can be reinstalled and adjusted
→ Anchor. |
| Special tools and workshop equipment
required |
|
|
|
|
|
|
Torque wrench -V.A.G 1331- |
| – |
Striker pin -1- can now be adjusted on
bonnet -2- in lateral elongated holes. |
| |
Hinges
→ Chapter „Assembly overview - bonnet“ |
| Special tools and workshop equipment
required |
|
|
|
| |
|
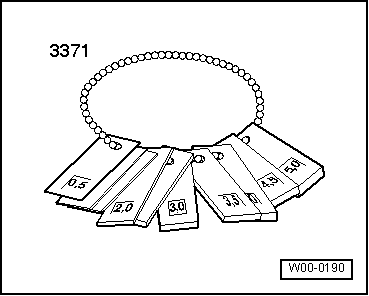
Setting gauge -3371- |
Note
| Use new bolts when adjusting the lid lock. |
|
|
Torque wrench -V.A.G 1331- |
| – |
Loosen bolts -2- to adjust lid lock
-1- relative to bonnet laterally
-arrow a- and vertically
-arrows b-
→ Rep. gr.00. |
| |
Bonnet lock
→ Chapter „Assembly overview - Bowden cable“ |
Special tools and workshop equipment
required
Removing
...
Special tools and workshop equipment
required
Removing
Torque wre ...
© 2016-2026 Copyright www.vwgolf.org

 Removing and installing bonnet
 Removing and installing bonnet lock, LHD vehicle