Volkswagen Golf Service & Repair Manual: Repairing rain and light sensor, Valeo
| Remove rain and light sensor -G397-
→ Chapter. |
|
|
|
| – |
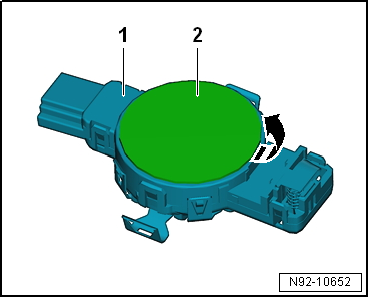
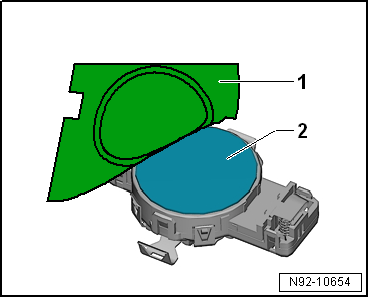
Carefully remove sensor foil -2-
or any sensor foil residues from rain and light sensor -G397--1-. |
 Caution
| The surfaces of the sensor must be completely free
of remnants of foil. |
|
| – |
Clean sensor surfaces with cleaning solution D 009 401 04. |
|
|
|
| – |
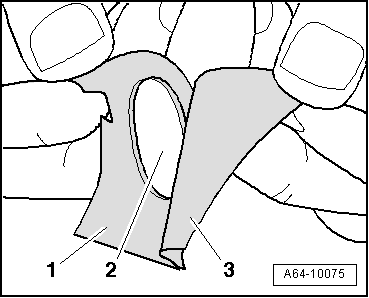
Pull silicone paper -3- off
sensor foil -2-. |
| The transparent protective foil -1-
remains initially on sensor foil as an assembly aid. |
|
|
|
| – |
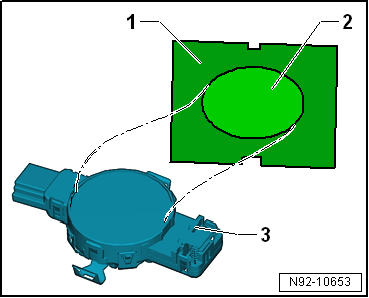
With the aid of transparent protective foil
-1-, position sensor foil
-2- on rain and light sensor -G397--3-. |
|
|
|
| – |
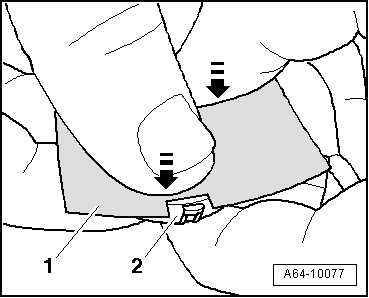
Press on rain and light sensor -G397--2-
without bubbles through protective foil
-1-. |
|
|
|
| – |
Peel transparent protective film -1-
off sensor foil -2-. |
| – |
Install rain and light sensor -G397-
→ Chapter. |
|
|
|
The housings for the rain and light sensors -G397- from
various manufacturers differ.
The sensor housing with lens unit is always supplied as a
...
Other materials:
Removing and installing coolant pipes at heat exchanger (Valeo)
Note
There are different designs and makes of heater and air
conditioning unit. The individual components of the various
heaters and air conditioning units are similar but not identical
(distinguishing features
→ Chapter). The c ...
Vehicle path display
Fig. 152 Vehicle path display without steering
input (colour display)
Fig. 153 Vehicle path display with steering
input (colour display)
First read and observe the introductory information
and safety warnings
Key
and
Meaning
...
Moving to and back from service position
Special tools and workshop equipment
required
Guide pins -T10093-
Adapter -T10467-
...
© 2016-2026 Copyright www.vwgolf.org

 Repairing rain and light sensor, TRW