Volkswagen Golf Service & Repair Manual: Masking areas, front body
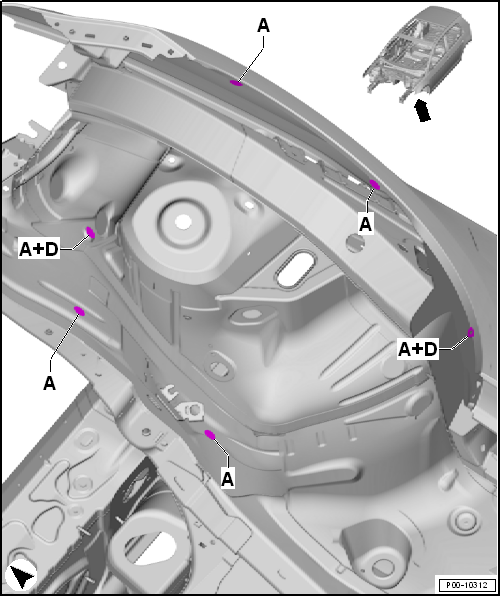
| Masking areas, plenum chamber |
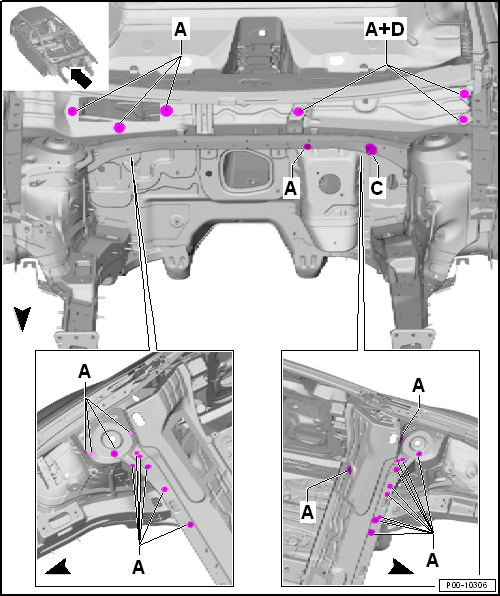
| A - |
No sealant on threads or contact surfaces. |
| C - |
No cathodic dip primer, surfacer or top coat on threads or contact
surfaces. |
| D - |
Threads free of surfacer and top-coat paint (joint surface may be
painted) |
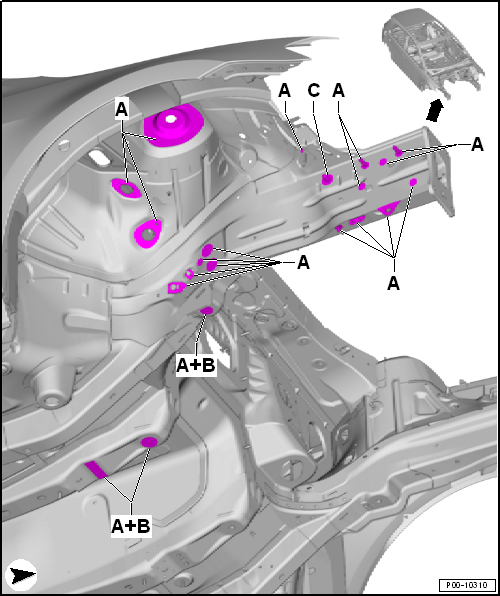
| Masking areas, left side of engine compartment, LHD vehicles |
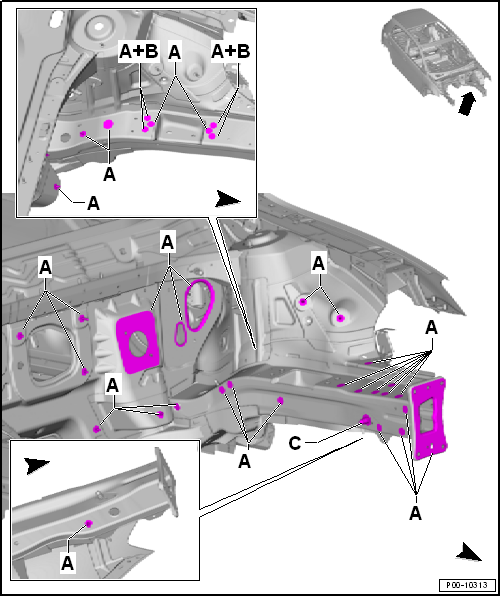
| A - |
No sealant on threads or contact surfaces. |
| C - |
No cathodic dip primer, surfacer or top coat on threads or contact
surfaces. |
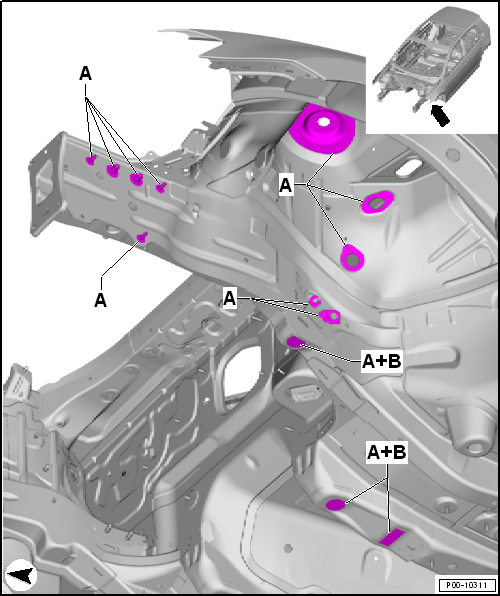
| Masking areas, right side of engine compartment, LHD vehicles |
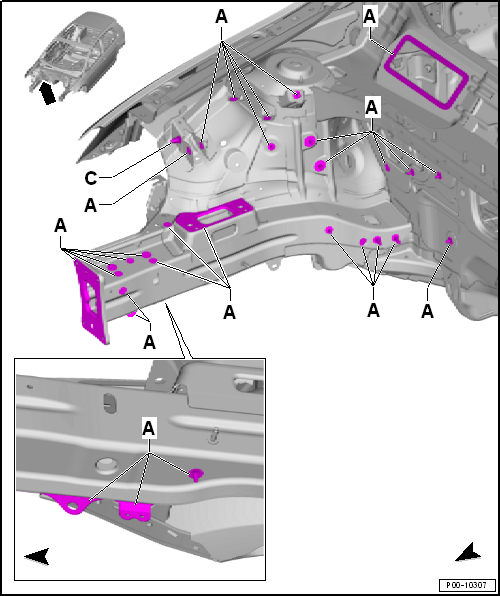
| A - |
No sealant on threads or contact surfaces. |
| C - |
No cathodic dip primer, surfacer or top coat on threads or contact
surfaces. |
| Masking areas, left side of engine compartment, RHD vehicles |
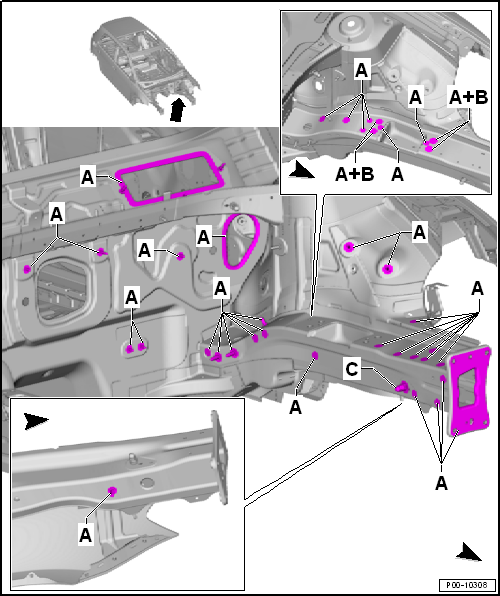
| A - |
No sealant on threads or contact surfaces. |
| C - |
No cathodic dip primer, surfacer or top coat on threads or contact
surfaces. |
| Masking areas, right side of engine compartment, RHD vehicles |

| A - |
No sealant on threads or contact surfaces. |
| C - |
No cathodic dip primer, surfacer or top coat on threads or contact
surfaces. |
| Masking areas, front right wheel housing |
| A - |
No sealant on threads or contact surfaces. |
| C - |
No cathodic dip primer, surfacer or top coat on threads or contact
surfaces. |
| Masking areas, front left wheel housing |
| A - |
No sealant on threads or contact surfaces. |
| Masking areas, front wing and wheel housing |
| Illustration shows left side. The right side is the mirror image. |
| A - |
No sealant on threads or contact surfaces. |
| D - |
Threads free of surfacer and top-coat paint (joint surface may be
painted) |
| Masking areas, centre underbody, right side |
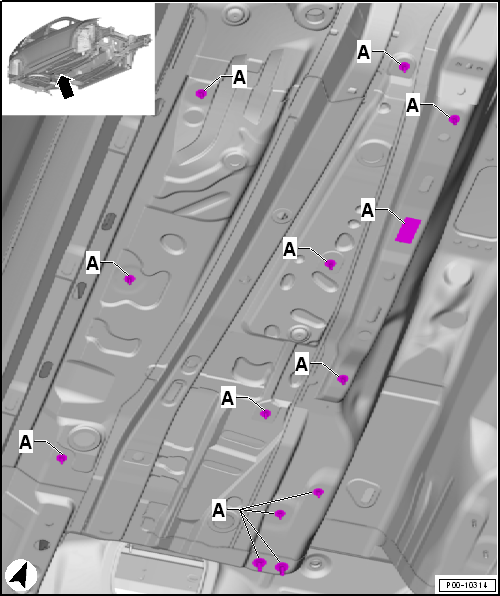
| A - |
No sealant on threads or contact surfaces. |
| Masking areas, centre underbody, left side |
| A - |
No sealant on threads or contact surfaces. |
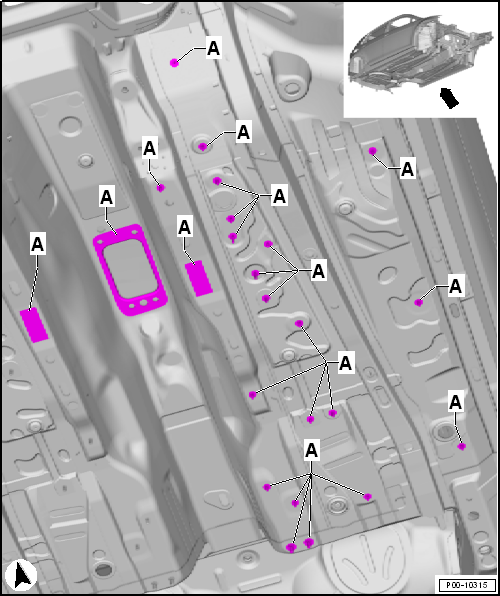
Masking areas, rear underbody
A -
No sealant on threads or contact surfaces.
B -
Threads waxed
D -
Threads ...
© 2016-2026 Copyright www.vwgolf.org

 Masking areas
 Masking areas, rear body