Volkswagen Golf Service & Repair Manual: Removing automatic distance control unit from and installing on retaining
plate, variant 1
| Adjusting adjustment screws:
→ Anchor |
| Renewing clips on adaptive cruise control unit -J428-:
→ Anchor |
| Special tools and workshop equipment
required |
| Calliper square -VAS 6335- |
| – |
Remove adaptive cruise control unit -J428-
→ Chapter. |
|
|
|
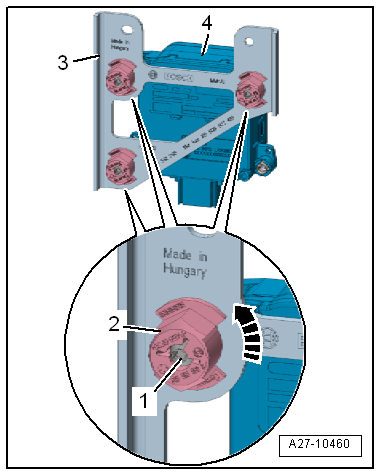
| – |
Turn quick-release fasteners -2-
in -direction of arrow-. |
| – |
Remove retaining plate -3- from
adaptive cruise control unit -J428--4-. |
| – |
Pull quick-release fasteners -2-
off adjustment screws -1-. |
| Install in the reverse order of removal, observing the
following: |
 Note Note
| Renew quick-release fasteners -2-. |
| The adjustment screws -1- in
the automatic distance control unit -J428- are preset. Correct
the adjustment as required
→ Anchor. |
| If studs -1- have been
unscrewed, clips on the adaptive cruise control unit -J428- need
to be renewed
→ Anchor. |
|
|
|
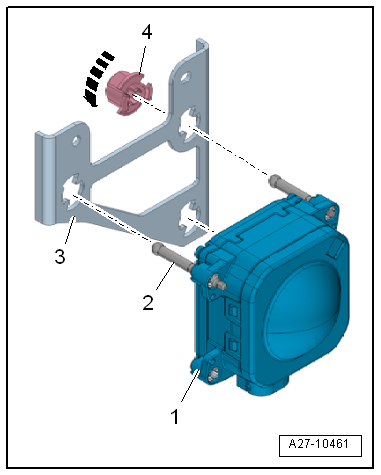
| – |
Carefully press new quick-release fasteners
-4- onto studs
-2-. |
| – |
Fit retaining plate -3- to
adaptive cruise control unit -J428--1-. |
| – |
Engage quick-release catches -4-
on retaining plate -3- in
-direction of arrow- as far as
stop. |
| – |
Install adaptive cruise control unit -J428-
→ Chapter. |
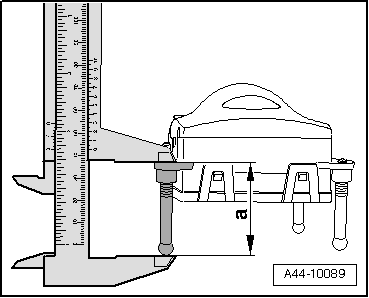
| Adjusting adjustment screws |
|
|
|
| – |
Place adaptive cruise control unit -J428- on a soft and
clean surface. |
| – |
Using digital calliper -VAS 6335-, measure setting
-a- of all adjustment screws and
correct, if necessary. |
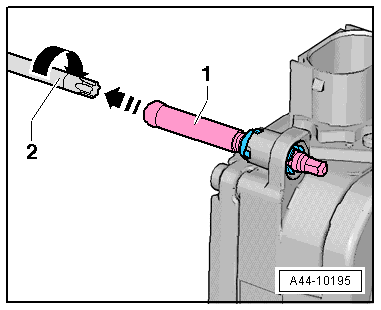
| Renewing clips on adaptive cruise
control unit -J428- |
|
|
|
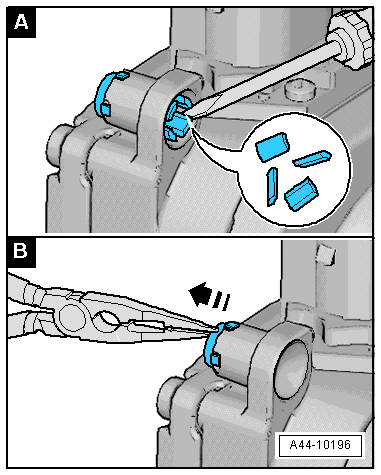
| – |
Unscrew adjustment screw -1-
using suitable tool -2-. |
|
|
|
| – |
Set screwdriver -A- between
retaining hook and housing. |
| – |
Bend retaining hooks with the screwdriver one after the
other towards the centre until they audibly break off. |
| – |
To prevent broken hooks from becoming caught in the housing,
remove them from inside clip using long-nose pliers
-B-. |
|
|
|
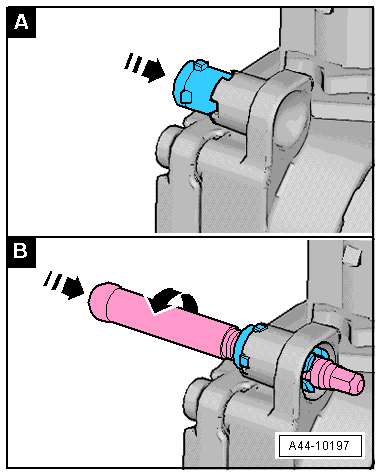
| – |
Insert new clip -A- into hole
in housing, and press it on by hand until it engages audibly
-arrow-. The lugs on the clip must
sit correctly in the recesses. |
| – |
Screw in adjustment screw -B--arrows-.
Adjustment screw must be parallel to bore and correctly aligned
with clip. |
| – |
Adjust adjustment screws
→ Anchor. |
| – |
Repeat this process if necessary at other clips. |
| – |
Install retaining plate for adaptive cruise control unit
-J428-
→ Anchor. |
|
|
|
Note
If the automatic distance control unit -J428- is renewed,
start the respective function → Vehicle
diagnostic tester.
...
Note
If the automatic distance control unit -J428- is renewed,
start the respective function → Vehicle
diagnostic tester.
...
© 2016-2026 Copyright www.vwgolf.org

 Removing and installing automatic distance control unit, variant 1
 Removing automatic distance control unit from and installing on retaining
plate, variant 2
Removing automatic distance control unit from and installing on retaining
plate, variant 2