Volkswagen Golf Service & Repair Manual: Removing and installing sun visor
 Note Note
| Removal and installation is described for the sun visor
on driver side. Follow same instructions for the front passenger
side as appropriate. |
| Special tools and workshop equipment
required |
|
|
|
| – |
Swing sun visor towards front. |
|
|

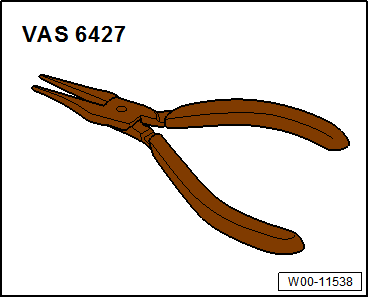
Release pliers -VAS 6427- |
| – |
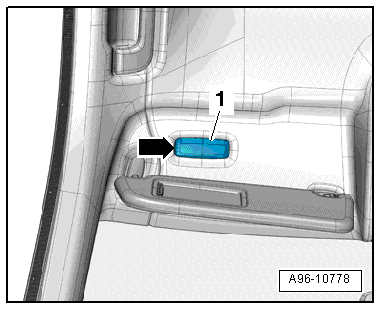
Fit a flat-bladed screwdriver on recess
-arrow- and carefully lever out
light -1- for vanity mirror. |
| – |
Disconnect electrical connector. |
|
|

|
| – |
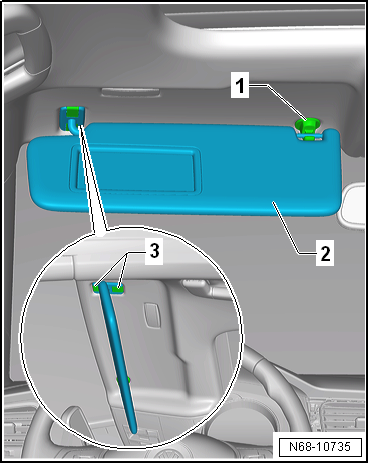
Detach sun visor -2- from
centre mount -1-. |
| – |
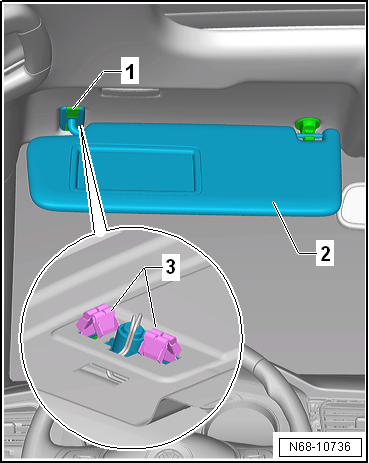
Open caps -3- on sun visor
mount. |
 Note Note
| When carrying out the steps below, ensure that release
pliers -VAS 6427- are positioned centrally in retaining clips. |
|
|

|
Special tools and workshop equipment
required
Removal wedge -3409-
...
Note
Removal and installation is described for the sun visor
centre mount on the driver side. Follow same instructions for
the front passenger side as ...
Other materials:
Paintwork structure of a factory finish
Structure of a solid-colour (uni) paint finish, conventional
Coat thickness approx. 80-120 µm
1 -
Sheet steel
2 -
Zinc phosphate
3 -
...
Starter button
Fig. 129 In the lower part of the centre
console: starter button for the Keyless Access locking and starting system
Fig. 130 Emergency start function in vehicles
with Keyless Access
First read and observe the introductory information
and safety warnings The starter button can only be ope ...
Removing and installing dash panel insert -KX2-
Special tools and workshop equipment
required
Vehicle diagnostic tester
Note
All indicator lamps in the dash panel insert -KX2- are
equipped with LEDs. LEDs cannot be renewed separately if
...
© 2016-2026 Copyright www.vwgolf.org

 Note
Note Note
Note Note
Note Note
Note Removing and installing eyelet for net partition
 Removing and installing sun visor centre mount


