Volkswagen Golf Service & Repair Manual: Removing and installing sliding sunroof frame
| Special tools and workshop equipment
required |
|
|
|
| |
|
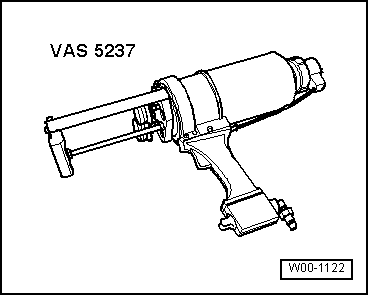
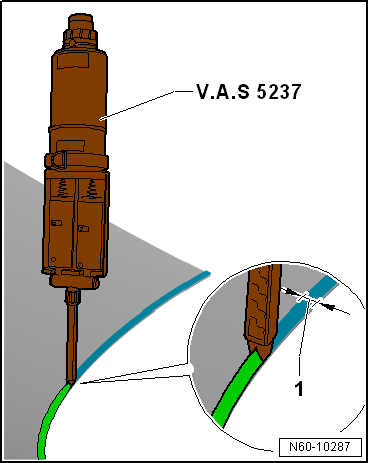
Double cartridge gun -VAS 5237- |
| |
|
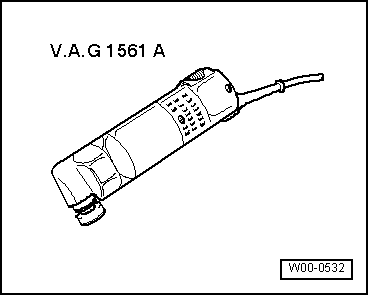
Electric cutter -V.A.G 1561A- |
|
|
|

L-shaped blade, 19 mm -V.A.G 1561/21- |
| |
2-component glass adhesive |
|
→ Remark1
→ Remark2
→ Remark4 |
|
|
→ Remark1 |
|
|
→ Remark1 |
|
|
→ Remark1 |
|
|
→ Remark1 |
|
|
→ Remark1 |
|
|
357 853
999 |
| 1) |
Observe manufacturer's instructions enclosed in
the packaging. |
| 2) |
Observe minimum curing period. |
| 3) |
Double cartridge gun -VAS 5237- must be used to
apply these materials. |
|
|
|
| – |
Remove glass panel
→ Chapter. |
| – |
Remove moulded headliner
→ General body repairs, interior; Rep. gr.70. |
| – |
Remove front trim
→ Chapter. |
| – |
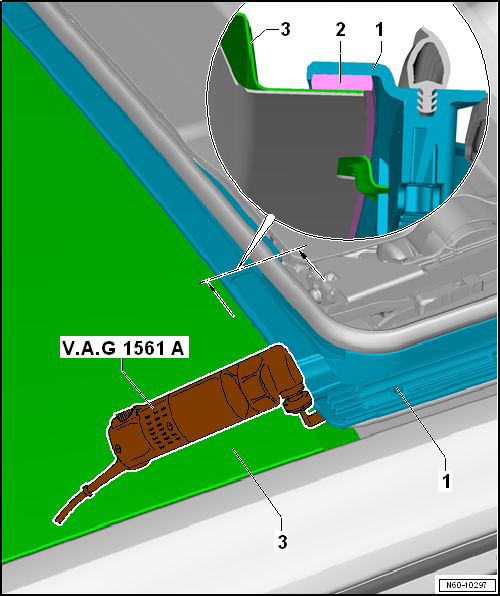
Use masking tape to cover roof rail and edge of roof
-3- in order to protect paintwork. |
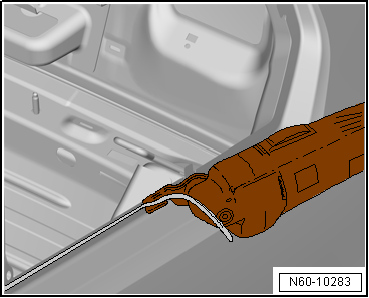
| – |
Stick electric cutter -V.A.G 1561A- with L-shaped 19 mm blade -V.A.G
1561/21- into rear adhesive bead -2- and
cut through bead. |
 Note
Note
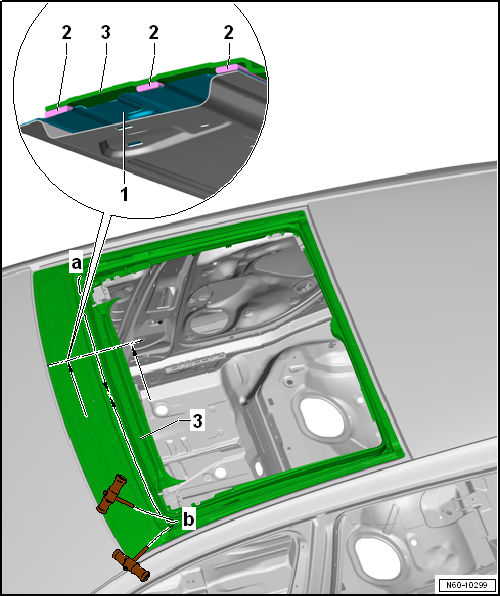
| In the middle at the rear, there is a centring lug made of plastic. |
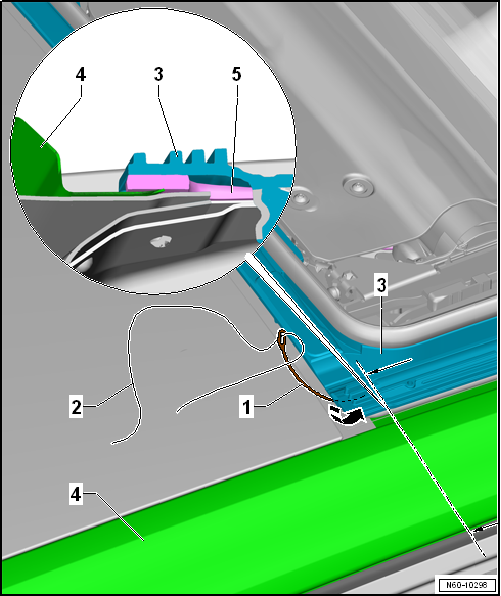
| – |
Take the cord -357 853 999--2- through
under the assembly frame -3-. |
| The needle -1- from the windscreen
removal kit -V.A.G 1755- can be used for this. |
| – |
Secure a handle from windscreen removal kit -V.A.G 1755- to each end
of the cord. |
| The cutting of the adhesive bead -2- is
only possible with the help of a second mechanic. |
| – |
One person pulls from the outside, the other pulls from the inside. |
Note
| |
There are 3 adhesive beads on the roof cross member and increased
resistance will be encountered here. |
| |
Keep the cord close to the assembly frame so that it is not cut by
the surrounding edges. |
| – |
The adhesive bead -2- must be cut
through, starting from the rear -arrow a-,
as far as the middle of the roof cross member -3-. |
| – |
Move cord to other side. |
| – |
The adhesive bond is cut through, starting from the rear
-arrow b-, as far as the roof cross member. |
| – |
Remove assembly frame -3-. |
Note
-
| |
The exact position of the adhesive bead on the new assembly
frame must taken from the adhesive bead on the removed assembly
frame. |
-
| |
The position of the adhesive bead on the metal flange must
also be the same if a new roof is fitted. |

WARNING
| Special standards must be adhered to when replacing
bonded assembly frame One of these standards is, for
example, that a freshly bonded assembly frame must
comply with the safety requirements, even in an
accident, following the minimum prescribed curing
period. |
| It is safe to use vehicle only after the curing
period is completed. |
| Observe minimum curing period. |
|
| For 2-component glass adhesive the minimum curing period is
2 hours. |
| The minimum curing period is the time from bonding until the
vehicle can be used. During this time, the vehicle must stand on
a level surface at room temperature (at least 15 °C). |
| Preparing body flange for bonding |
|
|
|
| – |
Apply adhesive sealing material in continuous bead, holding
applicator at right angle to frame. |
WARNING
| Frame must be installed within 10 minutes, or
adhesive properties of glass adhesive will be impaired. |
| Adhesive bead should not be applied too thick and
frame should not be pressed too forcibly on body flange. |
|
| |
Fit frame into aperture, align and press in onto spacer rib. |
| If paintwork is damaged, paint structure must be restored
according to specifications in “Paint” workshop manual. |
| Cleaning off excess adhesive sealing
material |
| – |
Use adhesive remover as a cleaning solution. Observe the
appropriate safety precautions when performing this work. |
WARNING
| When cleaning freshly installed glass from the
inside in the vehicle, do not press assembly frame
outwards. |
|
| – |
First clean painted surface as well as possible using a dry
cloth. Remove residue using adhesive remover. |
| – |
Cleaning plastic trim: allow adhesive sealant to cure
(approx. one hour) and then peel off. |
|
|
|
Note
| |
If the assembly frame is new, the trim has already been glued in. |
| |
If a frame is to be re-used, the residual material serves as the
adhesion base for the new adhesive sealant to be applied. |
| |
Cut adhesive sealing material back to 1 mm just before gluing in
again to ensure that the primer is not damaged. |
WARNING
| Do not prime bonding surface for adhesive bead and do not
treat it with a cleaning solution. Keep bonding surface free of
dirt and grease. |
|
| Exception: If bonding is not performed immediately after cutting
back, the remaining residual material must be activated with activator D
181 801 A1. |
| Work to be carried out for a new frame: |
| – |
Slightly roughen the bonding surface with fine emery paper. |
| – |
Clean around bonding surface -2- using
cleaning solution. |
| – |
Now apply glass and paint primer evenly in one stroke using
applicator. |
| – |
Drying time for glass/paint primer is 10 minutes. |
| Work to be carried out for all frames: |
| – |
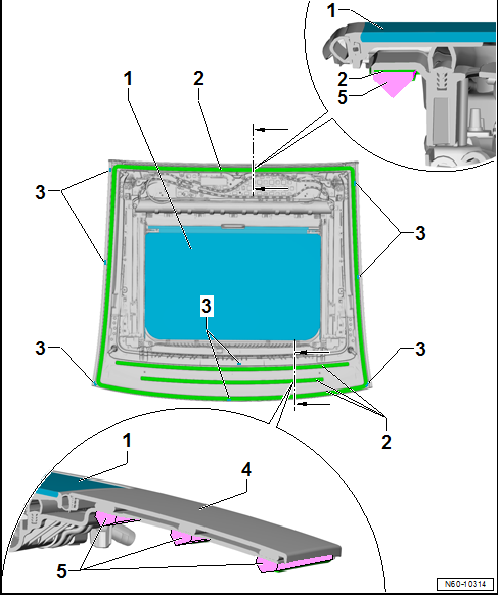
Fit glass panel -1- into frame
-4-. |
| – |
Check number of -3- vertical stops. |
| – |
Apply 2-component glass adhesive. Dimensions for adhesive bead
-5-: width = 12 mm; height = 10 mm |
WARNING
| Frame must be installed within 10 minutes after adhesive has
been applied, otherwise the adhesive properties of the adhesive
sealing compound will be impaired. |
|
Note
| Install glass panel -1- in assembly
frame before installing assembly frame. |
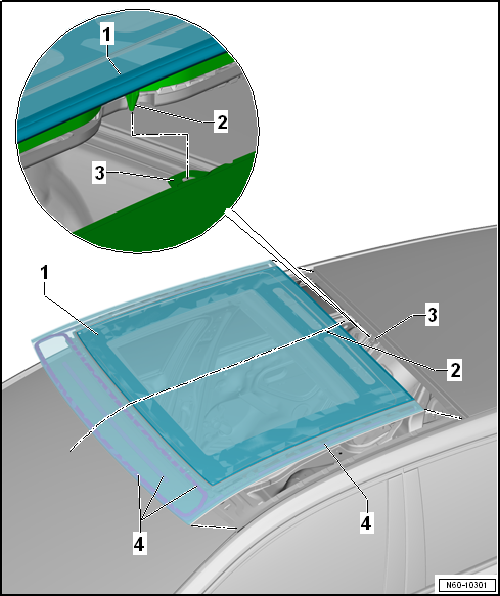
| – |
Insert frame together with glass panel into roof aperture. |
| – |
The centring lug -3- aligns frame
within aperture. |
| – |
Press frame downwards as far as the stops, check height setting in
relation to roof
→ Chapter. |
| – |
As the centring lug no longer exists, the frame is aligned in
relation to the roof aperture -2-. |
| – |
Press frame downwards as far as the stops, check height setting in
relation to roof
→ Chapter. |
| – |
Observe minimum curing period
→ Anchor. |
1 -
Sunroof roller blind
Removing and installing
→ Chapter.
2 -
Mounting
For sunroof roller blind fabric
3& ...
Special tools and workshop equipment
required
Removing
Torque wre ...
© 2016-2026 Copyright www.vwgolf.org

 Assembly overview - sunroof roller blind
 Removing and installing wind deflector