Volkswagen Golf Service & Repair Manual: Removing and installing sill panel moulding, 4-door model
 Note Note
| Removal and installation are described for the left vehicle
side. Follow same instructions for the right side as
appropriate. |
| Special tools and workshop equipment
required |
|
|
|
| |
|

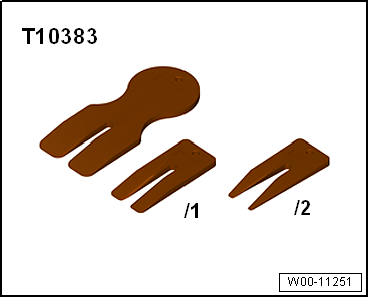
Wedges -T10383 |
| – |
Remove rear bench seat
→ Chapter. |
| – |
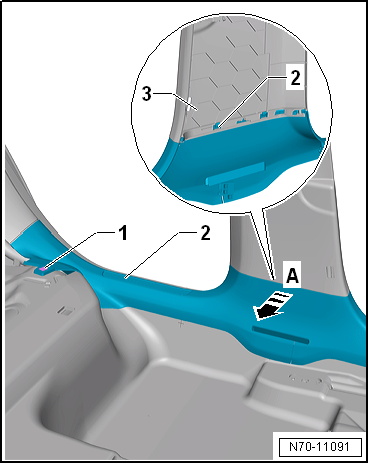
Remove spreader clip -1-. |
| – |
Release locking lugs of sill panel moulding
-2- from lower B-pillar trim
-3--arrow A- using wedge -T10383-. |
|
|

|
| – |
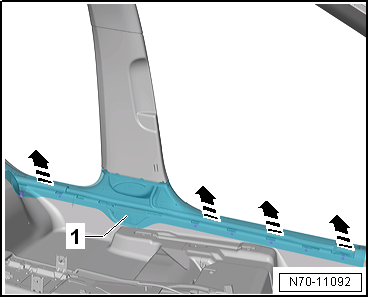
Release sill panel moulding -1-
from side member and beading of door seal
-arrows- using wedge -T10383-. |
| – |
At the same time, pull off sill panel moulding
-1- slightly towards front. |
| – |
Open cover for belt guide and thread out seat belt. |
| – |
Remove sill panel moulding. |
 Note Note
-
| |
Before installing, check all fasteners for damage and
renew if necessary. |
-
| |
Remove any retaining clips left in body mountings
using removal tool -T40280- and fit them in sill panel
moulding for installation. |
-
| |
Following installation, ensure that the sill panel
moulding is positioned in the door seal beading. |
| Installation is carried out in reverse order. |
|
|
 |
Note
Removal and installation are described for the left
vehicle side. Follow same instructions for the right side as
appropriate.
...
Note
Removal and installation are described for the left
vehicle side. Follow same instructions for the right side as
appropriate.
...
Other materials:
Introduction
This chapter contains information on the following subjects:
→ Display and indicator lamps
→ Operating the cruise control system (CCS)
The cruise control system (CCS) helps to maintain an individual set speed when
the vehicle is travelling forwards at speeds of more than ...
Overview of fitting locations – controls in roof trim
Note
The illustration shows fitting locations for LHD vehicles. Fitting
locations for RHD vehicles are similar.
1 -
Driver vanity mirror contact switch -F147-
The vanity mirror contact switch is as integral part of the sun
v ...
Removing and installing valve, description of the valve
1. Valve body
1 -
Valve body
2 -
Valve core
3 -
Valve cap
The rubber valve for tubeless tyres is designed to create an
air-tight sea ...
© 2016-2026 Copyright www.vwgolf.org

 Note
Note Note
Note Removing and installing sill panel moulding, 2-door model
 Removing and installing A-pillar gap cover


