Volkswagen Golf Service & Repair Manual: Removing and installing shock absorber, torsion beam axle
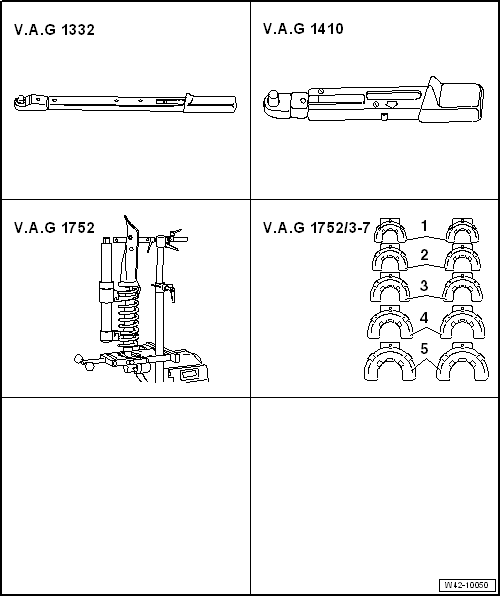
| Special tools and workshop equipment required |
| Torque wrench -V.A.G 1332- |
| Torque wrench -V.A.G 1410- |
| Spring compressor -V.A.G 1752/1- |
| Spring retainer -V.A.G 1752/3A- |
| – |
Remove rear wheel housing liner
→ General body repairs, exterior; Rep. gr.66. |
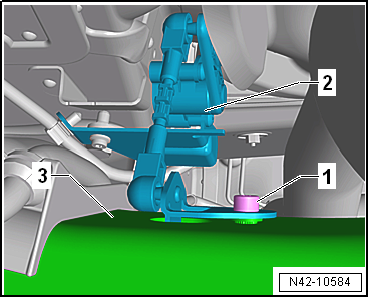
| Vehicles with vehicle level sender |
|
|
|
| – |
Pull rear left -G76- lever -2-
off axle beam -3-. |
| Vehicles with adaptive chassis control DCC |
|
|
|
| – |
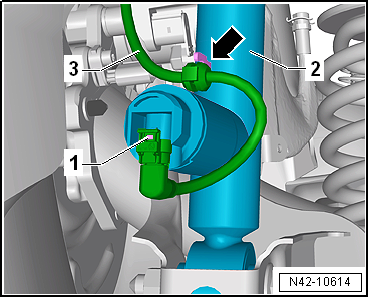
Disconnect connector -1- on
shock absorber -2-. |
| – |
Pull line -3- off shock
absorber -2--arrow-. |
 Note Note
| If there is moisture in the area of the connector, blow
compressed air on the contacts on the shock absorber and the
connector. |
| Continuation for all vehicles |
|
|
|
| – |
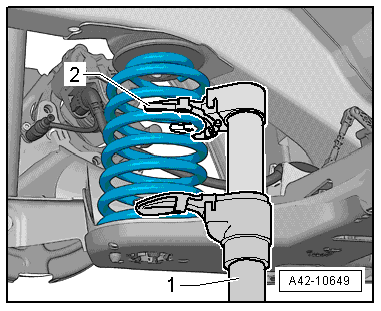
Insert spring compressor-1-. |
| 1 - |
Spring compressor -V.A.G 1752/1- |
| 2 - |
Spring retainer -V.A.G 1752/3A- |
 WARNING
| Ensure that coil spring is correctly seated in
spring retainers -V.A.G 1752/3A--2-. |
|
| – |
Compress coil springs until load on shock absorber is
relieved. |
|
|
|
| – |
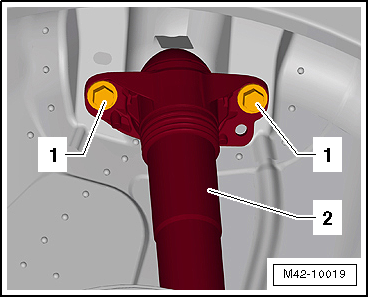
Unscrew bolts -1- for shock
absorber -2-. |
|
|
|
| Install in reverse order of removal, observing the
following: |
| – |
On vehicles with vehicle level sender, carry out basic
settings for wheel damper electronics → Vehicle
diagnostic tester. |
| → Chapter „Assembly overview - suspension strut, shock absorber,
spring, torsion beam axle“ |
| → Chapter „Torque settings for wheel bolts“ |
| Wheel housing liner
→ General body repairs, exterior; Rep. gr.66. |
|
|
|
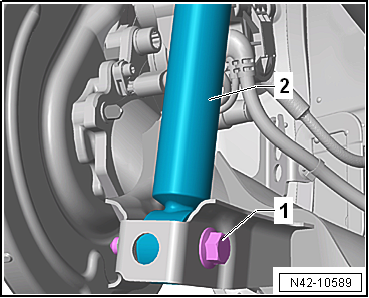
1 -
Bolt
Renew after removing
50 Nm +45°
2 -
Shock absorber
Removing and installing ...
Special tools and workshop equipment required
Torque wrench -V.A.G 1332-
Torque wrench -V.A.G 1410-
Spring compressor -V.A.G 1752/1 ...
Other materials:
Frequently asked questions
If you suspect that there is a fault in the vehicle or if your vehicle has been
damaged, read and observe the following information before contacting
a Volkswagen dealership or qualified workshop. You may also find useful information
in the index under the headings Things to note or Checklist. ...
Seam seals, front body
Note
Seam seals made during repair work must be identical in
appearance and thickness to the original seam seals.
To avoid damage or faulty operation, brush seam seals smooth
near attachments which must be attached.
...
Removing and installing centre console trim in footwell
Note
Removal and installation is described for the centre console
trim in footwell on driver side. Follow same instructions for
the front passenger side as appropriate.
Special tools and workshop equipment
required
...
© 2016-2026 Copyright www.vwgolf.org


 Note
Note Assembly overview - suspension strut, shock absorber, spring, multi-link
suspension
 Removing and installing shock absorber, multi-link suspension, left shock
absorber


 WARNING

