Volkswagen Golf Service & Repair Manual: Removing and installing selector lever cable, manufacturer ZF
| Special tools and workshop equipment
required |
|
|
|
| Golf, Golf Estate, only diesel engine: |
| – |
Remove air filter housing
→ Rep. gr.23. |
| Continued for all vehicles: |
|
|
|
| – |
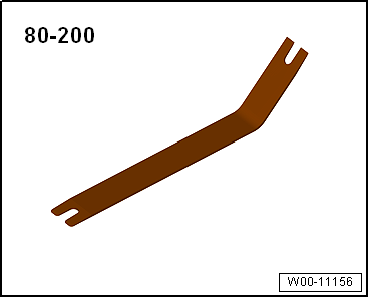
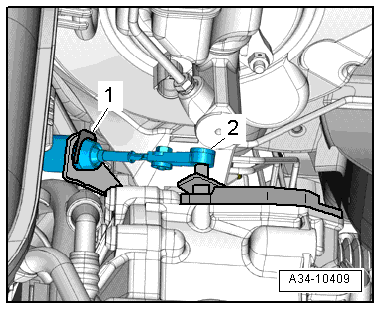
Using removal lever -80 - 200-, lever selector lever cable
-2- off gearbox selector lever. |
| – |
Remove securing clip -1-. |
| Use pliers to remove the securing clip on the cable support
bracket. Do not use a sharp-edged lever. The selector lever
cable could otherwise be damaged. |
| Securing clips for selector lever cable must always be
renewed. |
 Caution
| Risk of damage to selector lever cable. |
| Do not push selector lever cable backwards out of
cable support bracket. The selector lever cable is not
detached from the cable support bracket until the
selector mechanism is removed. |
|
| Securing clips for selector lever cable must always be
renewed. |
| – |
Shift selector lever on selector mechanism to position “N”.
Only in this position the selector lever cable can be released
from selector mechanism. |
| – |
Remove heat shield for centre tunnel below selector
mechanism
→ General body repairs, exterior; Rep. gr.66. |
|
|
|
| – |
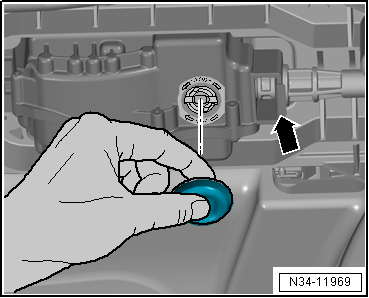
Remove plug and securing clip -arrow-. |
| Renew the securing clip after each removal. |
|
|
|
| – |
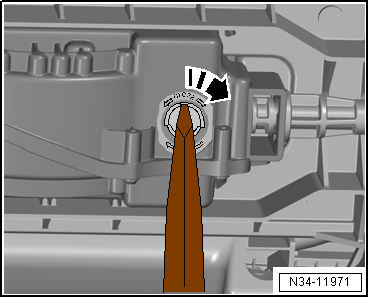
Fit a large screwdriver in grooves of locking mechanism and
turn it 90° in direction of arrow. |
| – |
Pull selector lever cable out of selector mechanism and
remove it. |
 Note Note
| Do not bend or kink selector lever cable. |
| Do not grease selector lever cable. |
| Ensure that selector lever cable is free to move after
installing. |
| Selector lever on selector mechanism must be set to position
“N”. Only in this position the selector lever cable can be
engaged in selector mechanism. |
|
|
|
| – |
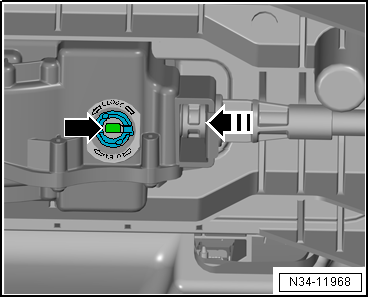
Insert selector lever cable into selector mechanism until it
is visible in locking mechanism -arrow-. |
|
|
|
| – |
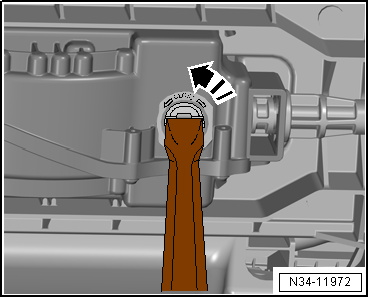
Fit a large screwdriver in grooves of locking mechanism and
turn it 90° in direction of arrow. |
|
|
|
| – |
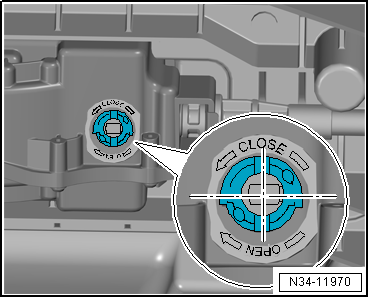
The selector lever cable is properly engaged when the
grooves in the locking mechanism are at right angles to the
selector lever cable. |
|
|
|
| – |
Install new securing clip -arrow-
and insert plug. |
|
|
|
| – |
Secure selector lever cable with new securing clip
-1- to cable support bracket. |
| – |
Install heat shield below selector mechanism
→ General body repairs, exterior; Rep. gr.66. |
| – |
Adjust selector lever cable
→ Chapter. |
| – |
Check selector mechanism
→ Chapter. |
| Golf, Golf Estate, only diesel engine: |
| – |
Install air filter housing
→ Rep. gr.23. |
|
|
|
Brief description
In the interior, the centre console must be removed.
The heat shield beneath the vehicle must be removed.
...
The starter must not operate in the selector lever positions
“R”, “D” and “S” and in the Tiptronic position.
On right-hand drive vehicles ...
© 2016-2026 Copyright www.vwgolf.org


 Removing and installing selector mechanism without selector lever cable,
manufacturer ZF
Removing and installing selector mechanism without selector lever cable,
manufacturer ZF Checking selector mechanism