Volkswagen Golf Service & Repair Manual: Removing and installing wheel bearing unit, multi-link suspension,
front-wheel drive
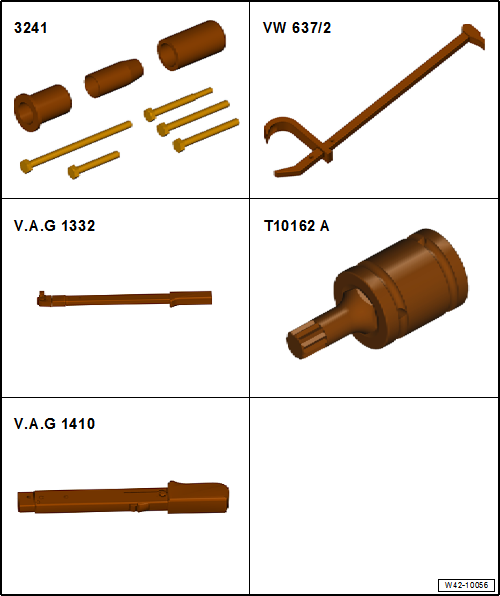
| Special tools and workshop equipment required |
| Hub grease cap puller -VW 637/2- |
| Torque wrench -V.A.G 1332- |
| Torque wrench -V.A.G 1410- |
| – |
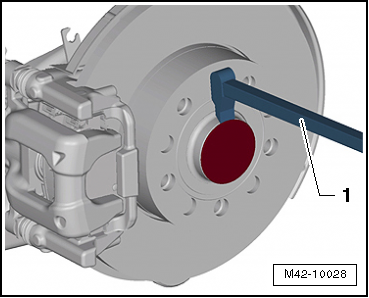
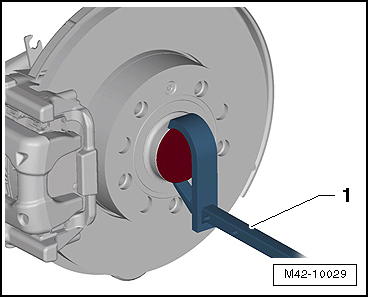
Loosen grease cap from seat by tapping lightly on the claw
of the hub grease cap puller -VW 637/2--1-. |
|
|
|
| 1 - |
Hub grease cap puller -VW 637/2- |
| – |
Detach brake carrier with brake caliper and tie to body with
wire
→ Brake system; Rep. gr.46. |
 Note Note
| Hang brake caliper from body. |
| – |
Remove bolt for brake disc and remove brake disc. |
|
|
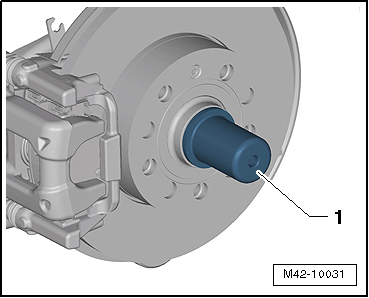
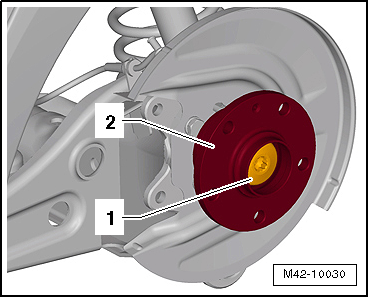
|
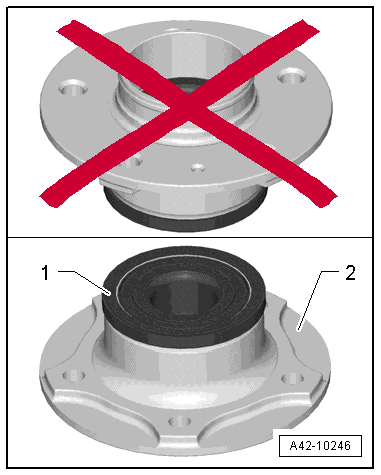
| Wheel bearing -1- must always
face upwards. |
| – |
Always set wheel bearing unit on hub
-2- when placing on a surface. |
| Install in reverse order of removal, observing the
following: |
|
|
|
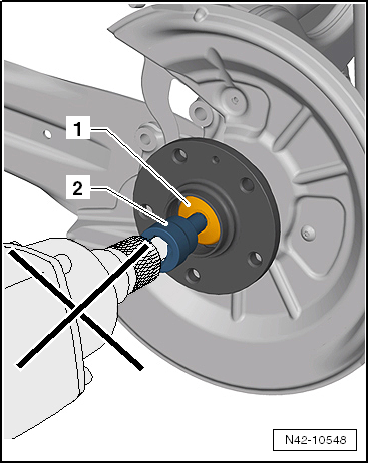
| Use a rigid spanner for turning further by angle. |
 Caution
| Do not use an impact driver when tightening bolt
-1- with socket -T10162 A--2-! |
|
|
|
|
| 1 - |
Fitting sleeve -3241/4- |
| Always renew removed grease caps. |
| Damaged grease caps may allow moisture to enter the bearing.
Therefore, always use the tool shown in the illustration. |
| → Chapter „Assembly overview - suspension, multi-link
suspension, front-wheel drive“ |
| → Chapter „Torque settings for wheel bolts“ |
| Bolts for heat shield, brake caliper and brake disc
→ Brake system; Rep. gr.46 |
|
|
|
Special tools and workshop equipment required
Fitting sleeve -3241/4-
Hub grease cap puller -VW 637/2-
Torque wrench -V.A.G 1332-
...
Special tools and workshop equipment
required
Torque wrench -V.A.G 1332-
...
© 2016-2026 Copyright www.vwgolf.org

 Removing and installing wheel bearing unit, torsion beam axle
 Removing and installing wheel bearing unit, multi-link suspension,
four-wheel drive
Removing and installing wheel bearing unit, multi-link suspension,
four-wheel drive