Volkswagen Golf Service & Repair Manual: Removing and installing seat trim on sill side, standard seat
 Note
| Removal and installation are described for the left vehicle
side. Follow same instructions for the right side as
appropriate. |
| Special tools and workshop equipment
required |
|
|
|
| – |
Adjust seat to fully upright position. |
| – |
Remove backrest adjustment
→ Chapter. |
| – |
Remove handle for seat height adjustment
→ Chapter. |
|
|
|

| – |
Press in clamping pin -3-. |
| – |
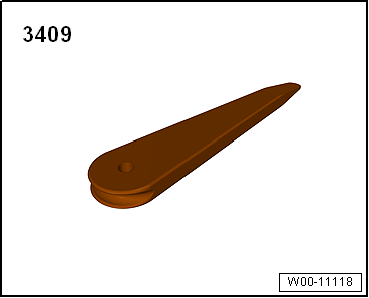
Lever off spreader rivets -2- using
removal wedge -3409-. |
| – |
Unscrew bolt -arrow- working from the
bottom. |
| – |
Open retainer -4- on trim
-1- working from bottom. |
| – |
Thread out trim -1- at rear. |
| – |
Remove trim -1- towards front from
bracket -5-. |
| Installation is carried out in reverse order. |
|
|
|
| Component |
Specified torque |
| Bolt between bracket and side
trim panel
→ Anchor |
2 Nm |
Note
Removal and installation are described for the left vehicle
side. Follow same instructions for the right side as
appropriate.
...
Note
Removal and installation are described for the left vehicle
side. Follow same instructions for the right side as
appropriate.
...
Other materials:
Introduction
This chapter contains information on the following subjects:
→ Display and indicator lamps
→ Function
→ Switch off the lane departure warning system in the following situations
Additional information and warnings:
Exterior views
Volkswagen in ...
Removing and installing shock absorber, multi-link suspension, right shock
absorber
Special tools and workshop equipment required
Torque wrench -V.A.G 1332-
Torque wrench -V.A.G 1410-
Spring compressor -V.A.G 1752/1-
Spring retainer -V.A.G 1752/3A-
Adapter -V.A.G 1752/9-, not illu ...
Painting parking aid sensor
To avoid malfunctions in the parking aid sensor, always
observe the following when painting:
Painting new parts
Maximum layer thickness 125 µm; a measurement of layer depth
is absolutely essential following ...
© 2016-2026 Copyright www.vwgolf.org


 Removing and installing seat trim on sill side, seat of type "ergo Aktiv"
 Removing and installing seat trim on sill side, electrically adjustable seat