Volkswagen Golf Service & Repair Manual: Removing and installing radiator, Golf, Golf SV, Golf Estate
 Note Note
| Radiator and water radiator for charge air cooling circuit
are removed together. |
| – |
Drain coolant
→ Chapter. |
| – |
Remove radiator cowl
→ Chapter. |
| – |
Remove front bumper cover
→ General body repairs, exterior; Rep. gr.63. |
|
|
|
| – |
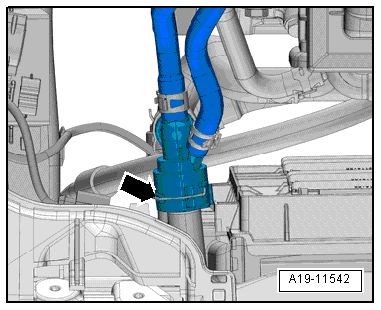
Lift retaining clip -arrow- and
disconnect coolant hose (top right) from water radiator for
charge air cooling circuit. |
|
|
|
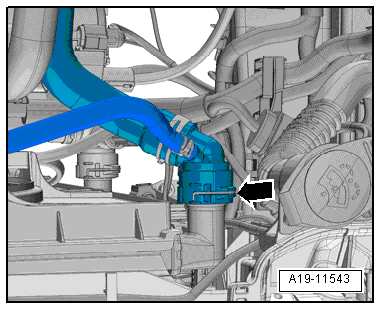
| – |
Lift retaining clip -arrow- and
disconnect coolant hose (top left) from radiator. |
|
|
|
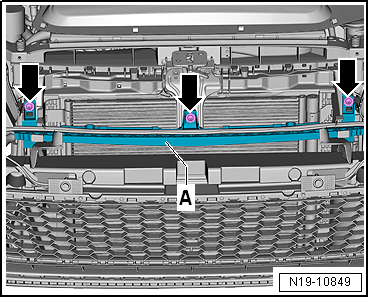
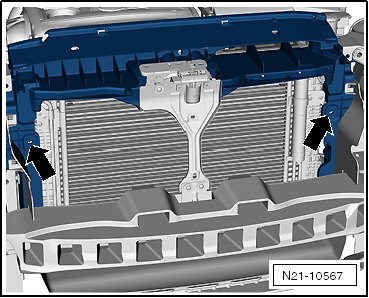
| – |
Remove centre guide profile -A-
from lock carrier -arrows-. |
|
|
|
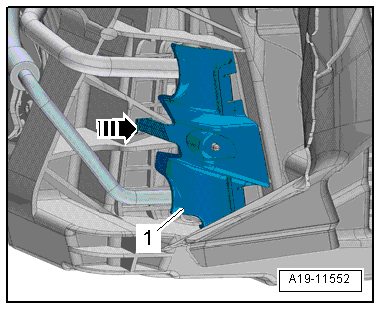
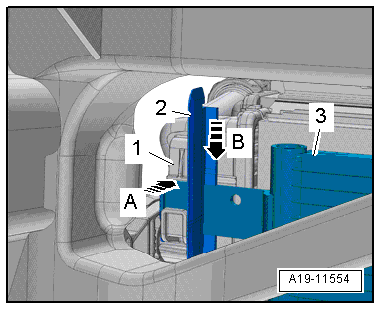
| – |
Release fastener -arrow- and
remove cover -1- towards front. |
|
|
|
| – |
Unclip air duct -2- downwards
on both sides -arrow B-. |
| – |
Release catches on both sides -arrow
A- and detach condenser -3-
from water cooler for charge air cooling circuit
-1-. |
| – |
Tie up condenser to lock carrier. |
|
|
|
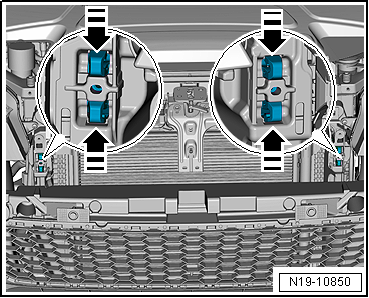
| – |
Using diagonal pliers, pinch off fasteners
-arrows- for radiator mounting on
left and right. Push radiator with water radiator for charge air
cooling circuit (top) slightly towards the rear. |
Note
| The radiator mounting will be reused when reinstalling the
radiator. It will then be bolted to lock carrier. Bolts
→ ETKA (Electronic Parts Catalogue). |
| – |
Detach radiator with water radiator for charge air cooling
circuit. |
|
|
|
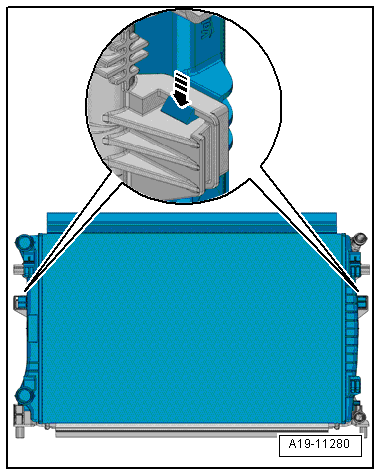
| – |
Press locking tabs on left and right sides of radiator
simultaneously -arrow-, and detach
radiator from water cooler for charge air cooling circuit. |
| Installation is carried out in the reverse order; note the
following: |
Note
| If there are minor dents in the fins, refer to
→ Chapter. |
| – |
Use bolts to secure radiator mountings, whose fasteners have
been pinched off, to lock carrier -arrows-.
Bolts
→ ETKA (Electronic Parts Catalogue). |
|
|
|
| – |
Install front bumper cover
→ General body repairs, exterior; Rep. gr.63. |
| – |
Install radiator cowl
→ Chapter. |
| – |
Connect coolant hose with plug-in connector to radiator
→ Fig.. |
| – |
Replenish coolant
→ Anchor. |
Note
| Do not reuse coolant which has been drained off. |
| → Chapter „Assembly overview - radiator and radiator fan“ |
|
|
|
1 -
Bolt
5 Nm
2 -
Radiator cowl
Removing and installing
→ Chapter
3 - ...
Removing
–
Release hose clip -1- and
detach air hose.
–
Un ...
© 2016-2026 Copyright www.vwgolf.org

 Assembly overview - radiator cowl and radiator fan
 Removing and installing radiator cowling