Volkswagen Golf Service & Repair Manual: Removing and installing protective cap
| Special tools and workshop equipment
required |
|
|
|
| Thrust piece -T10502- for rear brake FNc-M38 (15”) |
|
|

|
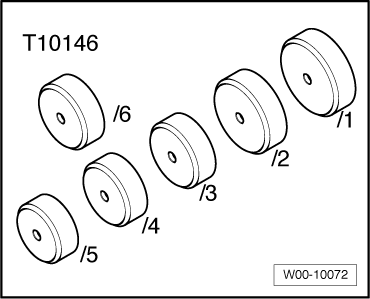
| Thrust piece -T10146/5- for rear brake FNc-M42 (17”) |
|
|
|
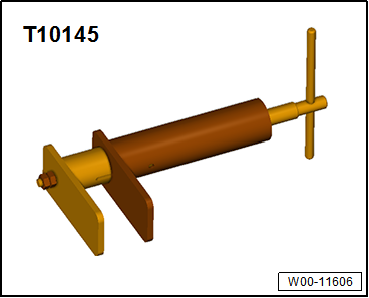
| Piston resetting appliance -T 10145- |
| Only the protective cap is intended to be renewed. |
 Note Note
| The brake caliper does not need to be removed in order to
renew the protective cap; do not unbolt the break hose. |
| Piston has been moved back. |
| Parking brake motor has been removed. |
Risk of damage to ball screw due to removal of piston and compressor
nut.Never unscrew piston and compressor nut completely. |
|
|
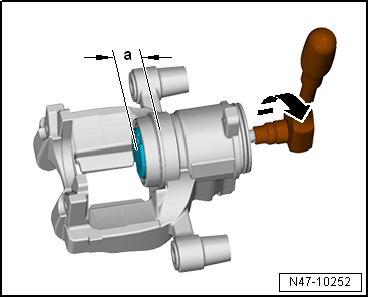
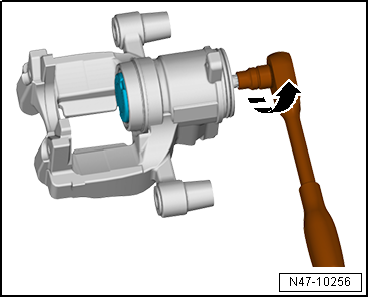
| – |
Unscrew piston (-direction of arrow-)
by maximum of 20 mm (-dimension a-)
using an E11 Torx socket. |
|
|
|
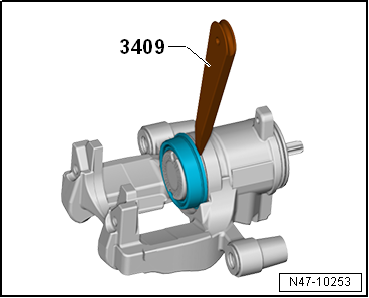
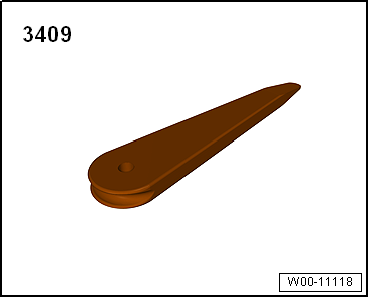
| – |
Lever protective cap off brake caliper using wedge 3409
-arrows-. |
| Install in reverse order of removal, observing the
following: |
| – |
The surfaces of the piston and brake caliper must be cleaned
only with methylated spirits, and then dried. |
|
|
|
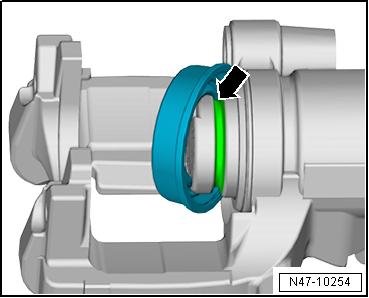
| – |
Insert protective cap into groove
-arrow- in piston. |
|
|
|
| – |
Screw piston back in (-direction of
arrow-). |
|
|
|
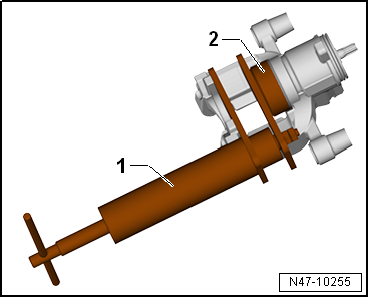
| – |
Push protective cap onto brake caliper using assembly tool
-T10502--2- and piston resetting
appliance -T 10145--1- in such a
way that protective cap lies against brake caliper all round its
circumference. |
|
|
|
When carrying out repairs, install all parts supplied in
repair kit.
Use only methylated spirits for cleaning the brake.
...
© 2016-2026 Copyright www.vwgolf.org

 Assembly overview - rear brake caliper