Volkswagen Golf Service & Repair Manual: Removing and installing memory block
| – |
Move front seat to rearmost and highest position. |
| – |
Release backrest and fold it towards front. At the same time
move front seat to foremost position. |
| – |
Unscrew rear bolt from seat rail on tunnel side
→ Chapter. |
| – |
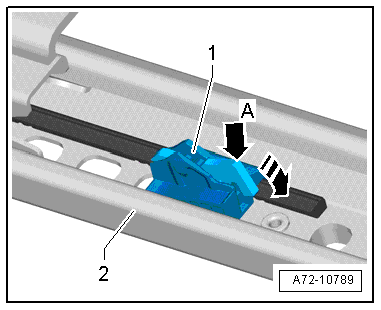
Push locking lever -arrow A- of
memory block in -direction of arrow-
and pull memory block towards rear. |
| – |
Slightly lift up memory block -1-
at rear using a screwdriver and pull it towards rear out of seat
rail -2-. |
|
|
|
| – |
If the memory block has been renewed, remove all residues
from the old memory block in the respective area of the seat
rail. |
| – |
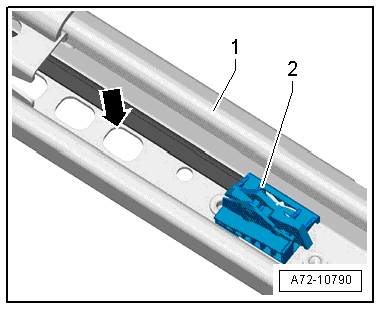
Insert memory block -2- into
seat rail -1-. |
| – |
Engage memory block in rearmost detent hole
-arrow-. |
 Note Note
| The memory block must not be adjusted. |
| Further installation is performed in reverse order of
removal |
|
|
|
Removing
–
Remove front seat
→ Chapter.
–
Secure front seat on seat repair stand
...
Special tools and workshop equipment
required
Torque wrench -V.A.G 1783-
Removing
...
© 2016-2026 Copyright www.vwgolf.org


 Removing and installing Bowden cable B for entry assistance
 Removing and installing storage compartment