Volkswagen Golf Service & Repair Manual: Removing and installing curtain airbag with igniter, 2-door and 4-door
models
| Special tools and workshop equipment
required |
|
|
|
| |
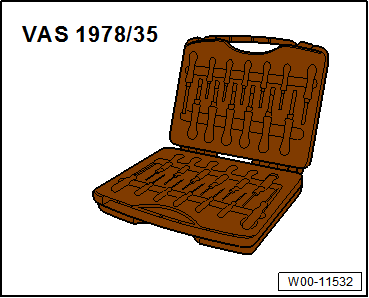
Release tool -VAS 1978/17- from release tool case -VAS
1978/35- |
 WARNING
| |
Observe safety instructions for pyrotechnic
components
→ Chapter. |
| |
Observe the additional safety instructions for the
curtain airbag
→ Chapter. |
| |
Observe disposal regulations for pyrotechnic
components
→ Chapter. |
|
|
|
|
| – |
For “e-Golfs” or “Golf GTEs”, disconnect the maintenance
connector for high-voltage system -TW-. |
| – |
Disconnect battery earth cable with ignition switched on
→ Electrical system; Rep. gr.27. |
| – |
Remove moulded headliner
→ Chapter. |
|
|
|
| – |
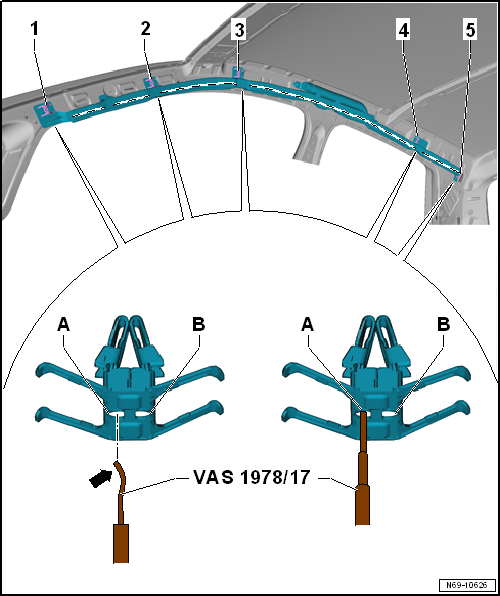
Detach retaining clips -1-,
-2-, -3-,
-4- and -5- in
retaining tabs for curtain airbag from body. |
| – |
To do this, carefully fit »tip«-arrow-
of release tool -VAS 1978/17- into recess -A-
as far as stop, as shown in illustration. |
| – |
Pull left side of retaining clip out of body. |
| – |
Pull release tool -VAS 1978/17- out of retaining clip ensuring that
released side of retaining clip does not engage again. |
| – |
Turn release tool -VAS 1978/17- by 180°. |
| – |
Repeat procedure on recess -B-. |
| – |
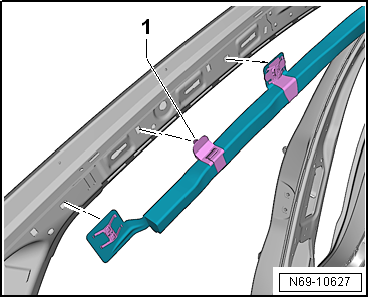
Unclip retaining clip -1- from
A-pillar. |
WARNING
| Before handling pyrotechnic components (e.g.
separating the electrical connector), the person
handling them must ensure that he/she is “electrically
discharged”. To do this e.g. briefly touch the door
striker plate. |
|
|
|
|
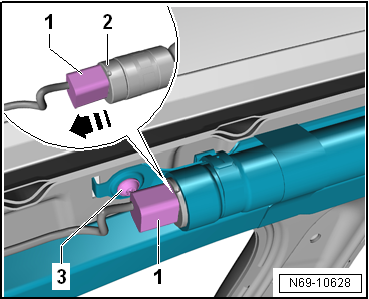
| – |
Pull out connector lock and pull connector
-1- off curtain airbag
-2--arrow-. |
| – |
Unscrew bolt -3- on curtain
airbag. |
|
|
|
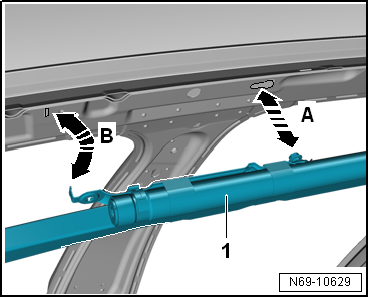
| – |
Initially, detach curtain airbag -1-
at front from body mounting -arrow B-
and push it towards rear. |
| – |
Then, detach curtain airbag at rear from body mounting
-arrow A- and remove it. |
WARNING
-
|
|
Observe safety instructions for
pyrotechnic components → Chapter. |
-
|
|
Always follow steps of procedure for
installing curtain airbag in the given order. |
-
|
|
Before handling pyrotechnic components
(e.g. connecting the electrical connector), the
person handling them must ensure that he/she is
“electrically discharged”. To do this e.g. briefly
touch the door striker plate. |
|
|
|
|
| – |
Initially, fit curtain airbag -1-
at rear into body mounting -arrow A-
and push it towards front. |
| – |
Then, fit curtain airbag at front into body mounting
-arrow B-. |
|
|
|
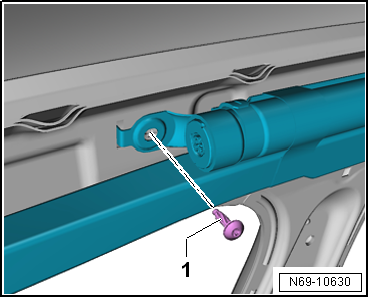
| – |
Secure curtain airbag in place using bolt
-1- |
|
|
|
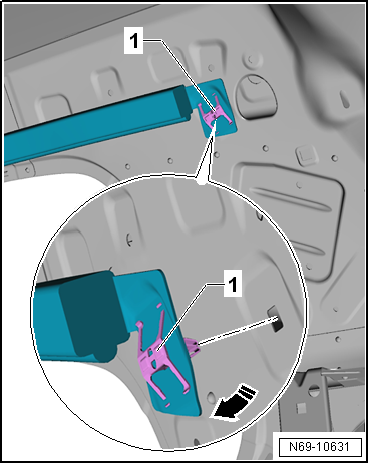
| – |
Turn rearmost retaining clip -1-
downwards by 90° -arrow- and clip
it into body. |
| – |
Clip in remaining retaining clips for curtain airbag
ensuring they engage audibly. Start at gas generator and
continue towards front and rear. |
| – |
Pull on retaining clips to ensure they are properly engaged. |
| – |
Connect connector to curtain airbag igniter. |
| – |
Press in connector lock. Doing so, the connector will be
fully inserted into curtain airbag igniter and locked at the
same time. |
| – |
Ensure that the line to prevent twisting is visible over the
entire length and that it is straight. This will ensure that the
curtain airbag is NOT twisted. |
| Further installation is performed in reverse order of
removal |
WARNING
| Battery must be connected with ignition
switched on. If pyrotechnic components (e.g. airbag,
seat belt tensioners) are repaired incorrectly,
undesired triggering may occur after the battery is
connected. Ensure that nobody is in vehicle when
connecting battery. |
|
|
|
|
1 -
Line to prevent twisting
Is used to ensure that curtain airbag is not twisted.
Must be entirely visible after installation
2 -
Curtain ...
Special tools and workshop equipment
required
Release tool -VAS 1978/17- from release tool case ...
© 2016-2026 Copyright www.vwgolf.org

 Note
Note Assembly overview - curtain airbag
 Removing and installing curtain airbag with igniter, estate