Volkswagen Golf Service & Repair Manual: Removing and installing catalytic converter
 Note Note
| The catalytic converter is removed together with the front
exhaust pipe. |
| Special tools and workshop equipment
required |
| High-temperature paste
→ Electronic Parts Catalogue. |
Note
| Reinstall all cable ties in the same locations when
installing. |
|
|
|
| – |
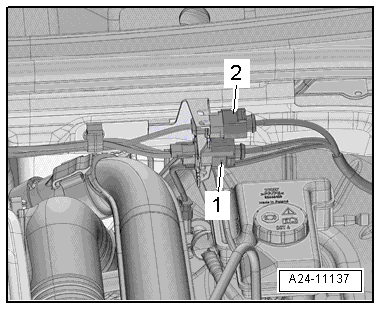
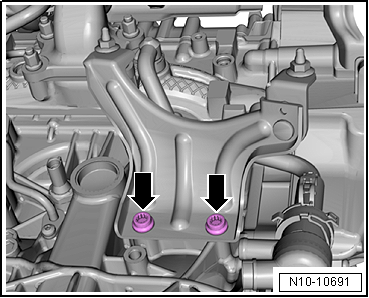
Detach electrical connectors -1-
and -2- from bracket, unplug
connectors and move electrical wiring clear. |
|
|
|
| – |
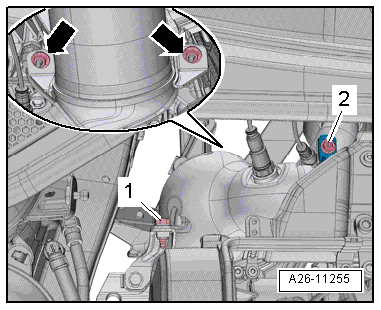
Unscrew bolt -2- and remove
screw-type clip. |
| – |
Remove bolt -1- and nuts
-arrows-. |
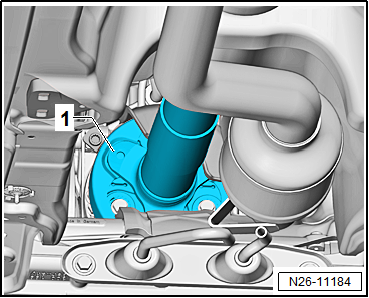
| Vehicles with engine preheater heater element -Z97- |
| – |
Unclip locking mechanism -arrow-. |
|
|
|
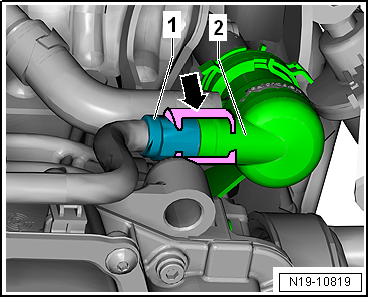
| – |
Pull off wiring -1- on engine
preheater heater element -Z97--2-. |
|
|
|
| – |
Unscrew nuts -arrows- and
remove engine preheating element -Z97- with bracket. |
| Continuation for all vehicles |
|
|
|
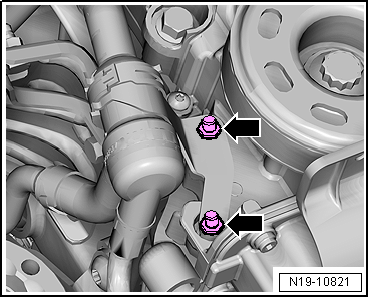
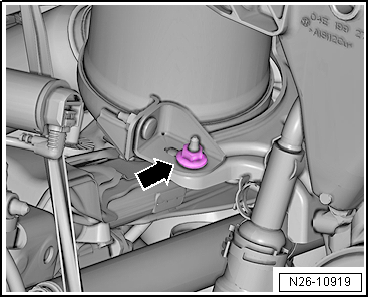
| – |
Unscrew bolts -arrows- of
bracket. |
|
|
|
| – |
Unscrew right nut -arrow- of
bracket. |
|
|
|
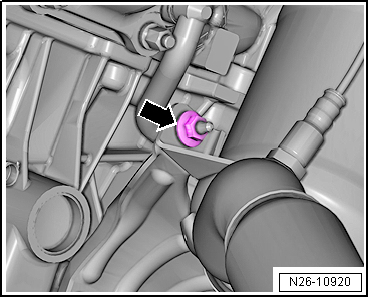
| – |
Unscrew nut -arrow- to the left
of the bracket. |
| – |
Remove tunnel cross-piece
→ General body repairs, exterior; Rep. gr.66. |
|
|
|
| – |
Detach connector from retainer and lay wire leading to
lambda probe to one side. |
|
|
|
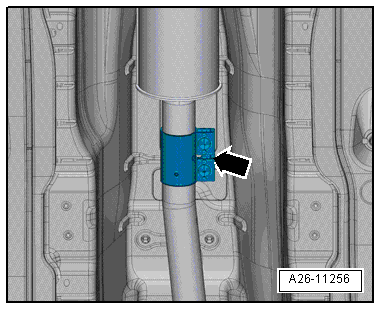
| – |
Loosen clamp -arrow- and push
it to rear. |
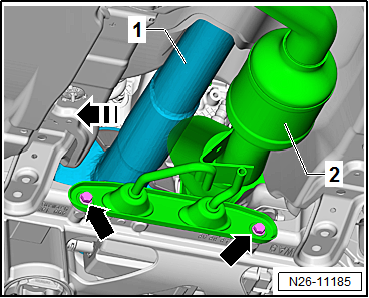
| Vehicles with four-wheel drive |
|
|
|
| – |
Unbolt flexible coupling of propshaft
-1- from bevel box
→ Final drive, differential; Rep. gr.39. |
|
|
|
| – |
Push propshaft -1- as far as
stop in direction of -arrow-. |
| – |
Remove catalytic converter with front exhaust pipe
-2- downwards. |
| Continuation for all vehicles |
|
|
|
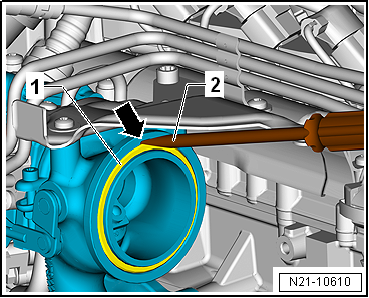
| – |
Fit screwdriver -2- in recess
-arrow- on turbocharger and lever
out seal -1-. |
| Installation is carried out in the reverse order; note the
following: |
Note
| Renew seal and self-locking nuts. |
| Coat studs and bolts of catalytic converter with
high-temperature paste; high-temperature paste
→ Electronic Parts Catalogue. |
| – |
Aligning exhaust system free of tension
→ Chapter. |
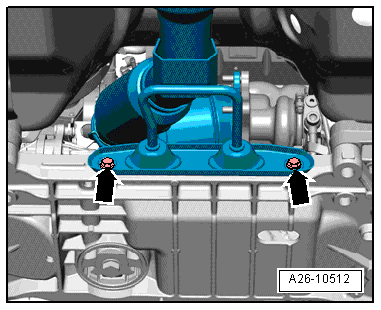
| → Fig. „“Installing catalytic converter - tightening torque and
sequence”“ |
| → Chapter „Assembly overview - emission control“ |
| → General body repairs, exterior; Rep. gr.66 |
|
|
|
1 -
Bolt
20 Nm
2 -
Bracket
Renew if damaged
3 -
Nut
Specified t ...
Other materials:
Continuation of checking pressures
Where vehicles have a restrictor and reservoir, check these
(with internally regulated air conditioning system compressor)
→ Chapter.
Where vehicles have an expansion valve and receiver, check
these (with internally regul ...
Removing and installing right temperature flap control motor -V159-, RHD
vehicles
Special tools and workshop equipment
required
Vehicle diagnostic tester
Bit ratchet
First carry out the following work:
–
Switch off all electrical consum ...
Driving through water on roads
First read and observe the introductory information
and safety warnings Please follow these rules to help prevent damage to your
vehicle when driving through water, for example if the road is flooded:
Check the depth of the water before driving through it. The water level
must be no hi ...
© 2016-2026 Copyright www.vwgolf.org

 Assembly overview - emission control