Volkswagen Golf Service & Repair Manual: Removing and installing brake light switch, RHD vehicles
| Vehicle with diesel engine: |
| – |
Remove engine cover panel
→ Rep. gr.10. |
The fuel system is pressurised.Risk of injury due to fuel which may
spurt out.Wear eye pretection.Wear protective gloves.Release pressure:
place clean cloth around connection, and carefully open connection.
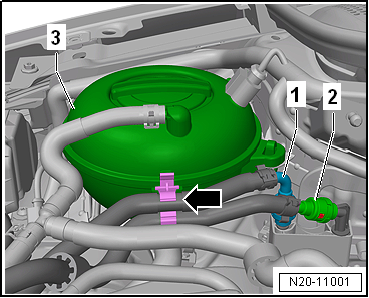
| – |
Release and pull off fuel supply lines
-1- and -2-. |
| – |
Separate plug-in connectors
→ Rep. gr.20. |
| – |
Unclip fuel lines -1- and
-2- from retainer
-arrow- on coolant reservoir
-3-. |
|
|
|
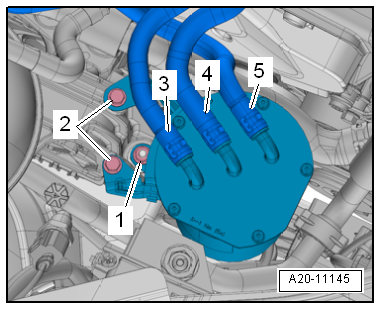
| – |
Remove securing bolts -2-. |
|
|
|
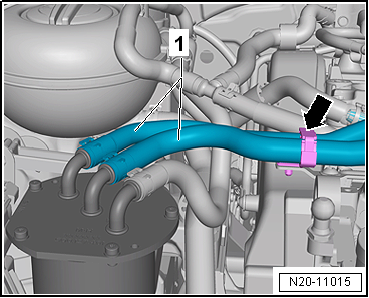
| – |
Open retainer -arrow- and
unclip fuel lines -1-. |
| – |
Then lay fuel filter to one side. |
|
|
|
| – |
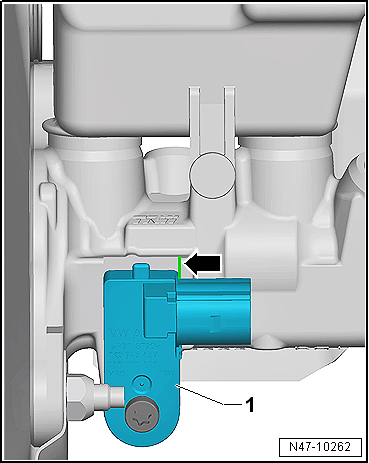
Release electrical connector -1-
and pull off. |
| – |
Release catches using a screwdriver
-arrow-. |
| – |
Place coolant expansion tank onto engine. |
| – |
Remove upper toothed belt guard
→ Rep. gr.15. |
|
|

|
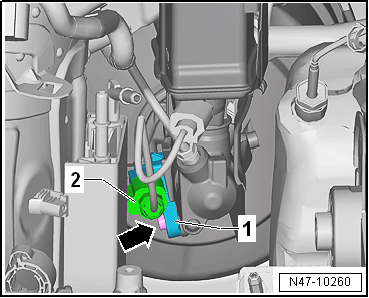
| – |
Release connector -1- and pull
off brake light switch -F--2-. |
| – |
Unscrew brake light switch -F- from brake master cylinder. |
| Install in reverse order of removal, observing the
following: |
|
|
|
| – |
Ensure that brake light switch -F--1-
seats properly on edge -arrow- of
brake master cylinder. |
| → Chapter „Assembly overview - brake servo/brake master
cylinder, RHD vehicles“ |
| Toothed belt guard
→ Rep. gr.15 |
|
|
|
Removing
Vehicles with diesel engine:
–
Remove air hose from air filter housin ...
Note
If there are problems with the brake servo, first check the
brake servo vacuum system
→ Chapter.
Special tools a ...
© 2016-2026 Copyright www.vwgolf.org

 Removing and installing brake light switch, LHD vehicles
 Removing and installing brake servo, LHD vehicles