Volkswagen Golf Service & Repair Manual: Removing and installing anti-roll bar
| Special tools and workshop equipment
required |
|
|
|
| Torque wrench -V.A.G 1331- |
 Note Note
| The following procedure is described for the left side of
the vehicle. The procedure for the right side of the vehicle is
identical. |
|
|
|
| – |
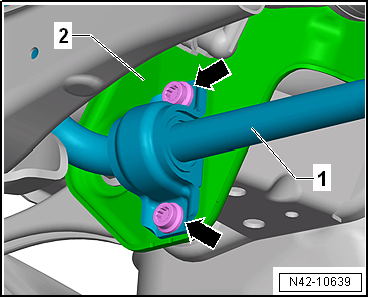
Unscrew bolts -arrows- for
anti-roll bar -1-. |
|
|
|
| – |
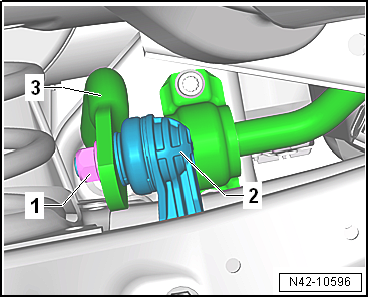
Unscrew nut -1- from coupling
rod -2-. |
| – |
Pull coupling rod -2- out of
anti-roll bar -3-. |
| – |
Remove anti-roll bar -3- from
subframe. |
| Install in reverse order of removal, observing the
following: |
|
|
|
| – |
Tighten bolts -arrows- for
anti-roll bar -1- evenly on
subframe -2-. |
| → Chapter „Assembly overview - anti-roll bar“ |
| → Chapter „Torque settings for wheel bolts“ |
|
|
|
1 -
Lower transverse link
2 -
Nut
Renew after removing
20 Nm +180°
3 -
Coupling ...
Special tools and workshop equipment
required
Torque wrench -V.A.G 1331-
Re ...
© 2016-2026 Copyright www.vwgolf.org

 Assembly overview - anti-roll bar, multi-link suspension, four-wheel drive
 Removing and installing coupling rod