Volkswagen Golf Service & Repair Manual: Moving push button to installation position in the handle
| Special tools and workshop equipment
required |
|
|
|
| If the push-button was pressed by mistake, the installation
position can be restored. |
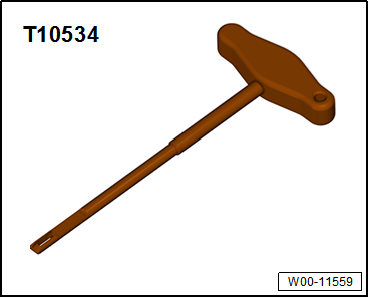
| There are 2 ways of moving the push button into the
installation position, »with« and
»without«release tool -T 10534-.
Both of them are described here. |
| Placing handle »with«release
tool -T10534- in installation position: |
|
|
|
| Instead of the release tool -T10534-, the installation guard
which is delivered with new handles may also be used. |
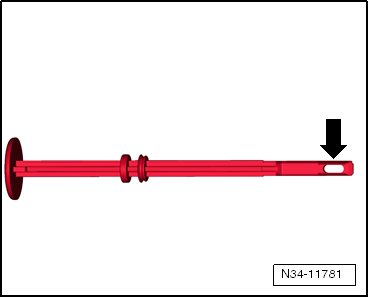
| When using the installation guard, make sure that it has an
eyelet -arrow- at the front. Other
types of installation guard are not suitable. |
|
|
|
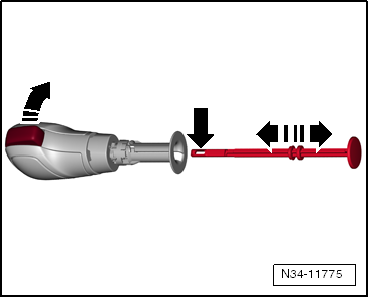
| – |
Holding down push button, completely push in release tool
-T10534- installation guard with eyelet
-arrow-. The installation guard latches in place while
doing so. |
| – |
Now, release pushbutton. When the installation guard is
pulled out, the push button engages in installation position. |
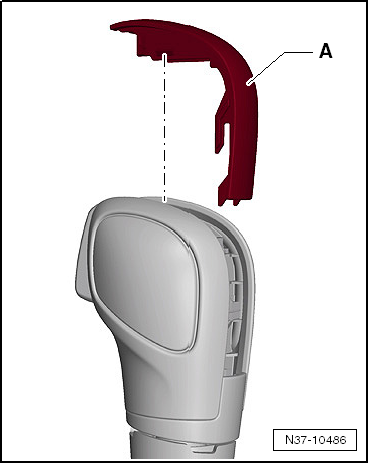
| Placing handle »without«release
tool -T10534- or installation guard in installation position: |
|
|
|
| – |
Carefully unclip trim of handle -A-
upwards. |
|
|
|
| – |
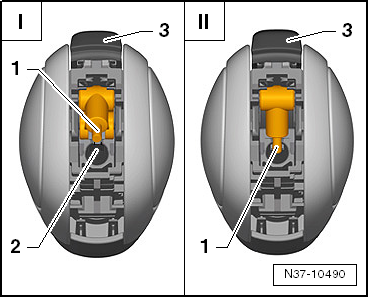
Using a screwdriver, for example, press small lever
-1- for pull rod into groove
-2-. When doing this, button
-3- is pushed back into
installation position. |
| |
-I- Push button in pressed
position |
| |
-II- Push button in
installation position |
 Note Note
| Only press the lever into the groove and no further. |
| Do not clip the trim of the handle onto the selector
mechanism until the handle has been fitted. This makes it
possible to check whether the small lever engages in the tie rod
when the push button is pressed. |
|
|
|
1 -
Handle with selector cover
Do not remove handle without reason. Emergency release from position
P
→ Chapter
Removing ...
Special tools and workshop equipment
required
Removal lever -80 - 200-
Brief des ...
Other materials:
Layout - infotainment system, Discover Pro version
Control unit 1 for information electronics -J794-
Display unit for control device of front display and
information control panel -J685-
CD/DVD drive
SD memory card reader: 2 SD card slo ...
Removing and installing brake caliper
Special tools and workshop equipment required
Vehicle diagnosis, testing and information system -VAS 5051-
Tool set for brake bleeding -VAS 6564-
Insert tool with ratchet -VAS 6784-
Bit attachment (7 mm) -T10503-
...
Removing and installing water deflector
Note
Removal and installation are described only for the left side.
Removal and installation of the right side are similar.
Removing
–
Starting at bottom end, pull water deflector
-1- out of clip -3- and retaining
strip -2-.
...
© 2016-2026 Copyright www.vwgolf.org

 Assembly overview - selector mechanism, manufacturer ZF
 Removing and installing selector mechanism with selector lever cable