Volkswagen Golf Service & Repair Manual: Installing dual clutch
| Special tools and workshop equipment
required |
|
|
|
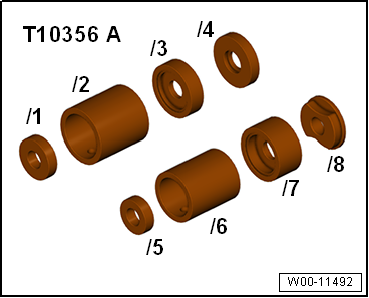
| -T10356/5- from assembly tool -T10356- |
|
|
|
|
|
|
|
 Caution
| Risk of damage to clutch and other components! |
| The positions of the engagement bearings must be set
correctly. |
| Adjustment can only be carried out before the clutch
is installed. |
| The position of the engagement bearings must be
adjusted after the following tasks: |
| Engaging levers were renewed. |
| Small ball pin for engaging lever “K 2” has been
renewed. |
| Engagement bearings were renewed. |
| If you have performed any of the above work, you
must now adjust the position of engagement bearings “K 1
and K 2”
→ Chapter. |
| Only when the adjustment is correct may assembly
work be continued. |
| If no new parts have been installed, insert removed
shims. |
| Only one shim per engagement bearing may be
installed. |
| Clutch parts must be free of oil and grease. |
| Risk of damage from clutch adjustment device. |
| The clutch is self-adjusting. Shocks can have an
effect on this adjusting device. Do not allow clutch to
fall into gearbox during installation. |
|
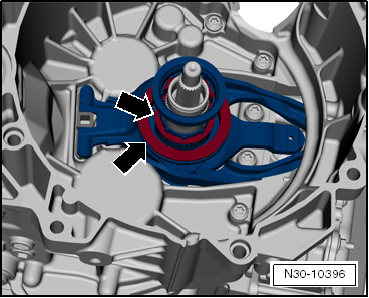
| Clutch engagement mechanism installed
→ Chapter. |
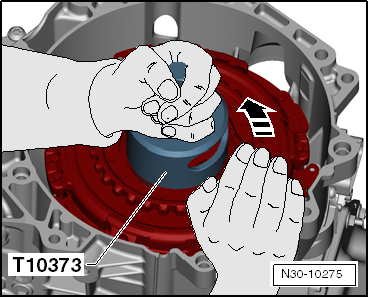
| – |
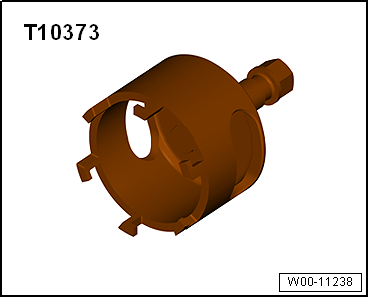
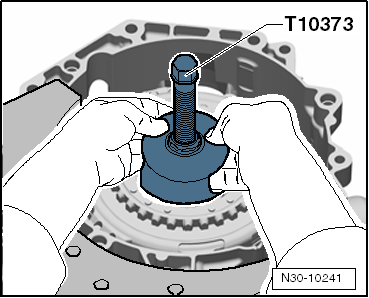
Turn back spindle of puller -T10373-. |
|
|
|
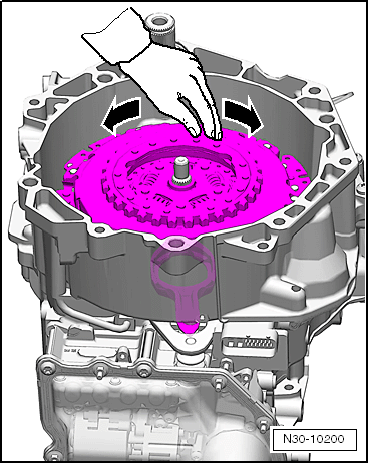
| – |
Install clutch with puller -T10373- in gearbox, as shown in
diagram. |
|
|
|
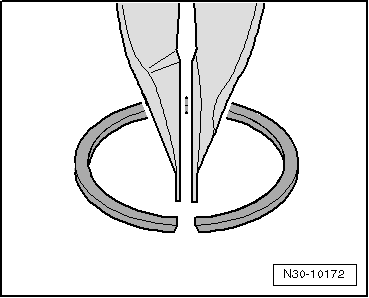
| – |
Take hold of new retaining ring with retaining ring pliers,
as shown in the illustration. |
| Installation position: narrow surface of retaining ring on
top. |
|
|
|
| – |
Inserting retaining ring -arrow-. |
 Note Note
| If the retaining ring cannot be inserted, the clutch has not
been pressed in onto its limit stop. |
|
|
|
| – |
To ensure that the clutch reaches its operating position
right from this stage, turn it against puller -T10373--arrow-
by hand without using any other tools. |
Note
| By pressing on, the clutch sits at the bottom against the
limit stop on the input shaft. This is not the optimum position. |
|
|
|
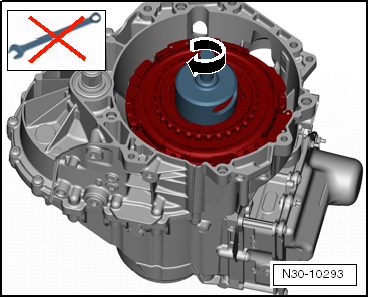
| Clutch should only be pulled up far enough for it to contact
retaining ring. |
| Only turn by hand. In this way, clutch slides against
retaining ring. Do not use any other tool. |
|
|
|
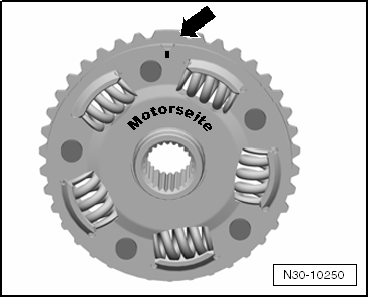
| Hub has »large tooth«-arrow-
and only fits in one position. |
| »Large tooth« has a mark at
engine end. |
|
|
|
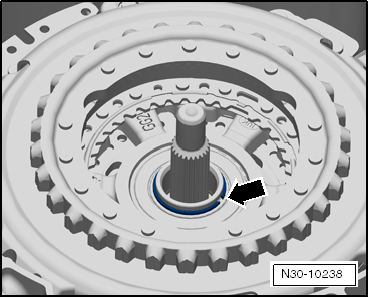
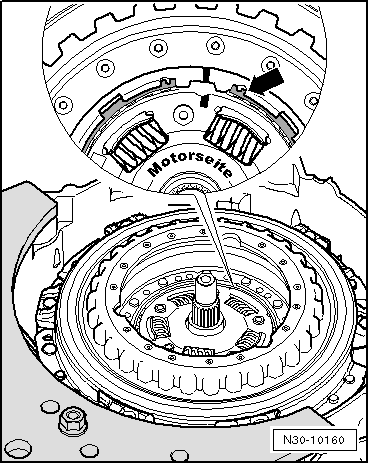
| – |
Insert retaining ring -arrow-
of hub. |
| Joint of retaining ring must point towards
»hub« of clutch. |
|
|
|
| – |
Turn clutch by hand. It should be possible to turn it
without difficulty. |
Note
| If the clutch is difficult to turn or if the clutch lining
is being rubbed hard, remove clutch again
→ Chapter. |
|
|
|
| Check installation position of shims
-arrows-. |
| The shims must be properly seated and must not be damaged. |
| A mathematical error could have been made. Check
measurements again
→ Chapter |
| If no fault can be found, the clutch may have been moved out
of position due to transport/assembly and a new clutch now has
to be installed. The position of the engagement bearings must
then be readjusted
→ Chapter. |
|
|
|
| – |
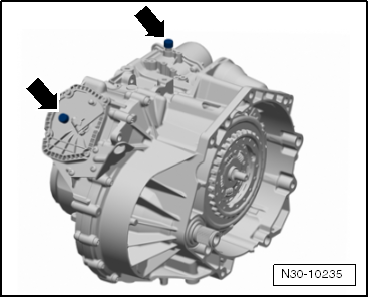
Remove two plugs and put breather caps
-arrows-on. |
Note
| The breather cap on the mechatronic unit is destroyed during
removal and must be renewed. |
| – |
Dispose of excess shims. |
| – |
After installing the gearbox, use the vehicle diagnostic
tester to run the Basic setting complete
function in Guided Functions. |
|
|
|
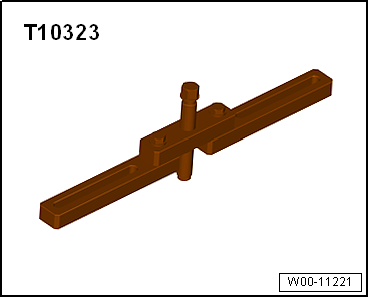
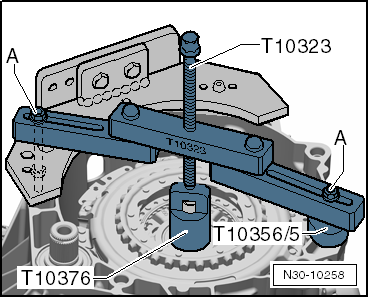
Special tools and workshop equipment required
Hook -3438-
Engine bung set -VAS 6122-
Support device -T10323-
-T10356/5- ...
Special tools and workshop equipment
required
Tube -VW 415 A-
...
© 2016-2026 Copyright www.vwgolf.org

 Removing dual clutch
 Renewing input shaft seal