Volkswagen Golf Service & Repair Manual: Balancing wheel, balancing wheel on stationary wheel balancer
| Road test has been carried out
→ Chapter. |
| Clamp wheel into wheel balancing machine |
 Note Note
| When balancing tyres, please remember that cleanliness is
absolutely essential, as is the case in any other repair work
you carry out. Only then can you attain a flawless result! |
| Dirt and rust in the area of the contact surfaces and centre
of the wheel distort the result. |
| – |
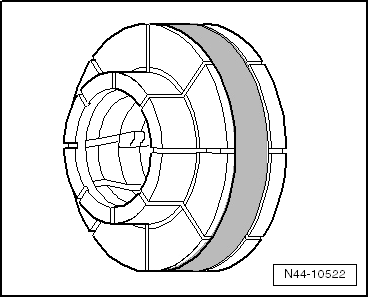
Clean contact surface, centring element and inside of wheel
using e.g. pneumatic brush grinding set -VAS 6446-
→ Volkswagen ServiceNet; Workshop Equipment, Catalogue
before clamping wheel on wheel balancing machine! |
Note
| It is very important that the correct tools for centring and
clamping the wheels are used on the wheel balancing system.
Before commencing any work, find out about the respective
centring system for wheel balancing machines
→ Volkswagen ServiceNet; Workshop Equipment, Catalogue. |
|
|
|
| – |
Attach the wheel (together with tyre) to the wheel balancing
machine. |
Note
|
|
|
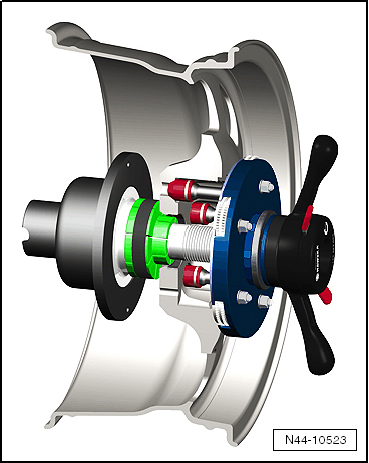
| To clamp the wheel in place, use centring system for wheel
balancing machines -VAS 5271-, for example. |
| This ensures that the wheel is 100% centred and that the
wheel will be clamped without damage! |
| The wheel cannot be centralised 100% with conical clamping
elements on the wheel balancing machine. |
| A deviation of 0.1 mm from the centre results in an
imbalance of 10 grams at the wheel/rim. |
| Procedure for balancing wheels and tyres |
| – |
Allow the wheel (together with tyre) to rotate on the wheel
balancing machine. |
| – |
Check that the indicator lines on the sidewalls of the tyre
near the wheel rim flange run evenly. |
| – |
Check tyre profile with wheel/tyre rotating. |
Note
| If one-sided wear, flat spots from braking or severely
washed out spots are apparent, balancing cannot achieve smooth
running. In this case, the tyre must be renewed. |
| – |
Check true running of wheel/tyre. If the wheel and tyre do
not run true although there are no flat spots, radial or lateral
run-out may be the cause. |
| – |
Check the wheel for radial or lateral runout
→ Chapter. |
| – |
If radial and lateral run-out are within the specified
tolerance, balance the wheel and tyre. |
Note
| More than 60 grams of weight per tyre should not be used. |
| If more weight is required, you may be able to achieve
smoother running by "matching" the tyre and rim. Matching tyres
→ Chapter. |
| The wheel balancer display should indicate 0 gram. |
| As an alternative to match mounting, you could use the
vibration control system -VAS 6230 A-
→ Chapter. |
| – |
Bolt wheel onto vehicle. |
| – |
First, hand-tighten the lowest wheel bolt to about 30 Nm. |
| – |
Then, tighten the remaining wheel bolts diagonally to about
30 Nm. This process centres the wheel on the hub. |
| – |
Lower vehicle onto its wheels. |
| – |
Now use the torque wrench to firmly tighten the wheel bolts
diagonally to the prescribed torque. |
| – |
After balancing the wheel/tyre, carry out a road test. |
| If you detect vibration during the road test, it may be due
to wheel centring tolerances. |
| In unfavourable circumstances, the component tolerances of
wheels and hubs could cumulate. This too can lead to vibration.
This can be alleviated using a finish balancer.
→ Chapter |
|
|
|
Before you start balancing the wheels, the following
requirements must be met.
Tyre pressure must be OK.
Tread mus ...
Note
Before working with a finish balancer, the mechanic needs to
have been instructed by the manufacturer of the balancer.
...
Other materials:
Headlight washer system
–
To loosen the connection, push the lock ring
-1--arrow- and pull off the hose
connection.
–
To secure the connection, push and hold the lock ring
-arrow- and push on the hose
connection. Check that the s ...
Other stowage compartments
Fig. 117 In the luggage compartment: side
compartment
First read and observe the introductory information
and safety warnings Stowage areas in the luggage compartment
Additional stowage compartments are located in the sides of the luggage compartment.
The side walls can be removed by pull ...
Necessity of wheel alignment, torsion beam axle
Wheel alignment is necessary if:
The vehicle does not handle properly.
Vehicle has been involved in an accident and components have
been renewed.
Axle components are removed or renewed. ...
© 2016-2026 Copyright www.vwgolf.org

 Balancing wheel, conditions
 Balancing wheel, balancing wheel with finish balancer